New Here? Read The Story behind the Box

Wednesday, August 31, 2011

garlic chive pesto

Before we begin, a little disclaimer:

I can't endorse you trying this recipe unless you promise to first make sure you have some breath mints handy. With all of its oniony, garlicy goodness, you won't make any new friends after you eat it.

Unless you invite them to eat some too. In which case, they will most likely find it so compellingly delicious that they become your best best friend forever.


This pesto had a little more bite to it than traditional basil pesto... and a little bit more complex flavor. It goes well with chicken (or fish, I suppose), pasta, or spread on a sandwich. This time around, I tried to imitate an appetizer I had at the very trendy Pizza Mozza in Hollywood -- served with crackers and ricotta cheese. Absolute heaven.


This is my own version of a few different recipes for chive pesto I found online. They are all more or less the same (chives, garlic, olive oil, nuts, cheese).

I'll give you the recipe the way I did it:

Garlic Chive Pesto

1/2 - 1 cup chopped garlic chives
1/4 cup parsley
3 tablespoons cashews
3 tablespoons parmesan cheese
1 large clove of garlic
4-5 tablespoons olive oil

Place the chives, parsley, cashews, garlic, and cheese into a food processor. Pulse until it is all mixed up and uniformly minced. Add the olive oil (enough to reach your preferred consistency), gradually as you continue pulsing.

Store it with a tiny bit of olive oil poured over the top, to help keep that beautiful bright green color.

Monday, August 29, 2011

Roast Red Peppers Sandwiches on Focaccia

It is hot. Hotter than Hades around here. I believe it got up to 107 yesterday. So hot, in fact, that my local hometown newspaper ran an article in which some of my townspeople, I'm ashamed to admit, explain that they have found it necessary to carry water bottles... and (oh! The horror!) rent a movie instead of heading out to the park. My hometown newspaper is fabulous for great tidbits like these.

At any rate, if there is one thing I am not so interested in when it's ridiculously hot out, it's cooking.

I thought that sandwiches would be a fabulous dinner, but I wanted to make them a tad more special than the usual PB&J that makes its way to school in the lunchbox every day.

Veggie sandwiches were the order of the day... and I did end up cooking a little bit. I roasted the peppers, so the broiler was on. But only for about 10 minutes, so that doesn't count. And I did bake the focaccia, but that was early in the morning, so that doesn't count either.

I love love love roasted red bell peppers, and here is how I do them (they work great on the grill as well, but it was to hot to go outside and stand near the grill, so I did them in the oven this time).

Turn on the broiler, and scrub the peppers clean.

Place the whole, uncut pepper straight onto the oven rack, near the broiling element. (If you place a baking sheet on a lower rack, it catches the dripping pepper juices, which will make cleaning up much easier). Turn the peppers every couple of minutes with a pair of tongs. You want the pepper to get as black and blistery as possible all over. It will take a total of about 10 minutes.


After the pepper is blackened, take it out of the oven and place it into a plastic or paper bag, and close up the bag. Wait a few minutes while it gets all sweaty and steamy. When you take it out, the skin should peel right off the pepper, leaving you with a delicious roasted, skinless bell pepper. Cut it up, removing the seeds, stem, and ribs. For sandwiches, I leave it in pretty big planks.


Once you have your bread and your roasted peppers, it's just a matter of stacking up a sandwich and enjoying the life of Riley. Especially if you lived the life of Cinderella earlier this summer and made some pesto and some pickles that you can grab.

Mine had lettuce, tomato, bread and butter pickles, sharp cheese, roasted peppers, and pesto.


Mmmmmm.

Wednesday, August 24, 2011

Roast Vegetable and Hummus Tart


I will admit that all week long  most days  once in a while I look at a recipe, and instead of thinking to myself That looks delicious! I think to myself That uses up a ton of veggies!


Such was the case when I saw a picture of this tart on Pinterest. It involves several different species currently living in the biosphere that is my crisper drawer. And that was good enough for me.

As it turns out, though, this baby is delicious! I plan to make it many more times... and it can be adapted to use whatever vegetables are in season, so I imagine it will become a semi-regular part of the rotation around here. Plus, it is meatless, so it can be a part of the Monday routine. Although I served it as a main course, it is presented cut into smaller pieces and served as an appetizer. Look out Book Club... it's coming your way soon!

Without any further ado, I present to you Roasted Vegetable and Hummus Tart.

Thanks to Soma at eCurry. You have no idea how much this recipe means to me.


The recipe that Soma has on her blog allows for making the crust, the hummus, and the veggie topping separately and then combining them. I happened to have some hummus on hand already, so I used pre-made hummus. If you want this hummus recipe, head on over and check it out. It's not hard at all, although it requires some ingredients you may not have around (chickpeas, tahini).

I used her recipe for the crust (so delicious! And flaky! And without any butter!) She uses somewhat odd and very precise amounts of ingredients for the crust, but don't doubt her. She clearly knows what she is doing. She topped her tart with onions, zucchini, eggplant and tomatoes. I (of course) used the veggies that came in my box this week... summer squash, bell pepper, tomatoes, and potatoes.

To make the Crust:

2 cups all-purpose flour
1/3 cup + 2 1/2 tablespoons olive oil
1/4 cup + 1 1/2 tablespoons very cold club soda
1 teaspoon salt
freshly ground black pepper
optional -- any herbs you like. I added some fresh thyme, since that was in my box this week

The trick is to handle this crust as little as possible. It isn't hard at all, so handling it very little is easy to do.

In a bowl, combine flour, salt, pepper and herbs. In a separate bowl, whisk together the olive oil and club soda for a couple of minutes, until it is almost creamy-looking.


Pour water-oil mixture into the flour mixture, and combine with a fork just until there is no dry flour left. Using your hands, form the dough into a ball.


Divide the dough into two pieces and roll each one separately. Place the dough between two pieces of parchment paper, and roll in only one direction (not back and forth). I rolled mine into rectangles like Soma did, by rolling out a more or less rectangular shape and cutting the edges. I was tempted to leave it as a sort of loose oval, because it looked rustic and charming. You can make it whatever shape you like.


Remove the top parchment paper, cut the edges if you wish, and pierce with a fork.

Bake the crusts on the parchment paper at 400 degrees, for about 12 minutes, or until golden.


To prepare the veggies:

Again, use whatever vegetables you prefer, or whatever you happen to have around.

2 summer squash, sliced into rounds
2 tomatoes, sliced
2 potatoes, sliced
2 red bell peppers, sliced
2 cloves of garlic, minced
salt and pepper
olive oil
herbs, to taste (again, I used the thyme from my box, plus some sage and rosemary)

Lay all of the vegetable slices out on parchment paper. Combine the oil with the herbs and salt and pepper. Drizzle over the vegetables.

Roast at 350 for about 30 minutes, or until the vegetables are soft. Turn once, about halfway through.


To Assemble the Tart:


2 tart crusts
1/2-1 cup of hummus
roasted vegetables
sea salt
olive oil

Let the crusts cool after baking. Spread 1/4-1/2 cup of hummus on each one. Layer the vegetables on top. Sprinkle with salt and drizzle with olive oil. Bake at 350 for about 15 minutes, to warm it all up.


Tuesday, August 23, 2011

Fresh Ranch Dressing

Sing this (out loud or in your head, you choose) to the tune of Love and Marriage:

Ranch and Veggies, Ranch and Veggies, The shock of healthy is so much less edgy...


Okay, a poet I am not. I guess I'll keep my day job.

We go through so many salads and miscellaneous other veggie dipping experiences that Ranch Dressing is a hot commodity around here. 

I love the stuff. But I have to say, I don't love it out of a bottle. I found that Marie's brand dressing (found, refrigerated, in the produce department) is pretty dang close to fresh ranch. Except it's pretty pricey. And still not perfect.


The good news, though, is that ranch dressing is super easy to throw together, and it's pretty much all ingredients you probably have already. I wish I could remember where I got this recipe, so I could give props to the creator. 


Here is the recipe I use:

1/2 - 1 tsp. sugar
1-2 cloves garlic
1/4-1/2 onion powder
salt to taste
1/4 cup Italian flat-leaf parsley
2 tablespoons chives
1 cup mayonnaise
1/2 cup sour cream
2 tsp. apple cider vinegar
1/2 - 1 tsp fresh dill
1/8 black pepper
1/2 tsp. dried oregano
buttermilk (as needed for desired consistency)

Mince the garlic with a knife, and then sprinkle about 1/8 to 1/4 teaspoon salt on it and mash it into a paste with a fork.

Chop the parsley, and chives very finely and add to the garlic.

In a bowl, combine all ingredients, tasting frequently and adjusting seasonings as needed.


Chill for a couple of hours before serving, and thin with buttermilk if desired. I usually leave it thick if it is going to be for dipping, and I thin it before I pour it over a salad.

Monday, August 22, 2011

Summer Vegetable Tian

Ahhhh. I am content.

We are back in a routine.  School, girl scouts and boy scouts, karate and piano lessons. Dad gets home at dinner time, kids are in bed at 8:00. It's lovely.

Don't get me wrong. I do love summer, what with the sleeping in, running off to the beach on a whim, eating dinner any time between 4:00 and 9:00 pm, and going days at a time without looking at a clock. Now that I think about it, I am not sure why I feel so happy to be back at school.

But it's true. After a couple of months of relaxing, we are ready to get back to normal. I get tired of running a 24-hour diner, and there are only so many times I can ask "Who left the __________ (legos, books, dirty clothes, dirty dishes, towel, shoes, crayons, athletic supporter) on the ____________ (living room floor, dining table, stairway, hallway, entryway, doorway, kitchen counter)?" before I go insane. It's nice that the kids get away from each other and from me for a few hours a day.

Last week, I left some green beans roasting in my oven when we went to karate class. I had it all planned out so that the food would cook while we were gone and I could do the last minute glazing and tossing when we got back. I forgot, though, to set the oven timer. Oops. So the green beans were a little bit shriveled and dry. There are worse things, right? Like... the house could have burned down, and it didn't. So there.

If the kids continue to be as involved in after-school activities as they are now, I see a lot of crock-pot cooking in my future. Crock-pot cooking seems so autumn-ish, that I think I'll wait a while yet.


Anyway, part of the new routine is Meatless Mondays, and here is a roast vegetable dish that I managed not to overcook. Although it is probably considered to be a side dish, I served it as the starring attraction, along with some crusty bread and a green salad.


Summer Vegetable Tian
(I got this recipe here.)

1 sweet onion, cut in half and then sliced
2 Tablespoons olive oil, divided
2 cloves garlic, minced
2 potatoes, un-peeled
1 zucchini
1 summer squash
4 roma tomatoes
salt and pepper, to taste
dried thyme, to taste
1/2 cup grated Asiago cheese

Preheat oven to 375. Coat a round baking dish with cooking spray.

In a skillet, heat 1 tablespoon olive oil. When hot, add the onions and saute for about 9-10 minutes, until translucent. Add the garlic and continue to saute for about another minute.

Transfer the onion mixture to the baking dish.


Slice the potatoes, zucchini, summer squash, and tomatoes into 1/4 inch slices. Stand them upright in a spiral in the baking dish, alternating the vegetables. Sprinkle the salt, pepper, and thyme on top, and drizzle the remaining olive oil over it all.


Cover the dish with foil, and bake until the potatoes are tender (about 40 minutes). Uncover, and sprinkle the cheese over it all. Bake another 25 minutes, until the dish is browned.


Friday, August 19, 2011

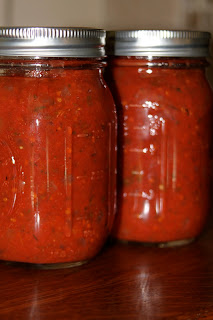
Fresh Tomato and Basil Pasta Sauce

We have tried growing a small garden for the past couple of summers. Last year was mildly successful. We got quite a few tomatoes, a few chile peppers, and fed some very young basil, cucumber, and zucchini plants to the bugs.

This year we have had a bit more successful. The tomatoes have been gorgeous; the basil managed to grow to a size that can handle the bug infestation better. Since Abundant Harvest is keeping us up to our ears in zucchini and cucumbers, we felt no need to try to grow those. We did add tomatillos this year. So far, the plants are filled with tiny little fruits that seem to be growing steadily, although slowly. The plants are gorgeous, though. They are leggy and bright green and have adorable little yellow flowers all over them.  I don't mind that they are using up valuable garden real estate that could have seen a couple of rounds of something else. Besides, how could I possibly use up a couple of rounds of something else? 

This week we seemed to have about a million tomatoes come ripe all at the same time. I went ahead and brought them all in, combined them with the tomatoes that I got in the AHO box, and made a batch of pasta sauce for the freezer. There is something amazing about picking the tomatoes, and then while they are still warm from the sun, washing and chopping them up. It's lethargic to work with something that fresh.

I think I may never have to go grocery shopping again. For the rest of my life.

Pasta sauce isn't difficult. It's just a matter of pureeing the tomatoes, adding some spices, and letting it all simmer and meld for a long time. Plus, it sure smells good while it simmers for a couple of hours!


Fresh Tomato and Basil Pasta Sauce
I cannot vouch for the acid level of this sauce, so if you want to can it you need to do it in a pressure canner. Unless, of course, you know a lot more about food safety than I do. As for me, I just put it in the freezer.


I based this recipe on the one in Animal Vegetable Miracle, and it can easily be multiplied to make a big batch of sauce. It is so easy, but long, that you might want to make a whole bunch while the tomatoes are ripe, to use all year.

2 quarts tomato puree (about 6 pounds tomatoes, hulled and pureed in a blender or food processor)
1 large onion, diced
1/4 cup fresh basil, chopped
1 Tablespoon honey
1 Tablespoon dried oregano
1 teaspoon salt
1 teaspoon thyme
1 teaspoon garlic powder
1/2 teaspoon pepper

Saute onions in a large pot, until soft and translucent. Add pureed tomatoes and all of the seasonings. Bring it all to a boil and then reduce to a simmer. Simmer on low heat for about 2 hours, until the sauce is a thickness that you like. Stir occasionally (more frequently toward the end).

Pour into jars or freezer bags and freeze (or refrigerate if you plan to use it soon).


Thursday, August 18, 2011

The First day of School

All of three of my kids started school today. This is the first year (of only two years) that they will all be at the same school.

Although I was happy to drop them all off and I am thrilled with the teachers they got and the friends in their classes, I was also a little bit sad heartbroken to take my baby to kindergarten for the first time. He was thrilled, of course.

After I came home (alone... how sad), I got to thinking "What can I do with all these vegetables?"

Of course that is what I was thinking. If I'm awake, there is a good chance that is what I am thinking.

More specifically, I wondered "What can I do with all these vegetables to make a dinner that the kids will like and will be a little bit celebratory for the first day of school?"

After hemming and hawing and thinking of things like green bean puree mixed into veggie lasagna or diced summer squash hidden in mashed potatoes, I came up with the perfect idea:

Make a really rich, peanut-buttery, chocolatey snack for after school, and then ignore the veggies and go out to dinner!

Once I had that moment of inspiration, things kicked into high gear around here. I whistled while I worked, and in no time flat I had these babies chilling in the fridge, waiting for a newly minted kindergartner, second-grader, and fifth-grader to come home and devour them.


Even though this has absolutely zero grams of vegetable in them, I would feel horrible if i didn't give you the recipe for this heaven-on-a-plate.

Four Ingredient Peanut Butter and Chocolate Bars
(I got this amazing and simple recipe from Souffle Bombay.)

1 pound white chocolate chips
1 cup peanut butter
1 1/2 cups chocolate chips
1/2 cup heavy cream

Line a 9x9 pan with wax paper or parchment paper, leaving some hanging over the edges.

In a microwave-safe bowl, heat the white chocolate chips for a minute. Stir until they are melted and smooth. Mix in the peanut butter and stir until smooth. Pour it into the prepared pan. Refrigerate for about 15 minutes to let it set.

In a saucepan, melt the chocolat chips and cream, stirring constantly until it is smooth and blended. Pour over the top of the peanut butter mixture. Chill it in the refrigerator for at least 3 hours (or overnight).

Use the paper lining to lift it from the pan, and cut into small squares (they are super rich, so a little is all you need!)

Wednesday, August 17, 2011

Bread and Butter Pickles

These kids I live with just don't like to eat their veggies. It's disheartening.

Add to the fact that I get a HUGE box of fresh vegetables every week, and I feel like I am in a constant uphill battle to get the veggies consumed by humans before they are consumed by rot.

It puts me in a real pickle.


Hee hee.

When I unpacked the box this week, and saw that there were 6 giant cucumbers, I may have hung my head and sighed out loud. I know, I'm letting a gourd relative get me down. I'm not proud of my little vegetable depression, it's just a fact. My kids really don't do well with raw veggies, and as far as I know, there aren't a ton of ways to cook a cucumber. I'm doing my best, but I just don't think its feasible for me to eat 6 cucumbers this week.

So, when a gal is faced with too many of a particular veggie, she finds a way (as usual) to put off eating it until later. In the case of cucumbers,  that means turning them into pickles. I decided to go with bread-and-butter pickles, since those happen to be my favorite. Besides, if we are going to be cutting back on meat around here, we are going to need some flavorful alternatives. And these are nothing if not flavorful.

Are you wondering why they are called "bread and butter" pickles? Well, keep wondering. I can't figure it out. Even Wikipedia lets me down this time. While doing my research, I did accidentally read about "Kool-Aid Pickles" which are made by soaking the cucumber in brine and Kool-Aid. Wha??? I guess I should withhold judgement. If I get a bunch of more pickles in the next box, I may well end up trying them out. Desperate times call for desperate measures.

Ummm, let's get back to our bread and butter pickles. Before we go and do anything desperate.

These pickles are made by slicing the cucumber before you pickle it. This is helpful in getting the largest volume of pickles into your jars. (and some people around here are running out of pantry space to fit all the jars of jams and pickles and fruit). They are delicious on their own, but they have enough flavor to really stand out on a burger or sandwich.

Do note, however, that you need to let the cucumbers sit and soak in salt for a spell. Make sure to do this ahead, and that you have time to finish you pickling afterwards.


Bread and Butter Pickles
There are tons of Bread and Butter Pickle recipes out there. This is the one that I chose.


cucumbers (I used 6 large; you can use how many you like. I ended up with 3 pints of pickles).
1 onion (I'd suggest yellow or white, but I had red on hand and it turned out great. Just pinkish)
1/4 cup Kosher salt (non-caking additives in regular salt will make the juice cloudy)
1 1/4 cups white vinegar
1 cup apple cider vinegar
2 1/4 cups sugar
1 tsp. crushed red pepper flakes (you may want to use less -- they came out with a bit of kick)
3/4 teaspoon celery seeds
1 inch cinnamon stick
6 allspice berries
6 whole cloves plus a pinch of ground cloves
1/2 teaspoon turmeric

Slice the cucumber and onion and place in a large bowl. Toss with the salt so that it is evenly distributed. Cover the vegetables with a tea towel (not a thick terrycloth dishtowel) and cover it all with an inch or so of ice cubes. Place in the refrigerator for 3-4 hours.

At the end of the 3-4 hours, take it out and dispose of the ice. Rinse the vegetables twice. You will notice that the cucumbers already feel more pickle-ish.

If you are going to store the pickles outside of the fridge, it's now time to sterilize your jars and get your water hot for the processing. If you promise to eat them all up in the next few weeks, you can just make sure your jars are squeaky clean.

In a big pot, combine the vinegars and all of the spices. Bring it to a boil. Add the cucumbers and onions, and bring it to a boil again. As soon as it comes to a boil again, you can start packing the jars. Use a canning funnel if you have one, and smoosh as many cucumber slices as you can in each jar, up to an inch from the top. Then pour some of the hot syrup over it all, up to 1/2 inch from the rim.

If you are planning to keep them in the fridge you are done! If not, read on!

Wipe the rims of the jars clean with a damp paper towel. Place the lid and bands on, and process in boiling water according to this chart:


Table 1. Recommended process time for Bread-and-Butter Pickles in a boiling-water canner.
Process Time at Altitudes of
Style of PackJar Size0 - 1,000 ft1,001 - 6,000 ftAbove 6,000 ft
HotPints or Quarts10 min1520


Monday, August 15, 2011

basil pesto

As I mentioned last week, this here little blog is now adhering to the concept of Meatless Mondays.

I have decided to start buying free-range, organic, grass-fed beef and chicken, and it's not as cheap as buying the equivalent meat in a supermarket or at Costco. However, here's the thing. The meat at Costco and the supermarket isn't the equivalent. Once I started reading about feed lots and factory farms and the stuff that the animals consume (as in cheep feed, antibiotics, and hormones) I decided I just can't give that stuff to my kids.

I am not so much worried about the chances of them dying of e coli or mad cow disease. I realize that the chances are very slim, and there are slim chances that they could die form anything at any moment. Lightning might strike one, or a plane could crash. If I lived my life worried about the things that could happen, I would have them all stuck in the house, wrapped in bubble wrap and eating only organic water chestnuts.

I am more concerned about the things that will happen over time. And my kids have a lot of time left for things to build up in their systems. (Let alone all the things building up in our ecosystems). Studies are showing that kids are hitting puberty earlier and earlier (thanks, in part, to hormones in the milk and meat), which leads to problems physically and socially. Doctors are finding kids who are obese, and yet malnourished (thanks, in part, to food that is primarily made of soy and corn... and yes, even cows are primarily made of soy and corn). A huge percentage of the food we eat is processed and sold by a very few companies, with very few ingredients. We are also in a race to keep developing new antibiotics faster than the diseases are developing resistance to them. The diet the food animals are being fed is so different than the diet they would have had naturally that the animals constantly get sick. Rather than change the diet, though, the factory farms just treat the sickness, by adding antibiotics right into the very food that weakens the animals in the first place. I don't want my kids' bodies to have a baseline of antibiotics already in their systems from the meat they eat. I want them to be able to fight disease.

There are so many ways to fight the problems in our food supply. One is to eat more fruits and veggies than we are currently eating. Another is to avoid the empty calories and processed foods that we are inundated with. We need to eat a bigger variety of foods, and we need to be careful about where we get the food, in order to avoid eating pesticides, antibiotics, meat from diseased animals, and chemicals.

One of the things I am focusing on is eating better meat. However, I do realize that it costs more. I am glad it does, because I find something wrong with 50 chicken nuggets for $9.99. That can't be quality food. I am willing to pay the money that the farmer requires to keep his livestock healthy and happy. I don't think $1.99 a pound is a bargain when I think about what I got for my $1.99.

I haven't found a tree (organic or otherwise) that grows money, however.  I can't afford to buy great meat as much as I was able to buy bad meat. And so, we will eat less meat.

I had a neighbor years ago who had moved here from Afghanistan. As she was preparing food for an Eid celebration, she mentioned to me that she would be cooking different dishes than she usually feeds her family. She said, "This is a party to celebrate the end of a month of fasting. I will have to honor my guests by serving them meat. Ordinarily we don't eat much meat."

I think I need to readjust my way of thinking to be more like that. Meat is a luxury. I don't plan to become a vegetarian, but I don't need to eat meat at every meal. It can become a special food. I don't plan to fast every day for a month either, but I am sure that the more I go without meat, the more I will appreciate it when I eat it.

I am also not going to make a huge stink about it. I won't turn away dinner at a friend's house if she buys her chicken breasts at Costco. I won't avoid restaurants (although I may opt for meatless entrees). As it is, though, I have this huge box of vegetables to eat my way though every week, so I am not going to restaurants much these days anyway!

And so, Meatless Mondays. I will certainly have more meatless days than just Monday. I just want to make sure that at least once a week we eat no meat. I figure if I make a point to do it on Monday, and I happen to eat meatlessly any other days, all the better.

There we have it. The long-winded version of why I made pesto. But wait! There are other reasons to make pesto. Don't do it because you are denying yourself meat. Do it because it is delicious, versatile, and easy. Do it because it freezes well, so you can have quick delicious meals any weeknight you want. Do it because basil is the food of the gods, and there could never be enough ways to enjoy it.


Basil Pesto
2 cups packed fresh basil leaves
2 garlic cloves
1/4 cup cashews or pine nuts (I happened to have cashews on hand, and although they have different tastes, both work well)
2/3 cup olive oil
salt and pepper to taste
1/2 cup parmesan cheese

Place the basil, garlic, and nuts in a food processor and pulse until it is chopped.
Add the oil. (If you plan to freeze it to use later, only add 1/2 cup of the oil at this point. If you are going to use it right away, add it all). Add salt and pepper and cheese and pulse until it is smooth.

If you are going to freeze it, put it in a airtight container, and pour the rest of the oil on top (this will help it keep the beautiful bright green color, and keep it fresher).

The pesto works great with pasta, on pizza, or spread on crostini. You can also use it to flavor chicken or fish. On Tuesday.

I used my pesto to make a pizza. I used this pizza crust recipe. After rolling out the dough, spread a thin layer of the pesto over it. Top it with fresh mozzarella slices and slices of ripe tomatoes.

You can grill it (like I did) or cook it in the oven. Either way, it's a little slice of heaven.


Friday, August 12, 2011

Peach Margarita

I think I mentioned a couple of days ago that I might need a couple of drinks to get me through the end of summer and my baby starting kindergarten. Well, despite today's post on margaritas, I would like to assert here and now that I am not drinking my miseries away. It just so happens that I had a couple of chances to make and enjoy some great fruity drinks.


When Life gives you lemons, make lemonade.

When life gives you peaches, make peach pie margaritas.

Let's assume for a minute here that you don't need all that butter and processed flour and sugar that is in a pie crust. We'll just skip over the crust, stir in some tequila, and consider it dieting.

We thought we would take advantage of the fact that the summer fruit trees are exploding and the prices are low on ripe fruit, and we bought an extra 20 pounds of peaches from Abundant Harvest. After canning most of them (to enjoy during the long winter months of citrus), and freezing some (for my morning smoothie), I still had a few left over. 

Peach margaritas are delicious. They beat the pants off of any sort of neon green stuff you mix with tequila. I am not one to ever turn down a real margarita mixed with Cointreau or Grand Marnier, but this adds a little summery twist that makes the margarita an amazing treat. This drink is basically just a standard margarita with some peach syrup mixed in. I got the recipe from How Sweet It Is, and I am heading back over there to try lots more of her stuff. Although she swears off vegetables, I think she has plenty to offer me. Like margaritas.


To make the peach syrup:

Make some simple syrup (boil equal parts water and sugar until the sugar is dissolved). Combine one cup of simple syrup with three peaches (that you peeled and chopped) in your blender. Puree until it is smooth.

You can use this syrup in the many of the same ways as the plum syrup of earlier this week.  (pour it one cupcakes, shake it with vodka, make a spritzer with club soda, and on and on).

But first, promise me you'll do this: Make the margarita. You won't regret it, and you'll have some peach syrup left over for less lofty goals.


To make the margarita:

Salt the rim of a glass and fill it with crushed ice. In a cocktail shaker, combine the peach syrup with 2 ounces Triple Sec or Grand Marnier, 1 1/2 ounces of tequila, 2 ounces lime juice (either fresh squeezed, or Rose's Sweetened Lime Juice in a pinch). The amount of peach syrup is up to you. I used about 1 1/2 ounce, since I didn't want the drink to be too sweet and sugary. I like a little bite to it. Also, if you use Rose's lime juice, it will make the drink a little sweeter than fresh lime juice, so you may want to scale back the peach syrup. Hey, it just means you can make more drinks in the long run!

Shake it all up and pour it over your ice.

Sit back, put your feet up, and say "aaaah."

Thursday, August 11, 2011

Thai-ish Shish Kebabs


One of the (many many) great things about Abundant Harvest Organics is that at any time I can purchase "add-ons." There are items ranging form nuts to eggs to beef to extra fruits and veggies. They are all local and organic, and the animal products are all free-range and grass fed.


This week, we decided to try some of the chicken. After meeting some of the chickens at Vernon Peterson's farm a couple of weeks ago, and seeing what great little chicken-lives they lead, I felt a need to support this kind of humane, organic, sustainable farming.

Get in ma' belly!

I made these kebabs with the chicken, onions, and bell peppers that I picked up on Saturday. As I rooted around int he fridge getting out the veggies, I grabbed a few things to make a marinade too. I am calling it Thai-ish, because I used the same kinds of things that I use when I follow Thai recipes. However, I am not a single ounce Thai. I'm also not in Thailand, so I don't think it's fair for me claim Thai-ness outright. They're Thai-like. Plus, how fun is it to say it out loud? Thai-ish Shish Kebabs.


Absolutely delicious Thai-ish Shish Kebabs
Prepare the marinade in the morning or the night before. Let the chicken marinate until you are ready to cook. 

1 cup peanut butter
1/2 cup Thai chile sauce
1/4 cup lemon juice
3 Tablespoons soy sauce
1/4 cup brown sugar
3 Tablespoons minced garlic
2 chicken breasts
3 bell peppers
1 red onion

Combine the peanut butter, chile sauce, lemon juice, soy sauce, brown sugar, and garlic. Add the chicken, cut into bite-sized pieces and let it marinate all day or overnight.

When you are ready to cook, turn on the grill. Chop the onion and bell peppers into bite-sized squares.

Thread the chicken and vegetables onto metal or wood skewers, and grill just until the chicken is cooked through. If you are using wooden skewers, soak them in water for about 20 minutes before loading them up. This will keep them from burning on the grill.

Serve hot with a side of rice or quinoa.


Wednesday, August 10, 2011

Plum-Vanilla Syrup

My kids return to school a week from today. My baby is starting kindergarten, and I keep having dreams that the teacher has to come up to me and tell me it is time to leave, that I can't stay at school with him all day. It isn't pleasant. He is a ton of fun to have around, and I am gonna miss him. 

On the one hand, I don't want summer to end. Ever. I love taking the kids to the beach, museums, parks, gardens, and swimming pools. I love sleeping in. I love staying in pajamas well past noon.

On the other hand, if these kids lose one more pair of flip flops, or make one more mess that they don't want to clean up, or squabble one more time, I might lose my mind. It will be kinda nice to have them all gone, making their messes somewhere else for a few hours a day.

It might take a couple of cocktails to get me through the end of summer. Then again, it might take me a couple of cocktails to get me through the first day of school.

Either way, I better be prepared.

Lucky for me, I found this recipe for Plum Vanilla Syrup. It is a great way to hang on to these last days of summer. This delicious syrup is really quite simple... just vanilla simple syrup and plums. 

The possibilities for it are endless, though.

I used it to make a cocktail, by mixing it with vodka and club soda. You could make a bellini by adding it to Prosecco. Or a kid-friendly, homemade, dye- and corn syrup-free soda by just mixing it with club soda or sparkling water. I can imagine it poured over ice cream, or even pancakes, or drizzled over some toasted pound cake.

Plum-Vanilla Syrup
I got the recipe from The Farmer's Daughter, who happens to be one of the growers who contribute to my Abundant Harvest Organics box, and also blogs about what she does with the stuff she grows.

1/2 cup water
1/2 cup sugar
1 vanilla bean
8 ripe plums, chopped

First, slice the vanilla bean lengthwise and scrape the seeds.


In a medium saucepan, combine the sugar, water, and vanilla bean. Bring to a boil, lower the heat, and simmer for about 5 minutes. Add the chopped plums and simmer for another 5 minutes. 

Let it cool. Remove the vanilla bean, and pour the rest into a blender. Puree until smooth.

Now, have fun with it. I sure did!


Tuesday, August 9, 2011

bacon-wrapped green bean bundles

So, after all that meatlessness yesterday, it's time to let the pendulum swing the other way.

And what is the meat of all meats?

Bacon.

I love how bacon is suddenly becoming a trend, what with bacon doughnuts, bacon muffins, bacon-wrapped .... you name it, and someone has wrapped bacon around it and sold it.

I remember going to Tijuana at age 18 legal drinking age in Mexico and seeing the street vendors there selling hot dogs wrapped in bacon. It smelled like a little bit of heaven, but there was no chance I was ever going to risk dying of some sort of food bacteria over a hot dog. Not even after a few couple Pacificos.

Ahem. Where were we?  Ah yes, bacon. Bacon in things and bacon around things. I can't think of a way to do anything wrong with bacon.

I have green beans coming out of my ears, and so I needed to find a new and fun way to make them tasty and fresh. Enter bacon. As a bonus, this is one recipe that all of my kids ate. Hooray!

Take the green beans (which I find to be delicious already), add bacon (which makes everything better) and then glaze it all with garlic and brown sugar (come to mama).

Have I died? Is this heaven? I think I like it here. It smells so good. And tastes... heavenly. But why am I still washing my own dishes?


Bacon-Wrapped Green Bean Bundles
This recipe is from the super-cute blog How Sweet It Is. Check her out! You won't be disappointed.

About 1 pound fresh green beans
1 pound bacon
2 tablespoons butter
1 Tablespoon brown sugar
2 cloves garlic, minced
1/4 teaspoon salt
1/4 teaspoon pepper

Spray the bottom of a baking pan with cooking spray, and preheat the oven to 400.

Rinse and trim the ends of the green beans.

Depending on how thick your beans are, gather 5-7 together, and wrap is a slice of bacon. Place into the baking dish. Continue until you have used up all of the green beans and all of the bacon, leaving a little space between the bundles.

In a small saucepan over low heat, combine the butter, brown sugar, and garlic until melted.

Brush this over the bundles, and sprinkle with salt and pepper.

Cover with tin foil and bake for 35 minutes. Remove foil and bake another 20 minutes or so, until the bacon is crispy and brown.


Monday, August 8, 2011

salt potatoes

I can't decide whether you want to hear my soapbox speech or not.

hahahaha. Who ever wants to hear anyone on a soapbox?

You can guess what it's all about anyway (eating locally, healthfully, and sustainably), so let's just skip ahead to the conclusion:

.... and that is why I have decided to force offer the opportunity for my family to go meatless one day a week.

Have you heard of the movement Meatless Monday? The gist of it is that it is very much good for your health and the planet if you abstain from meat one day a week. It doesn't have to be Monday, but "Meatless Thursday" lacks a little... je nais se quoi.


Click on that link up there if you want to know more about the reasons or get some recipe ideas. You can also find out about chefs who have made their restaurants meatless every Monday, and celebrities who are following the plan. In case you want to eat like a celebrity.


This family is going meatless on Mondays from here on out. At least until I get bored of it, anyway.

Here is the thing, though. Don't tell anyone around here. Lucky for me, no one in my house reads this blog, so they won't know. They are so used to eating what is placed in front of them, that they won't question me. We eat meatless meals fairly often, so it shouldn't be a noticeable issue.

My blog, too, is going meatless on Mondays. That's right, if it's Monday and you are craving a big ole' steak, don't come here. You ain't gonna find it.

Since we are starting this evening (with pesto pizza), I had to go through some older pictures in order to share something meatless with you today.

But it's a good one!

Salt Potatoes
New York Times 


In Syracuse, where this dish originates and still holds its own at state fairs and restaurants alike (so I'm told), in the 1800's Irish workers in the salt mines ate this as their daily lunch. While boiling the brine to distill the salt, they threw in some small potatoes to boil just before lunch time. In the summer, when the baby potatoes are coming out of the ground, you can buy a bag of potatoes and the salt in a combination package.


This is a very simple recipe, and one that you won't regret trying. The potatoes, after boiling at an extra-high temperature in the very salty water, come out with crinkly skins and creamy insides. Combine that with the salty flavor and some butter and herbs. Mmmm mmm mmm.

It's a crazy amount of salt in the boiling water (spill some while you cook and you can watch the water evaporate and leave a salt deposit on your counter). However, since the potatoes aren't peeled or pierced in any way, they don't get salty on the inside.

8 cups water
1 1/2 cups Kosher salt
3 pounds baby potatoes (scrubbed and with skins intact)
1 stick butter
fresh rosemary (you can use whatever herb you like, but I am partial to potatoes and rosemary)
pepper

Bring the salt and water to a boil. Add the potatoes, and cook until tender. It will take about half an hour.

Drain the potatoes (and watch the salt show up immediately on their skins).


Melt the butter in the cooking pot, add the herbs. When the butter is fully melted, add the potatoes back into the pot, toss and serve hot.


Enjoy!


Friday, August 5, 2011

Pad Ka Prao

You know how those urban legends go? "One time, my friend's neighbor's grandma's sister...."

I fel like I am starting a story like that. 

There is this family. And somehow they have a connection to my husband's family. I think perhaps it goes like this:

My husband's neighbors (from the neighborhood he lived in as a kid) had a son. The neighbor's son's wife's sister and her husband opened a little Thai restaurant in Los Osos, California. We were lucky enough to get to go to this restaurant one day, when the neighbor, the wife, and the sister were all present. Which seemed to make us like instant family.

This restaurant, called Noi's Little Thai Takeout has the very best Thai food I have ever eaten. In my life. And I am a HUGE fan of Thai food.

Los Osos is a small town, and Noi's is a small restaurant (a couple of tables inside, a couple of tables on the porch). But there is nothing small about the flavors of their food. Or the line that forms to get the daily curry before it sells out each afternoon.

Being that were closelikethis with Noi and Doi (the sister, who at that time was a major part of running the restaurant), we were lucky enough to get a cooking lesson.

That means that we got the recipe for the most delicious Thai dish ever. 

Pad Kra Prao. (My Thai is a little sketchy, but I believe it translates to Chicken with bell peppers and basil). Which works out well, because as it turns out, it is chicken with bell peppers and basil. Isn't that nice? I like Thai food names. They are pretty straightforward. Unlike, say, Welsh Rabbit (I know, it's really rarebit, but both names are used), which has nothing to do with rabbits, but rather is a glorified cheese sandwich. Or a bearclaw that contains no bear, or a mincemeat pie with no meat.


Pad Ka Prao has become a favorite of not only myself and my husband, but also plenty of our friends and family, as we now serve it on our camping trip every summer. It is generally cooked in a wok, but a large skillet will do (especially if you are camping). Serve it alongside rice, and you have a dinner fit for the gods.

We couldn't figure out how to keep basil fresh in our ice chest,
so we just brought the whole plant. It cost the same as a
much smaller bunch of cut basil in the market!
You can buy chili sauce in a jar at the market. You can also make it, and someday if I can get my husband to write the recipe down for me, I will be happy to give it to you.


Also, this recipe calls for fish sauce. I ordinarily do not, under any circumstances, recommend fish or fish products in anything that you are creating for human consumption. However, I do make an exception here. If you promise not to smell the fish sauce before you add it in, I will allow you to use it. It really doesn't create any fishiness in the dish, and it does enhance the flavor. This, too, should be available at your supermarket. If you can't find it, you can substitute soy sauce. It is a close second.

Finally, this dish calls for white pepper. White pepper is very dusty, and a little goes a very long way. Be super careful the first time you use it... you can always add more later! If you can't find white pepper, or you are tired of gathering a million different ingredients for this dish, go ahead and use black pepper. The white adds a little zing that the black won't give you, but you'll still love the results either way.

Pad Ka Prao

4 Tbsp. Garlic
4 Tbsp. Thai chili sauce
1/2 pound chicken, cut into very small bite-sized pieces. (this time we did beef... but I don't know how to say beef ka prao. You can use either.)
1 Tbsp. brown sugar
1-2 bell peppers, cut into small pieces
2 large handfuls of Thai basil (or regular basil)
1/2 cup bamboo shoots
1/4 cup chopped green onions
fish sauce
white pepper

Heat the wok to very high, and then lower the heat to medium-high.

Add garlic and chili sauce. 

Add the chicken and stir fry until cooked through.

Stir in the sugar. Add the bell peppers and stir-fry just until tender.


Add the bamboo shoots, basil, green onions, and continue to stir-fry until the basil is wilted.

Just before taking out, stir in a splash of fish sauce.

Before serving, sprinkle on a teeny bit of white pepper.


Serve it hot, along with white rice. Enjoy!


Thursday, August 4, 2011

Spring Rolls

After driving halfway up California's Great Central Valley, and visiting Peterson Family Farm, we arrived at our campground.

AAAAHHHHH.

I love camping. I was trying to figure out why it seems so relaxing, when in reality many things are more difficult while camping. For example, washing dishes:

At home, I load the dishwasher (theoretically I do this as I create dirty dishes), pop in the detergent, and press "start."

While camping, I walk to the water spout to fill a dishpan. Then I walk back to fill a large pot. I place the pot onto the stove to heat the water. Once it boils, I divide the cold water and the hot water so that I end up with two pans of very warm water. One gets soap, the other is for rinsing. Then, I scrub each item in the first pan, transfer it to the rinse pan, and then place it into a drying rack. When they are all done, I have to throw the water out, place the dish rack into one pan, and invert the other pan over it all, in order to keep it dust-free.

Really, being at home is much easier, right?

Well, except.

At a campground, I have no floors to sweep, mop, or vaccuum. I have no beds to make (unless you count throwing the sleeping bag back to it's proper side of the tent). I have no washing machine or dryer to run. I have no windows to wash, furniture to dust, or showers to scrub. I also have no appointments to keep, errands to run, or practices and classes to shuttle kids to and from.

It's lovely.

As I mentioned, eons ago, we grabbed our Abundant Harvest box on the way to the campground. Meaning that there were all sorts of yummy fruits and veggies to consume during the week. Fortunately, we also had friends and family there to share in the harvest.


One fun use for many veggies was spring rolls. This was actually my mom's idea, and she got my kids and their friends involved right alongside the adults, in making this delicious appetizer.


They are super nutritious (all sorts of raw vegetables) and easy to make (very little actual cooking). Once the chopping was done, the kids pretty much took over, and the adults got busy eating the spring rolls as quickly as the kids could build them.


Spring Rolls

First, you need to buy spring roll wrappers. I have only seen them at Asian Markets.


It is an extra errand to run, but as you can see, they are certainly reasonably priced! This package didn't say how many it contains, and they were being eaten faster than I can count. However, I'd be willing to bet that for $1.49, we made at least 80 spring rolls.


Spring roll wrappers are made out of rice flour, water and salt. They are rolled out to be extremely thin, and then dried on bamboo mats.


They are almost transparent and completely dry (almost fragile) when you take them out of the package. After dipping them into warm water for a half-minute or so, they become pliable.


The other specialty ingredient is rice noodles. These can probably be found in any supermarket, but you will find them for a ridiculously low price if you get them at the Asian Market while you are picking up your spring roll wrappers. Cook the noodles according to the directions on the package. (Pretty much like cooking any pasta, but way faster). This is the only cooking you have to do.

Now, chop up your veggies. They should be chopped into match sticks. I used (of course) the stuff I had on hand, but any combo is bound to be good. I had carrots, basil, bell peppers (red and yellow), summer squash, lettuce, and cilantro. You could add almost anything. Some things that come to mind are bean sprouts, cucumber, celery, mushrooms, or radishes.


Once you have assembled your supplies (wrappers, cooked noodles, chopped veggies), you can begin rolling.

Take a wrapper, and submerge it in warm water until it is soft enough to fold without cracking (20-30 seconds). Lay it out and begin piling ingredients onto one side of it. Remember that it is small and needs to roll up, so go easy on the filling! A couple of pieces of each veggie, and bit of noodles is all it takes.

This one is filled very generously!
Once you have gotten all the good stuff on there, roll it and tuck the ends in as you go. (Like a burrito).


Since we had a whole group of rollers (ranging in age from 7 to... shall we say... adults?), we ended up with a whole range of rolling styles. Some were perfectly done.


Others looked a little more... creative.


But all of them were delicious!

Ordinarily, I would love to artfully display a platter-ful.
This time, though, I had to snap quickly. These hungry
campers weren't waiting to eat them! I don't think we ever had
more than four on the plate at any one time.


Once they are rolled, dip them in the most delicious dipping sauce ever. 

1 cup hoisin sauce
1 Tablespoon peanut butter
1 teaspoon rice vinegar
1/4 cup chopped peanuts

Mix together hoisin sauce, peanut butter and vinegar. If it seems too thick, you can stir in a little water. Top with chopped peanuts.