New Here? Read The Story behind the Box

Showing posts with label tomato. Show all posts

Tuesday, February 7, 2012

seven-layer dip


I have watched many episodes of ER and Grey's Anatomy, so I feel like I am a bit of an expert on Emergency Rooms and procedures for dealing with a massive catastrophe.

You know how the rescue workers go around marking the victims according to a triage system? I think the people who are about to die get a red tag, and the people who have a broken toe get a yellow tag, and everyone in between gets some color on the spectrum between the two. The idea is that you have to take care of some people immediately, whereas other people can sit and wait -- although they do need help -- for some time before they are taken care of.

My life feels this way right now. Since my kindergartner was Star of the Week last week, making his poster and preparing his biography were given red tags... DO THIS BEFORE MONDAY MORNING! Then came making valentines (which for some reason needed to be turned in already), and below that was putting together party favors and baking cupcakes for the second grader's birthday. Those got orange tags... they could wait a week without any major repercussions. Then there were a few yellow tags on things like making appetizers for the Superbowl party and RSVP'ing to a wedding and two birthday parties, and securing a babysitter for everything. Oh yeah, and a glance at the calendar reminded me that we are hosting a cub scout meeting/craft today. Yellow tag on that one.

Once the Star Week passed, the birthday party items moved into red tag status, and everything else moved up a step. There are still a few victims lying so deep in the wreckage that I may never get to them... things like cooking dinner or shaving my legs...or writing this blog. Don't tell anyone, okay? They'll just remain passengers "unaccounted for."

For the past two weeks, everything that has crossed my mind as a "to-do" item falls into its place...Just let me get through the birthday party and I can worry about the Superbowl. Just let me get these appetizers done and I'll bake the birthday cake and wrap gifts after the Superbowl party. Just let me get through the birthday and then I can plan the craft/shop/make snacks/clean the house for the cub scout meeting. 

So anyway, I meant to write about some Superbowl Party foods before the big game... you know, when it might have actually been helpful for you? But since the food got thrown together just as we walked out the door, things are not nearly as impressive as I wish they were.

Luckily, I got green garlic and avocados in my Abundant Harvest box this week. Which meant that the fates wanted me to be able to eat guacamole during the big game. And who am I to test fate?

Still, though, seven-layer dip should be an entire cuisine, in my opinion. And it is the perfect party food. So, here is what I brought when I went to watch the Giants beat the Patriots. 

Okay, who am I kidding? I watched the food table. Other people watched some sort of football game.

Seven layer bean dip:

Start with a good thick layer of black beans stirred with some salsa. This makes it easy to scoop up with chips. Spread a layer of sour cream over that, and them some shredded cheddar cheese, some sliced green onions, some chopped tomatoes, some black olives, and then dollop a whole lotta guacamole on top. I recommend waiting till the last minute for the guac, since you don't want it getting brown at all.

Monday, October 24, 2011

roast eggplant sandwiches

I think I mentioned before that I am not the world's biggest eggplant fan. I don't have anything against the suckers, but they aren't something I ever find myself craving. But see, that's the thing with getting a CSA box. You don't get to just eat the stuff you are craving, or the stuff that's your favorite. You eat the stuff that gets harvested each week, whether you wanted it or not. The amazing thing about Abundant Harvest Organics is that, due to it being a cooperative of sorts between many farms, there is much more variety than any one single farm could provide on its own. As a matter of fact, years ago we tried a CSA share from a small farm located practically in our neighborhood. They were swell folks, but there was only so much kale that my newlywed self and my young groom could eat in a week. On the other hand, Abundant Harvest makes sure that my box has a whole bunch of variety not just within each box, but also between weeks.

Part of what I love about this whole veggie box experience is the creativity and the new experiences it provides for myself and my family. It has certainly made us all try lots of new things we hadn't before... and likely never would have! And even things that aren't necessarily new are sure making their way into our diets far more that they used to.

For example, the eggplant. Whether I was looking for it or not, there it was.

I though about a few different ways I could prepare it, and as I considered and tossed out such ideas as eggplant parmesan and eggplant lasagna, I finally settled on eggplant sandwiches.

I followed the recipe that I found on allrecipes.com, and LOVED it! My husband said, "If we were in a restaurant right now, I would already be planning to return... and place the same order." I take that as a compliment in highest form.

Anyway, the sandwich is very simple... it's just eggplant and some other very delicious ingredients stacked up. Somehow they turn out to be an amazing combination that tastes amazing and is very simple to prepare. Other than mixing up the garlic mayonnaise (which I recommend doing in advance to let the flavors meld) and quickly roasting the eggplant, all you need to do is build the sandwich. I served these with some slaw I made out of bok choy and carrots... and I will give you that recipe tomorrow.

For now, enjoy this one!

Eggplant sandwiches
enough for 2 tall sandwiches

1 medium eggplant, sliced 1/2 inch thick
some olive oil (enough to brush the eggplant slices)
1/4 cup mayonnaise
2 cloves garlic
2 (6-inch) sandwich rolls
1 medium tomato, sliced
1/2 cup crumbled feta cheese
1/4 cup fresh basil leaves

If you can, prepare the mayonnaise ahead of time and refrigerate. Simply mince the garlic cloves and stir into the mayonnaise. If it is going to sit for any length of time, be sure to refrigerate.

Turn on the broiler element in your oven.

Slice the eggplant and lay out on a baking sheet. Brush both sides with oil. Place the baking sheet in the oven, about 6 inches from the broiling element. Cook for about 10 minutes, or until nicely toasted.


Split the rolls in half and toast. (I do mine by simply placing them, cut side up, directly on the oven rack and leaving for about 3-4 minutes to toast under the broiler). You can use your toaster or toaster oven if you prefer. It's less risky, since they go from toasted to black pretty quickly.

Spread the mayonnaise on the roll. Stack up the roasted eggplant, tomato slices, feta, and basil leaves.

Enjoy!

Wednesday, October 19, 2011

salsa

What do salsa the condiment and salsa the dance have in common?

They're both made better by a margarita.

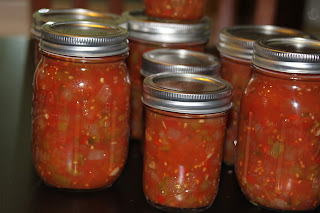
Although I wish I could say that I spent the day dancing the salsa with a handsome man named Javier, I can't. What I can say is that I spent a day canning salsa. As a matter of fact I canned enough salsa to last far longer than any relationship with Javier would.

When I say I spent a whole day, I really mean it. It was one of those days where I was in and out a lot, but in between, from 7 in the morning until 8 at night, I was chopping vegetables and boiling jars. This salsa recipe, that I got from the Ball Complete Book of Home Preserving, is not complicated. It doesn't need crazy ingredients or require unheard of steps. It just makes an enormous batch of salsa, and therefore requires an enormous amount of time chopping. As a matter of fact, when the kids asked what was for dinner, I looked around the kitchen and said, "hmmm...salsa?" There wasn't anything else to be had!

Actually, I felt a little bit like a pioneer while making this. Not like Pioneer Woman (she can do anything With élan and verve that I ain't got.). And not like those Mormon pioneers who came across the plains with their 18 children and covered wagons. Goodness knows I couldn't have done it without a drink at the end of one of those days of trekking across the wilderness. I felt rather like the kind of pioneer who "puts up" the veggies at the end of the harvest.  The person who had to preserve the food because when the summer ended, there would be no more tomatoes for another 9 months, and the would need it to last through the winter.

We only had four tomato plants, but they were prolific this year! Those tomatoes plus the tomatoes I got in the Abundant Harvest box turned out to be more than we could use all at once for a couple of weeks there. And so, the canning. Like I said, this recipe makes a heap of salsa. It used up all the tomatoes that were threatening to fall apart on the kitchen counter, plus some other spare parts slowly dying in the fridge. It does take a ton of chopping, but it makes a ton of salsa. And around here, a ton of salsa is a good thing (balancing out those margaritas and all). In the end, I had 6 pint jars plus 3 8-ounce jars of salsa. Yum.

I followed the Ball recipe exactly. I rarely follow a recipe 100%, but with canning I wasn't going to take any chances. If you want to preserve it, you have to be really careful with acid levels, so that bacteria doesn't grow when it's in the jars. Since botulism doesn't go as well with margaritas, I decided to just be safe. And so, here it is:


Zesty Salsa
Use whatever type of chili peppers your family prefers, and add hot pepper sauce if your tastes are even more daring.


10 cups of chopped, cored, peeled tomatoes
5 cups chopped, seeded green bell peppers
5 cups chopped onions
2 1/2 cups chopped seeded chili peppers, such as hot banana, Hungarian wax, serrano, or jalapeno
1 1/4 cups cider vinegar
3 cloves garlic, finely chopped
2 tablespoons finely chopped cilantro
1 tablespoon salt
1 teaspoon hot pepper sauce (optional)

1. Prepare canner, jars, and lids.

2. In a large stainless steel saucepan, combine tomatoes, green peppers, onions, chili peppers, vinegar, garlic, cilantro, salt, and hot pepper sauce, if using. Bring to a boil over medium-high heat, stirring constantly. Reduce heat and boil gently, stirring frequently, until slightly thickened, about 10 minutes.

3. Ladle hot salsa into hot jars, leaving 1/2 inch head space. Remove air bubbles and adjust headspace, if necessary, by adding hot salsa Wipe rim. Center lid on jar. Screw band down until resistance is met, then increase until finger-tip tight.

4. Place jars in canner, ensuring they are completely covered with water. Bring to a boil and process both 8-ounce and pint jars for 15 minutes. Remove canner lid. Wait five minutes, then remove jars, cool, and store.

Monday, October 17, 2011

bell peppers stuffed with quinoa, tomatoes, beans and cheese

Woo hoo! I got meatless Monday back on track. I got lost for a couple weeks there, but now I am back. One in a row.

For our Monday dinner, I wanted to find a way to use up some green bell peppers from the AHO box, but most recipes for stuffed peppers that I could find are made with rice and ground beef or turkey. After thinking a while about this, I decided to use one of the oldest vegetarian tricks in the book... substitute beans for meat, and therefore lose the animal, but retain the protein.


Instead of rice, I went for my new favorite grain, quinoa. (Okay, technicality police, I know it's not a grain. It's the seed from a plant related to the tumbleweed. But really? Tumbleweed? Let's just think of it as a grain. It goes down a little easier that way.)  Ever since my fist quinoa experiment, I have been using it instead of rice just about everywhere. I like it better, and supposedly it is nature's miracle. So I feel better about eating it.

Anyway, I took the quinoa and I took the beans and I saved some tomatoes from death on their vine, and I added some cheese and I stuffed the peppers. Oh my oh my. What a delicious dinner. Lucky for me, there was enough for two days of leftovers! (You may not end up with so much to eat tomorrow. I have kids who won't tough most of what I make, and that leaves more for me. This recipe should serve 4-8, depending on whether you are using it as a main dish or a side.)

This recipe is loosely based on one I found at Vegetarian Times.  I have to warn you, it takes about 2 hours from start to finish!

Stuffed Bell Peppers


4-5 tomatoes, chopped (about 2 cups)
2 tablespoons olive oil
1 onion, finely chopped

3 carrots, finely chopped
2 cloves garlic, minced
1 tablespoon ground cumin
3/4 cup quinoa
2 cups vegetable broth
pinto beans (again, I used some that my husband cooked, but you could use a can. I used about the equivalent of one can of beans)
1 1/2 cups shredded cheddar cheese
bell peppers (I used 9 very small peppers, because that is what I had. I imagine that 4-5 average peppers would use up this amount of stuffing. But if you have some extra stuffing leftover, lucky you! It makes a great burrito for lunch!)

First, chop the tomatoes. Reserve as much liquid as you can from the cutting board. Place a small colander into a baking dish on your counter.  Put the tomatoes into the colander and let the juice drain into the baking dish. This will help steam the peppers when you bake them, as well as keep them from sticking to the dish). Set this aside to drain while you prepare the rest of the dish.


Heat a skillet over medium-high heat. Add the oil, and then the carrots, onion, garlic, and cumin. Saute for about 5 minutes, until the carrots and onions are soft. 


Add the quinoa and vegetable broth and bring it all to a boil. Reduce heat to low and cover. Let it simmer for 20 minutes, until the liquid is absorbed and the quinoa is fluffy. At this point, start heating the oven to 350.


When the quinoa is done cooking, stir in the drained tomatoes, beans, and about half of the cheese.


Cut each pepper in half, and remove the ribs and seeds. Stuff each pepper with a mound of the filling, and place them in the baking dish with the tomato juice.


Cover the pan with tin foil, and bake for an hour. After the hour, remove the foil, sprinkle the rest of the cheese evenly on the peppers, and bake for another 15 minutes, until the cheese is lightly browned.


Enjoy with some crusty bread and a big green salad!


Wednesday, October 12, 2011

Crock Pot Chicken Taco Soup

If you don't live in Southern California, you may want to just skip down to the next paragraph. It feels so wrong to say it, but I am getting so weary of warm sunny days! I am not in the mood for Halloween (which may explain the lack of work on the costumes that need to be done in time for a party in 10 days). I put out some decorations, but only because the kids asked me to. I wasn't feeling it. My friends and acquaintances are full of stories of apple and pumpkin and baking and roasting, and I am just not feeling it. I need to at least put on a sweater before I feel like having pumpkin pie. I know this is a silly complaint. I know I would be lamenting the rain or the wind or the snow if I lived anywhere else. But I don't. I live in Los Angeles and I am tired of sunshine. I want fall to feel like fall so I can feel like doing fall things.

One day last week it actually did rain. For one day it felt a little more like we were getting to a new season... time for roasting squash and baking apple pie. However, the vegetables are still coming off of summer. Which makes sense, because right after that rainy day we shot back up to sunny days in the 80s and 90s. I'm no farmer, but I imagine we have to have a few cool days in a row before the fall and winter veggies can ripen.

For one day, though, it was cool. For one day, I felt a desire to make a crock-pot dinner. It seemed like a good day for some comfort food, and we had a busy schedule, so coming home to a ready meal worked out great.  Instead of a stew with carrots and potatoes, though, it was going to have to straddle seasons... a slow-cooked, warm, comforting meal made all out of summer veggies like tomatoes and corn.

I have to stop and wonder, though... why does "Crock Pot" cooking need to be "Canned Food" cooking? Just because I want something to be cooked slowly and to be conveniently ready for me when I get home, doesn't mean I want to just open a few cans of food and stir them together.

All of the recipes I found for taco soup asked for canned corn, canned tomatoes, canned beans, and a packet of taco seasoning. Instead, I went for the fresh(er) equivalents of those ingredients. It worked out great, and I am sure we saved at least a heart attack's worth of sodium by not getting all that stuff out of a can! (I did, however, include the bottle of beer that was in most recipes. I'm glad I did! It gave the soup a sort of yeasty, malty flavor.) I'm almost embarrassed to still call it Taco Soup. Somehow I feel this revamped, fresh-ingredient meal deserves a loftier name than "soup that is named after quasi-Mexican, Americanized food."

At any rate, here is Taco Soup that doesn't require a can opener whatsoever. Unless you buy canned beans. I am lucky that my husband likes to cook beans and freeze them, so that is what I use. If it were up to me, I would open a can of beans. So I am certainly not going to judge you canned-bean eaters.


Crock Pot Chicken Tortilla Soup

1 onion, chopped finely
1-2 cups (or 1 can) beans of your choice (I used pinto beans, but black or kidney would be good too)
4 cobs of corn, kernels removed from the cob
6 tomatoes, diced (and try to retain as much juice as you can)
1 bottle or can of pale beer
2 garlic cloves, minced
1 teaspoon chili powder
1/4 teaspoon onion powder
1/4 teaspoon dried red pepper flakes
1/4 teaspoon dried oregano
1/4 teaspoon paprika
1 1/2 teaspoons dried cumin
1 teaspoon salt
1 teaspoon black pepper
2 chicken breasts
shredded cheddar cheese


In your Crock Pot, combine the onion, beans, corn, tomatoes (and as much of the juice as you can keep), and beer. Add the garlic, chili powder, onion powder, red pepper flakes, oregano, paprika, cumin, salt and pepper and stir to combine. Place the chicken breasts on top of it all, and push them down until they are just covered in liquid. Cook on low for five hours. Take the chicken breasts out, shred them with a couple of forks, and stir the shredded chicken back in. Let it cook for a couple more hours.

Top each serving with a bit of cheddar cheese. Serve it with a big green salad and some quesadilla wedges.

Monday, September 19, 2011

tomato soup

One of my favorite combinations is grilled cheese sandwiches and tomato soup. I've liked it since I was a wee little thing.  Once in a while, so I remember, we got away with it on a Friday in lent, instead of having to eat dreaded tartar sauce with a little bit of even more dreaded fish underneath it. Those were the days.

Here is the thing about tomato soup from a can, though. It's really really good, but it doesn't exactly taste like... tomatoes. Nor does it really look like tomatoes. It has it's own color. Once, a friend asked me to help her make some curtains. "They need to go with our new couch," she said. "It's tomato-soup colored." And it was, exactly. It was that odd, almost-red color of tomato soup straight out of the Cambell's soup can. Not tomato-colored, tomato soup-colored.

Anyway, this recipe will definitely fill any nostalgic need you might have for the tomato soup of your youth. It is creamy and sweet, goes great with grilled cheese sandwiches, and just feels like going home. But here's the kick. It also manages to taste like tomatoes! Bonus!

Tomato Soup
This recipe makes enough for 10-12 servings. Plan to freeze some for a future night of easy dinner prep, or make only half.

2 tablespoons olive oil
3 cloves garlic, minced
1 onion, finely chopped
8 cups tomatoes, chopped (including juice, skins and seeds)
1 quart vegetable stock (or chicken stock)
1/4 cup chopped fresh basil
1/4 cup balsamic vinegar
1 cup heavy cream
salt and pepper to taste


In a large stockpot, saute garlic in olive oil. Add onion and saute until translucent and soft, (about 8 minutes). Add the tomatoes and bring it to a boil. When it comes to a boil, add vegetable stock. Simmer for about 20 minutes.

Let it cool. When it is relatively cool, add basil. Puree in a blender, a couple cups at a time, until it is an even smooth consistency. Set aside.

Make a roux in the now-empty pot, by melting butter and then stirring in flour until it is a medium brown color. Add the pureed tomato mixture back into the pot. Mix together, and then add in the salt, pepper, vinegar, and cream.

Let it all simmer about 20 minutes more. Serve warm... perhaps with a grilled cheese sandwich?

Thursday, September 15, 2011

spaghetti squash salad with tomato and basil

If you have been reading my blog for any length of time (or if you know me in "real" life and you have been hearing me whine), you won't be surprised to know that sometimes I get overwhelmed by a particular vegetable in the Abundant Harvest box.

Last year I vaguely remember having a period where there was a ton of broccoli... and this summer there was most definitely a zucchini surplus.

It's not that it is a yucky vegetable. Or that I don't know how to prepare it. It is just that sometimes I just don't know what to do with so much of it. At points I felt like I might turn into broccoli from eating it so often.

This week, it is spaghetti squash. Up until now, the only way I have ever prepared it is to turn it into a spaghetti-like dish (with red sauce and meat). I did that last week. And this week, I was rewarded with two new, large, spaghetti squash. I can serve it one more time as a main dish, but any more than that? My husband and kids would be rightly justified in walking out on me. For good.

So, enter creativity mode!

Hey, if spaghetti squash takes the place of spaghetti, why shouldn't it take the place of other pastas Like...say... couscous?


I made a sort of spaghetti-squash, semi-caprese, semi pasta-salad salad.


Spaghetti Squash Salad with tomato and basil
(plan ahead to cook the squash and let it completely cool before assembling the salad)

1 spaghetti squash
3 small tomatoes, chopped (about 1 cup)
1/2 cup crumbled feta cheese
3 green onions, thinly sliced
1/4 cup chopped fresh basil
2 small yellow squash, chopped (about 1 cup)
3-4 tablespoons olive oil
salt and pepper to taste

Preheat the oven to 400.

Cut the squash in half lengthwise and scrape out the seeds and pulp. Place face down into a pan filled with about 1 inch of water.

Bake for 45-50 minutes, until the shell of the squash is browned and the insides are very soft.

Let it cool completely. Once it is cool, you will be able to easily scrape the flesh out into spaghetti-like strands.

Mix together the squash, feta and vegetables. Add olive oil, salt, and pepper to taste.

Like many pasta salads, this tastes even better after being refrigerated for a few hours, so go ahead and make it the morning before you need it!

Served in a half of an avocado, it makes and especially filling, healthy, delicious lunch!


Wednesday, September 14, 2011

Grilled Cheese sandwich with pesto, avocado, and tomoato

I think one of the most important things I have learned from the past (naerly) year (wow!) that we have been getting the weekly box of produce from Abundant Harvest, is that if you have enough of the right foods in your house, it is really much easier to eat at home than it is to go through a drive-through.

And don't get me started on how much more:
  • healthy
  • inexpensive
  • environmentally responsible
  • delicious
Because it is all those things too.


But take last night, as an example.

We were at karate class, where all three kids were punching and kicking their little hearts out, when I suddenly remembered that we had a cub scout meeting at 4:45 (why such an odd time? Let's just say compromise). Since karate ends at 4:30, we would need to go straight to cub scouts. And since cub scouts ends at 6:00, that really leaves no time for cooking dinner. And since this just occured to me, clearly I didn't plan ahead.

No problem. We'll go through the In-N-Out drive through on the way home. Easy, cheap, delicious, and, best of all, these tired and hungry martial artists/scouts will get to eat right away.

Except, as I drove toward In-N-Out, I could see the line at the drive through. If you haven't ever been to In-N-Out, shame on you   I am deeply sorry   come to California immediately   you may not realize that the cars will line up 15-20 deep at dinner time. And stay that way late into the night. The extremely friendly and happy staff will take care of those cars just as quickly as you can imagine, but still. You have to wait for those 15-20 people to order their fries animal style, their burgers double-double-protein-style-easy-on-the-spread-with-grilled-onions, and their chocolate shakes... just shakes. There really is no way to improve on those milkshakes. mmmm.

Anyway, I decided not to swing the car over and get in that line. Why? In addition to the long line, because... say it with me...  there are vegetables in my house that I need to use up! That is becoming quite a refrain around here.

But in all honesty, I do have vegetables I need to use up. And they are much better for me than a double double. Even if I order it protein style (no bun), and even though it comes with "hand leafed lettuce" and tomato. Even if they own no microwaves or freezers.

I went home and pulled together a meal that probably took less time than that drive through line would have taken. And it involved real, organic, fresh produce. And was absolutely delicious.

Grilled Cheese Sandwiches with pesto, avocado, and tomato

If you have cheese, bread, and butter in the house, all you need to do is dress it up a little bit. It makes all the difference in the world.

Mine were stacked like this:

buttered bread
chive pesto (although basil pesto would be great too)
muenster cheese
tomato
avocado
more muenster cheese
buttered bread


You can really stack up anything you want... I would love to have it with bacon, fresh basil, roasted peppers, jalapenos, or even slices of pear. The trick is just to take some fresh veggies, some strong flavor to balance the cheese (like pesto or hummus), and to stack it up!

I placed one slice of bread on the griddle, then spread the pesto and layered the cheese. Once it started to melt a little bit, I place the other bread next to it, stacked up the other items on it, and then flipped the first bread and cheese on top. That way the bread was toasted and the cheese melted, but the tomato and avocado didn't get too warm and slimy.

I served it with some fresh fruit, and we were happily munching away within 15 minutes of walking in the front door. Which is good, because there was still homework to do...


Tuesday, September 13, 2011

Broiled Tomatoes with Asiago and Herbs

Know what my friend told me the other day? "Hey guess what?! You have a blog!" I had almost forgotten. Or so it may seem.

You see, though, we went out of town. And we cancelled the box for that week.

So there's that.

And then my camera battery ran out (you know, from taking millions of pictures of my cute kids while we were out of town.)

So there's that.

And I couldn't find the battery charger for a couple of days, because it went out of town with us, and somehow it came back home with us in the cupholder of my car. I know it makes no sense, but there it is.

So there'e that, too.

And then I finally did get the battery out of the car, charged, and plugged back into the camera. And I got the next box of produce the next week.  And then, about 2 hours later, I was hit with a nasty stomach bug and spent the weekend in bed.

So there's that on top of it all.

And then the dog ate my blog.

Okay, that's not true. But the rest of it is. And although it is just a list of excuses, they are real excuses, and so I can do nothing but work on the assignment and turn it in late and hope that you give me partial credit.

Anyway, what we did do in between all of the doing things wrong and making excuses for them, was to collect a whole bunch of tomatoes out of the garden. Oh my oh my. I am not much of one for pale, orange, mealy tomatoes that you get from the supermarket or at a restaurant. I am, however, quite smitten with fresh, juicy, red tomatoes that come right off of a vine and into my kitchen. Especially when you dress them up with warm melted cheese and crisp bread crumbs.


These particular tomatoes became the focus of our Meatless Monday dinner last week, just before the camera battery died. (ahem. Sorry for the horrible pictures. It was an unexpected death.) We ate them with a twice-baked potato casserole, and a salad. Again, it seems a tad like a dinner of side dishes, but it is working for me right now!

Broiled Asiago Tomatoes

5-6 tomatoes, sliced thickly
1/4 cup asiago cheese, grated
1/4 cup chopped fresh parlsey
3 cloves garlic, minced
1/4 cup panko bread crumbs
salt and pepper

Slice the tomatoes and lay them in the bottom of a baking pan, overlapping if necessary.

Mix together the remaining ingredients, and sprinkle evenly over the tomatoes.

Turn the broiler on to high, and place the tomatoes on the oven rack closest to the broiler. Broil for only a few minutes, until the cheese is melted and the bread crumbs are toasted. (they can burn quickly, so watch closely!)

Tuesday, September 6, 2011

Corn Fritter Stack

Meatless Monday took Labor Day off. Which is not to say that I ate meat. It is just to say that I didn't post anything about it.

I spent the whole weekend with my family at Bass Lake.


For those who aren't from California, (and for some of you who are but have never heard of Bass Lake), it is the best lake in the state. Or maybe the world, but I can't vouch for all the lakes of the world. Minnesota itself has 10,000 that I've never seen, for starters. It is located just south of Yosemite, right about here:


But Bass Lake is beautiful. The water is clean-ish (for a lake), the area is gorgeous, and the air and water temperatures make for tons and tons of hours spent tubing, swimming, floating, canoeing and kayaking.


But not cooking.


So, I don't have much to write about this minute. But I will tell you about these delicious corn fritters that I found on meatlessmonday.com. They should probably be served as a side dish or salad, but we ate them as the main course for our meatless Monday. Along with some potatoes and a green salad, maybe it wasn't the most conventional meal, but it sure made our bellies and our faces happy.


Corn Fritters

1/2 cup flour
2 teaspoons baking powder
1/3 cup milk
1 egg, lightly beaten
corn cut from 3 grilled cobs
1 shallot, minced
oil, for coating the skillet
3 large tomatoes
1 cup (packed) fresh basil leaves
balsamic vinaigrette

Combine the flour and baking powder. Stir in the milk, egg, corn, and shallot.

Heat a skillet on a stove set at medium. When it is hot, coat it in oil. Drop the corn mixture in approximately 1/4 cup mounds, and flatten with a spatula to about 1/2 inch thick. Cook about 2-3 minutes, until it is getting dry around the edges and bubbles are forming. Turn, and continue to cook about a minute more, until it is cooked through.


To serve, stack corn fritters, slices of tomato, and basil leaves. Dress with a bit of vinaigrette.

Monday, August 29, 2011

Roast Red Peppers Sandwiches on Focaccia

It is hot. Hotter than Hades around here. I believe it got up to 107 yesterday. So hot, in fact, that my local hometown newspaper ran an article in which some of my townspeople, I'm ashamed to admit, explain that they have found it necessary to carry water bottles... and (oh! The horror!) rent a movie instead of heading out to the park. My hometown newspaper is fabulous for great tidbits like these.

At any rate, if there is one thing I am not so interested in when it's ridiculously hot out, it's cooking.

I thought that sandwiches would be a fabulous dinner, but I wanted to make them a tad more special than the usual PB&J that makes its way to school in the lunchbox every day.

Veggie sandwiches were the order of the day... and I did end up cooking a little bit. I roasted the peppers, so the broiler was on. But only for about 10 minutes, so that doesn't count. And I did bake the focaccia, but that was early in the morning, so that doesn't count either.

I love love love roasted red bell peppers, and here is how I do them (they work great on the grill as well, but it was to hot to go outside and stand near the grill, so I did them in the oven this time).

Turn on the broiler, and scrub the peppers clean.

Place the whole, uncut pepper straight onto the oven rack, near the broiling element. (If you place a baking sheet on a lower rack, it catches the dripping pepper juices, which will make cleaning up much easier). Turn the peppers every couple of minutes with a pair of tongs. You want the pepper to get as black and blistery as possible all over. It will take a total of about 10 minutes.


After the pepper is blackened, take it out of the oven and place it into a plastic or paper bag, and close up the bag. Wait a few minutes while it gets all sweaty and steamy. When you take it out, the skin should peel right off the pepper, leaving you with a delicious roasted, skinless bell pepper. Cut it up, removing the seeds, stem, and ribs. For sandwiches, I leave it in pretty big planks.


Once you have your bread and your roasted peppers, it's just a matter of stacking up a sandwich and enjoying the life of Riley. Especially if you lived the life of Cinderella earlier this summer and made some pesto and some pickles that you can grab.

Mine had lettuce, tomato, bread and butter pickles, sharp cheese, roasted peppers, and pesto.


Mmmmmm.

Wednesday, August 24, 2011

Roast Vegetable and Hummus Tart


I will admit that all week long  most days  once in a while I look at a recipe, and instead of thinking to myself That looks delicious! I think to myself That uses up a ton of veggies!


Such was the case when I saw a picture of this tart on Pinterest. It involves several different species currently living in the biosphere that is my crisper drawer. And that was good enough for me.

As it turns out, though, this baby is delicious! I plan to make it many more times... and it can be adapted to use whatever vegetables are in season, so I imagine it will become a semi-regular part of the rotation around here. Plus, it is meatless, so it can be a part of the Monday routine. Although I served it as a main course, it is presented cut into smaller pieces and served as an appetizer. Look out Book Club... it's coming your way soon!

Without any further ado, I present to you Roasted Vegetable and Hummus Tart.

Thanks to Soma at eCurry. You have no idea how much this recipe means to me.


The recipe that Soma has on her blog allows for making the crust, the hummus, and the veggie topping separately and then combining them. I happened to have some hummus on hand already, so I used pre-made hummus. If you want this hummus recipe, head on over and check it out. It's not hard at all, although it requires some ingredients you may not have around (chickpeas, tahini).

I used her recipe for the crust (so delicious! And flaky! And without any butter!) She uses somewhat odd and very precise amounts of ingredients for the crust, but don't doubt her. She clearly knows what she is doing. She topped her tart with onions, zucchini, eggplant and tomatoes. I (of course) used the veggies that came in my box this week... summer squash, bell pepper, tomatoes, and potatoes.

To make the Crust:

2 cups all-purpose flour
1/3 cup + 2 1/2 tablespoons olive oil
1/4 cup + 1 1/2 tablespoons very cold club soda
1 teaspoon salt
freshly ground black pepper
optional -- any herbs you like. I added some fresh thyme, since that was in my box this week

The trick is to handle this crust as little as possible. It isn't hard at all, so handling it very little is easy to do.

In a bowl, combine flour, salt, pepper and herbs. In a separate bowl, whisk together the olive oil and club soda for a couple of minutes, until it is almost creamy-looking.


Pour water-oil mixture into the flour mixture, and combine with a fork just until there is no dry flour left. Using your hands, form the dough into a ball.


Divide the dough into two pieces and roll each one separately. Place the dough between two pieces of parchment paper, and roll in only one direction (not back and forth). I rolled mine into rectangles like Soma did, by rolling out a more or less rectangular shape and cutting the edges. I was tempted to leave it as a sort of loose oval, because it looked rustic and charming. You can make it whatever shape you like.


Remove the top parchment paper, cut the edges if you wish, and pierce with a fork.

Bake the crusts on the parchment paper at 400 degrees, for about 12 minutes, or until golden.


To prepare the veggies:

Again, use whatever vegetables you prefer, or whatever you happen to have around.

2 summer squash, sliced into rounds
2 tomatoes, sliced
2 potatoes, sliced
2 red bell peppers, sliced
2 cloves of garlic, minced
salt and pepper
olive oil
herbs, to taste (again, I used the thyme from my box, plus some sage and rosemary)

Lay all of the vegetable slices out on parchment paper. Combine the oil with the herbs and salt and pepper. Drizzle over the vegetables.

Roast at 350 for about 30 minutes, or until the vegetables are soft. Turn once, about halfway through.


To Assemble the Tart:


2 tart crusts
1/2-1 cup of hummus
roasted vegetables
sea salt
olive oil

Let the crusts cool after baking. Spread 1/4-1/2 cup of hummus on each one. Layer the vegetables on top. Sprinkle with salt and drizzle with olive oil. Bake at 350 for about 15 minutes, to warm it all up.


Friday, August 19, 2011

Fresh Tomato and Basil Pasta Sauce

We have tried growing a small garden for the past couple of summers. Last year was mildly successful. We got quite a few tomatoes, a few chile peppers, and fed some very young basil, cucumber, and zucchini plants to the bugs.

This year we have had a bit more successful. The tomatoes have been gorgeous; the basil managed to grow to a size that can handle the bug infestation better. Since Abundant Harvest is keeping us up to our ears in zucchini and cucumbers, we felt no need to try to grow those. We did add tomatillos this year. So far, the plants are filled with tiny little fruits that seem to be growing steadily, although slowly. The plants are gorgeous, though. They are leggy and bright green and have adorable little yellow flowers all over them.  I don't mind that they are using up valuable garden real estate that could have seen a couple of rounds of something else. Besides, how could I possibly use up a couple of rounds of something else? 

This week we seemed to have about a million tomatoes come ripe all at the same time. I went ahead and brought them all in, combined them with the tomatoes that I got in the AHO box, and made a batch of pasta sauce for the freezer. There is something amazing about picking the tomatoes, and then while they are still warm from the sun, washing and chopping them up. It's lethargic to work with something that fresh.

I think I may never have to go grocery shopping again. For the rest of my life.

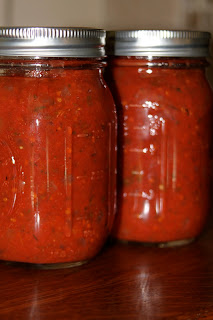
Pasta sauce isn't difficult. It's just a matter of pureeing the tomatoes, adding some spices, and letting it all simmer and meld for a long time. Plus, it sure smells good while it simmers for a couple of hours!


Fresh Tomato and Basil Pasta Sauce
I cannot vouch for the acid level of this sauce, so if you want to can it you need to do it in a pressure canner. Unless, of course, you know a lot more about food safety than I do. As for me, I just put it in the freezer.


I based this recipe on the one in Animal Vegetable Miracle, and it can easily be multiplied to make a big batch of sauce. It is so easy, but long, that you might want to make a whole bunch while the tomatoes are ripe, to use all year.

2 quarts tomato puree (about 6 pounds tomatoes, hulled and pureed in a blender or food processor)
1 large onion, diced
1/4 cup fresh basil, chopped
1 Tablespoon honey
1 Tablespoon dried oregano
1 teaspoon salt
1 teaspoon thyme
1 teaspoon garlic powder
1/2 teaspoon pepper

Saute onions in a large pot, until soft and translucent. Add pureed tomatoes and all of the seasonings. Bring it all to a boil and then reduce to a simmer. Simmer on low heat for about 2 hours, until the sauce is a thickness that you like. Stir occasionally (more frequently toward the end).

Pour into jars or freezer bags and freeze (or refrigerate if you plan to use it soon).


Monday, August 15, 2011

basil pesto

As I mentioned last week, this here little blog is now adhering to the concept of Meatless Mondays.

I have decided to start buying free-range, organic, grass-fed beef and chicken, and it's not as cheap as buying the equivalent meat in a supermarket or at Costco. However, here's the thing. The meat at Costco and the supermarket isn't the equivalent. Once I started reading about feed lots and factory farms and the stuff that the animals consume (as in cheep feed, antibiotics, and hormones) I decided I just can't give that stuff to my kids.

I am not so much worried about the chances of them dying of e coli or mad cow disease. I realize that the chances are very slim, and there are slim chances that they could die form anything at any moment. Lightning might strike one, or a plane could crash. If I lived my life worried about the things that could happen, I would have them all stuck in the house, wrapped in bubble wrap and eating only organic water chestnuts.

I am more concerned about the things that will happen over time. And my kids have a lot of time left for things to build up in their systems. (Let alone all the things building up in our ecosystems). Studies are showing that kids are hitting puberty earlier and earlier (thanks, in part, to hormones in the milk and meat), which leads to problems physically and socially. Doctors are finding kids who are obese, and yet malnourished (thanks, in part, to food that is primarily made of soy and corn... and yes, even cows are primarily made of soy and corn). A huge percentage of the food we eat is processed and sold by a very few companies, with very few ingredients. We are also in a race to keep developing new antibiotics faster than the diseases are developing resistance to them. The diet the food animals are being fed is so different than the diet they would have had naturally that the animals constantly get sick. Rather than change the diet, though, the factory farms just treat the sickness, by adding antibiotics right into the very food that weakens the animals in the first place. I don't want my kids' bodies to have a baseline of antibiotics already in their systems from the meat they eat. I want them to be able to fight disease.

There are so many ways to fight the problems in our food supply. One is to eat more fruits and veggies than we are currently eating. Another is to avoid the empty calories and processed foods that we are inundated with. We need to eat a bigger variety of foods, and we need to be careful about where we get the food, in order to avoid eating pesticides, antibiotics, meat from diseased animals, and chemicals.

One of the things I am focusing on is eating better meat. However, I do realize that it costs more. I am glad it does, because I find something wrong with 50 chicken nuggets for $9.99. That can't be quality food. I am willing to pay the money that the farmer requires to keep his livestock healthy and happy. I don't think $1.99 a pound is a bargain when I think about what I got for my $1.99.

I haven't found a tree (organic or otherwise) that grows money, however.  I can't afford to buy great meat as much as I was able to buy bad meat. And so, we will eat less meat.

I had a neighbor years ago who had moved here from Afghanistan. As she was preparing food for an Eid celebration, she mentioned to me that she would be cooking different dishes than she usually feeds her family. She said, "This is a party to celebrate the end of a month of fasting. I will have to honor my guests by serving them meat. Ordinarily we don't eat much meat."

I think I need to readjust my way of thinking to be more like that. Meat is a luxury. I don't plan to become a vegetarian, but I don't need to eat meat at every meal. It can become a special food. I don't plan to fast every day for a month either, but I am sure that the more I go without meat, the more I will appreciate it when I eat it.

I am also not going to make a huge stink about it. I won't turn away dinner at a friend's house if she buys her chicken breasts at Costco. I won't avoid restaurants (although I may opt for meatless entrees). As it is, though, I have this huge box of vegetables to eat my way though every week, so I am not going to restaurants much these days anyway!

And so, Meatless Mondays. I will certainly have more meatless days than just Monday. I just want to make sure that at least once a week we eat no meat. I figure if I make a point to do it on Monday, and I happen to eat meatlessly any other days, all the better.

There we have it. The long-winded version of why I made pesto. But wait! There are other reasons to make pesto. Don't do it because you are denying yourself meat. Do it because it is delicious, versatile, and easy. Do it because it freezes well, so you can have quick delicious meals any weeknight you want. Do it because basil is the food of the gods, and there could never be enough ways to enjoy it.


Basil Pesto
2 cups packed fresh basil leaves
2 garlic cloves
1/4 cup cashews or pine nuts (I happened to have cashews on hand, and although they have different tastes, both work well)
2/3 cup olive oil
salt and pepper to taste
1/2 cup parmesan cheese

Place the basil, garlic, and nuts in a food processor and pulse until it is chopped.
Add the oil. (If you plan to freeze it to use later, only add 1/2 cup of the oil at this point. If you are going to use it right away, add it all). Add salt and pepper and cheese and pulse until it is smooth.

If you are going to freeze it, put it in a airtight container, and pour the rest of the oil on top (this will help it keep the beautiful bright green color, and keep it fresher).

The pesto works great with pasta, on pizza, or spread on crostini. You can also use it to flavor chicken or fish. On Tuesday.

I used my pesto to make a pizza. I used this pizza crust recipe. After rolling out the dough, spread a thin layer of the pesto over it. Top it with fresh mozzarella slices and slices of ripe tomatoes.

You can grill it (like I did) or cook it in the oven. Either way, it's a little slice of heaven.


Tuesday, July 26, 2011

grilled veggie pizza

while you are reading this, I am camping far far away from my computer. I am off where cell signal doesn't exist, and if there is wifi, I don't want to know about it. I may come down from the mountain once or twice during the week to check in with the housesitter, but I may not. Hopefully I am cooking up lots of great meals and even greater memories that I will share with you when I get back.


It seems like no matter how hard I try, I can't ever quite use up everything that comes in my AHO box. Oh, it all gets used up eventually. It seems, though, that when I pick up the box on Saturday morning, I have to move some of last week's produce into prime fridge real estate, and put the new stuff behind and below it. I am, I guess, rotating my stock. It would be so freeing to bring home the new box and put the veggies away into an empty fridge. However, I am accepting that that may never happen.


One thing I have been doing, though, is using up some of whatever is left by making a veggie pizza at the end of the week. I have recently caught onto the trend of grilling the pizza, which I guess makes it a little bit more like a wood-burning oven, and less like a regular electric oven like most of us use. At any rate, it gets a little bit smoked in the grill, and that makes all the difference in the world.


Here is my pizza crust recipe:
(this makes enough for 3 medium pizzas. If you don't use it all up, just freeze the extra for use at another time)
(I got this recipe from here.)


4 1/2 cups flour plus some for rolling
1 3/4  teaspoons salt
1 teaspoon instant yeast
1/4 cup olive oil
1 3/4 cups ice-cold water

First, add all the dry ingredients to a mixer. Mix on low with the paddle attachment and slowly add in the oil and water. Mix until it is all combined. Switch to the dough hook, and mix on medium for 5-7 minutes, until the dough is smooth and not sticking to the sides of the bowl (it will still be stuck to the bottom).


Now you can either use this or freeze it. Or do some of both.

If you are ready to use it, go fire up your grill. You want it to be just about as hot as it will go, so get all the burners going at full tilt and close the lid. When it gets well up over 400 degrees inside, you are set.


Roll out the dough and cover it with the toppings of your choice. The day I made this one, we had tomatoes, zucchini, potatoes, and onions. I didn't use a pizza sauce, but instead drizzled oil and garlic on the crust, covered that in slices of fresh mozzarella, and then piled on the veggies.


Take the whole schebang out to the grill, and put the pizza, still on its pan, onto the grill. Close it up and wait a few minutes. It will cook right quick, considering how hot you made it.


It's done when the crust is golden brown and the cheese is melted and bubbly.


This goes great with a cold beer (you've been sweating next to an extremely hot barbecue. You need to regulate your temperature). Cheers!