New Here? Read The Story behind the Box

Showing posts with label basil. Show all posts

Thursday, March 29, 2012

Larb (Thai Salad)

Oh happy day! I love when I discover that one of my favorite, special occasion, once-in-a-while treats can be made easily and with great results at home!


Larb has always been one of my favorite things to order at a Thai restaurant, when I am being schmancy and ordering appetizers. It seems like an appetizer to me, that is, but it is usually found under the salad portion of the menu. (maybe because the veggies in it are added at the end and not cooked?) If you have never had it, either make this version or go to a Thai restaurant (tonight!) and order it. You won't regret it. Despite the unfortunate-sounding name (to our western ears) the dish is to. die. for.


Before I move on, I feel I need to give props to Laos. I discovered, in looking up some different versions of Larb recipes, that it is actually the national dish of Laos. Who knew? I haven't been to a Laotian restaurant (or Laos for that matter), but I know what I will be ordering if I ever do go! (To either a restaurant or the country, that is). I also learned that a portion of Thailand used to be Laos (Again, who knew? I am clearly not up to snuff on my Asian history), and that this dish is common mostly in that part of Thailand. Well. I am glad for that, because that means it made it into some of my favorite restaurants. And if you live in town, go to Thai Pepper on Main Street and order the Larb. It's number 19 under the ... you guessed it... salad portion of the menu. Not only is the food fabulous, but so is the adorable older couple who own the place.

Ahem. Back to the appetizer salad recipe at hand. Larb is a mixture of meat (I have seen it made with chicken, beef, turkey, and pork), lime juice, fish sauce, and cilantro and onions. All flavored with garlic and ginger.


I found this recipe thanks to Rachel at De Ma Cuisine, who does the weekly cooking show and meal planner for Abundant Harvest. If you are an AHO subscriber (or just a lover of fresh delicious veggie-loaded food), check her out! She is adorable, her show is fun, and her recipes are yummy. Anyway, Rachel had included this on her weekly plan when we got cabbages in her box. The recipe was listed as Thai Beef Cabbage Cups, which intrigued me. When I saw the subtitle (Larb), I was hooked.

I followed the recipe more or less, but I added a little fresh basil, and forgot the peanuts (accidentally). It's perfect! I think I will try making it with turkey next time, since the beef tastes still rather beefy, and I think the turkey might take on more of the flavors of the garlic and ginger, but I am not complaining. I am in love!


Larb

2 1/2 teaspoons dark sesame oil, divided
3 teaspoons minced fresh ginger
3 garlic cloves, minced
1 pound ground sirloin (or turkey, or chicken, or....)
1 tablespoon sugar
2 tablespoons fresh lime juice
1 1/2 tablespoons fish sauce
1/4 teaspoon crushed red pepper
1/2 cup vertically sliced onion
1/2 cup chopped fresh cilantro
1/2 cup chopped fresh basil
8 large cabbage leaves
2 teaspoons finely chopped peanuts

Heat a skillet over medium-high heat. Add 2 teaspoons of the sesame oil to the pan. Add the ginger and garlic and cook for one minute stirring constantly. Add the meat and cook, stirring to break it up, until it is done all the way through.

Combine the rest of the sesame oil, sugar, lime juice, fish sauce, and crushed pepper in a large bowl When the meat is cooked, add it to the bowl along with the cilantro, basil, and onion, and toss well.

Divide the meat mixture into the cabbage leaves, and serve. (At this point, you may want to go ahead and add the peanuts. I wish I had!)


Wednesday, March 28, 2012

Asparagus Pesto

I have to admit, I am a fool for anything with the name pesto in it. I adore basil (as much as any person can adore an herb), and by the time you add some garlic to it, I am in flavor heaven.

I also happen to be a fool for asparagus. I was thrilled to see it it my Abundant Harvest Box this week. I have read that there are many cultures who see the first asparagus as the official start to spring, and hold festivals to celebrate its arrival. I totally get it.

When two worlds collide, and I see a veggie I love and a recipe that intrigues me on the same day, I know the vegetable gods are asking that I make it. Who am I to defy the gods?


This pesto is everything I hoped for. The salty, garlic-y, basil-y nutty flavors were perfect. It's not a sauce so much as a paste, and it seems perfect for spreading on crackers or crostini for an appetizer, or with chicken, pork, or fish for a delicious main dish. If you wanted to toss it with pasta I would recommend adding a bit more oil, and letting it puree finer. I served it with chicken breasts that I grilled. A big salad and some fresh strawberries and orange slices, and it was a perfect spring dinner.


Asparagus Pesto
(Adapted from here)

one pound asparagus, tough ends trimmed
3 cloves garlic
1/4 cup cashews
3/4 cup fresh basil leaves, packed
1 teaspoon salt
1 tablespoon olive oil
1/2 teaspoon fresh ground pepper

First, steam the asparagus until tender. I used a microwave steamer that I love for its handiness, but you can do it on the stovetop as well. Set aside to cool.

In a food processor, whir the garlic cloves until they are chopped pretty finely. (This way no big chunks will be left to overpower any one mouthful). Add the remaining ingredients, and pulse until they are all chopped finely and mixed well, but not pureed into a sauce. You want some bite to it.

That's it! Serve it with your favorite accompaniment!


Monday, October 24, 2011

roast eggplant sandwiches

I think I mentioned before that I am not the world's biggest eggplant fan. I don't have anything against the suckers, but they aren't something I ever find myself craving. But see, that's the thing with getting a CSA box. You don't get to just eat the stuff you are craving, or the stuff that's your favorite. You eat the stuff that gets harvested each week, whether you wanted it or not. The amazing thing about Abundant Harvest Organics is that, due to it being a cooperative of sorts between many farms, there is much more variety than any one single farm could provide on its own. As a matter of fact, years ago we tried a CSA share from a small farm located practically in our neighborhood. They were swell folks, but there was only so much kale that my newlywed self and my young groom could eat in a week. On the other hand, Abundant Harvest makes sure that my box has a whole bunch of variety not just within each box, but also between weeks.

Part of what I love about this whole veggie box experience is the creativity and the new experiences it provides for myself and my family. It has certainly made us all try lots of new things we hadn't before... and likely never would have! And even things that aren't necessarily new are sure making their way into our diets far more that they used to.

For example, the eggplant. Whether I was looking for it or not, there it was.

I though about a few different ways I could prepare it, and as I considered and tossed out such ideas as eggplant parmesan and eggplant lasagna, I finally settled on eggplant sandwiches.

I followed the recipe that I found on allrecipes.com, and LOVED it! My husband said, "If we were in a restaurant right now, I would already be planning to return... and place the same order." I take that as a compliment in highest form.

Anyway, the sandwich is very simple... it's just eggplant and some other very delicious ingredients stacked up. Somehow they turn out to be an amazing combination that tastes amazing and is very simple to prepare. Other than mixing up the garlic mayonnaise (which I recommend doing in advance to let the flavors meld) and quickly roasting the eggplant, all you need to do is build the sandwich. I served these with some slaw I made out of bok choy and carrots... and I will give you that recipe tomorrow.

For now, enjoy this one!

Eggplant sandwiches
enough for 2 tall sandwiches

1 medium eggplant, sliced 1/2 inch thick
some olive oil (enough to brush the eggplant slices)
1/4 cup mayonnaise
2 cloves garlic
2 (6-inch) sandwich rolls
1 medium tomato, sliced
1/2 cup crumbled feta cheese
1/4 cup fresh basil leaves

If you can, prepare the mayonnaise ahead of time and refrigerate. Simply mince the garlic cloves and stir into the mayonnaise. If it is going to sit for any length of time, be sure to refrigerate.

Turn on the broiler element in your oven.

Slice the eggplant and lay out on a baking sheet. Brush both sides with oil. Place the baking sheet in the oven, about 6 inches from the broiling element. Cook for about 10 minutes, or until nicely toasted.


Split the rolls in half and toast. (I do mine by simply placing them, cut side up, directly on the oven rack and leaving for about 3-4 minutes to toast under the broiler). You can use your toaster or toaster oven if you prefer. It's less risky, since they go from toasted to black pretty quickly.

Spread the mayonnaise on the roll. Stack up the roasted eggplant, tomato slices, feta, and basil leaves.

Enjoy!

Tuesday, October 11, 2011

zucchini and herbed ricotta torte

A few weeks ago I made a hummus and roasted vegetable torte that just rocked my world.  Actually, it was the simple, four-ingredient, flaky delicious crust from Soma at ecurry that was the world-rocking part.

And so, on meatless Monday yesterday, at about 4:45, when I had no idea what to make for dinner, I remembered Soma's awesome torte crust. Luckily I had all the ingredients on hand, and away I went!

After making the crust (this time with rosemary), I went about loading it up with the vegetables that are still lingering from last week's box. Ahem. That is to say that this week I am somehow faced with catching up on all the stuff we somehow didn't get around to eating last week, and at the same time tackling this week's bounty. I am not sure how this is all going to work out, but I guess there are worse problems in the world than having too much delicious, fresh, organic produce on hand.

Back to 4:45 yesterday. With my crust safely baking in the oven, I had 12 minutes of free time to figure out how to top it. We have no hummus on hand right now, but while rooting around in the fridge I found some ricotta. Perfect! Mixing the ricotta with some fresh herbs gave it plenty of zip, and topping it with a couple of the veggies I needed to attend to made it perfectly tasty. Again, I think it would make a perfect appetizer, cut into  small squares. However, though, this time it was the main course here, served alongside a big salad.

And so, I give to you, my zucchini, tomato, and herbed ricotta cheese torte!


2 cups all-purpose flour
1 teaspoon salt
freshly ground black pepper
1 teaspoon fresh rosemary (or any other herbs you have on hand)
1/3 cup + 2 1/2 tablespoons olive oil
1/4 cup + 1 1/2 tablespoons very cold club soda
1 cup ricotta cheese
1/4 cup basil leaves, cut into thin slivers
2 tablespoons chives, chopped finely
2 garlic cloves, minced
1 medium zucchini
about 12-14 cherry tomatoes
crushed red pepper flakes
salt and pepper to taste

Preheat the oven to 400 degrees.

Mix the flour, salt, pepper and herbs together. In a separate small bowl, whisk the club soda and olive oil for a couple minutes, until they become creamy and well incorporated.

Pour water-oil mixture into the flour mixture, and combine with a fork just until there is no dry flour left. Using your hands, form the dough into a ball.

Divide the dough into two pieces and roll each one separately. Place the dough between two pieces of parchment paper, and roll in only one direction (not back and forth). Last time I did it, I went for a rectangle. This time, I let it take on the shape it wanted... a sort of loose oval.

Bake it for 12 minutes, until the crust is starting to become golden.

While it is baking, prepare the toppings:
First, mix the ricotta with the garlic, chives, and basil, and set aside.
Using a vegetable peeler (I used my new y-shaped peeler. For $4.99, it is giving me a whole new happy life in the kitchen! Why didn't I invest in this baby sooner?), cut the zucchini into thin ribbons. Cut the cherry tomatoes in half.

When the crusts are done, remove it from the oven and let it sit for a few minutes to cool a little bit.

Spread the ricotta mixture evenly over both crusts.

Spread the zucchini strips in an overlapping layer over the torts, and sprinkle with the crushed red pepper, salt and pepper. Place it back in the oven for about 10 minutes, until the zucchini starts to soften.

When it comes out of the oven, top it with the tomatoes, and cut into pieces.


Monday, September 19, 2011

tomato soup

One of my favorite combinations is grilled cheese sandwiches and tomato soup. I've liked it since I was a wee little thing.  Once in a while, so I remember, we got away with it on a Friday in lent, instead of having to eat dreaded tartar sauce with a little bit of even more dreaded fish underneath it. Those were the days.

Here is the thing about tomato soup from a can, though. It's really really good, but it doesn't exactly taste like... tomatoes. Nor does it really look like tomatoes. It has it's own color. Once, a friend asked me to help her make some curtains. "They need to go with our new couch," she said. "It's tomato-soup colored." And it was, exactly. It was that odd, almost-red color of tomato soup straight out of the Cambell's soup can. Not tomato-colored, tomato soup-colored.

Anyway, this recipe will definitely fill any nostalgic need you might have for the tomato soup of your youth. It is creamy and sweet, goes great with grilled cheese sandwiches, and just feels like going home. But here's the kick. It also manages to taste like tomatoes! Bonus!

Tomato Soup
This recipe makes enough for 10-12 servings. Plan to freeze some for a future night of easy dinner prep, or make only half.

2 tablespoons olive oil
3 cloves garlic, minced
1 onion, finely chopped
8 cups tomatoes, chopped (including juice, skins and seeds)
1 quart vegetable stock (or chicken stock)
1/4 cup chopped fresh basil
1/4 cup balsamic vinegar
1 cup heavy cream
salt and pepper to taste


In a large stockpot, saute garlic in olive oil. Add onion and saute until translucent and soft, (about 8 minutes). Add the tomatoes and bring it to a boil. When it comes to a boil, add vegetable stock. Simmer for about 20 minutes.

Let it cool. When it is relatively cool, add basil. Puree in a blender, a couple cups at a time, until it is an even smooth consistency. Set aside.

Make a roux in the now-empty pot, by melting butter and then stirring in flour until it is a medium brown color. Add the pureed tomato mixture back into the pot. Mix together, and then add in the salt, pepper, vinegar, and cream.

Let it all simmer about 20 minutes more. Serve warm... perhaps with a grilled cheese sandwich?

Tuesday, September 6, 2011

Corn Fritter Stack

Meatless Monday took Labor Day off. Which is not to say that I ate meat. It is just to say that I didn't post anything about it.

I spent the whole weekend with my family at Bass Lake.


For those who aren't from California, (and for some of you who are but have never heard of Bass Lake), it is the best lake in the state. Or maybe the world, but I can't vouch for all the lakes of the world. Minnesota itself has 10,000 that I've never seen, for starters. It is located just south of Yosemite, right about here:


But Bass Lake is beautiful. The water is clean-ish (for a lake), the area is gorgeous, and the air and water temperatures make for tons and tons of hours spent tubing, swimming, floating, canoeing and kayaking.


But not cooking.


So, I don't have much to write about this minute. But I will tell you about these delicious corn fritters that I found on meatlessmonday.com. They should probably be served as a side dish or salad, but we ate them as the main course for our meatless Monday. Along with some potatoes and a green salad, maybe it wasn't the most conventional meal, but it sure made our bellies and our faces happy.


Corn Fritters

1/2 cup flour
2 teaspoons baking powder
1/3 cup milk
1 egg, lightly beaten
corn cut from 3 grilled cobs
1 shallot, minced
oil, for coating the skillet
3 large tomatoes
1 cup (packed) fresh basil leaves
balsamic vinaigrette

Combine the flour and baking powder. Stir in the milk, egg, corn, and shallot.

Heat a skillet on a stove set at medium. When it is hot, coat it in oil. Drop the corn mixture in approximately 1/4 cup mounds, and flatten with a spatula to about 1/2 inch thick. Cook about 2-3 minutes, until it is getting dry around the edges and bubbles are forming. Turn, and continue to cook about a minute more, until it is cooked through.


To serve, stack corn fritters, slices of tomato, and basil leaves. Dress with a bit of vinaigrette.

Monday, August 29, 2011

Roast Red Peppers Sandwiches on Focaccia

It is hot. Hotter than Hades around here. I believe it got up to 107 yesterday. So hot, in fact, that my local hometown newspaper ran an article in which some of my townspeople, I'm ashamed to admit, explain that they have found it necessary to carry water bottles... and (oh! The horror!) rent a movie instead of heading out to the park. My hometown newspaper is fabulous for great tidbits like these.

At any rate, if there is one thing I am not so interested in when it's ridiculously hot out, it's cooking.

I thought that sandwiches would be a fabulous dinner, but I wanted to make them a tad more special than the usual PB&J that makes its way to school in the lunchbox every day.

Veggie sandwiches were the order of the day... and I did end up cooking a little bit. I roasted the peppers, so the broiler was on. But only for about 10 minutes, so that doesn't count. And I did bake the focaccia, but that was early in the morning, so that doesn't count either.

I love love love roasted red bell peppers, and here is how I do them (they work great on the grill as well, but it was to hot to go outside and stand near the grill, so I did them in the oven this time).

Turn on the broiler, and scrub the peppers clean.

Place the whole, uncut pepper straight onto the oven rack, near the broiling element. (If you place a baking sheet on a lower rack, it catches the dripping pepper juices, which will make cleaning up much easier). Turn the peppers every couple of minutes with a pair of tongs. You want the pepper to get as black and blistery as possible all over. It will take a total of about 10 minutes.


After the pepper is blackened, take it out of the oven and place it into a plastic or paper bag, and close up the bag. Wait a few minutes while it gets all sweaty and steamy. When you take it out, the skin should peel right off the pepper, leaving you with a delicious roasted, skinless bell pepper. Cut it up, removing the seeds, stem, and ribs. For sandwiches, I leave it in pretty big planks.


Once you have your bread and your roasted peppers, it's just a matter of stacking up a sandwich and enjoying the life of Riley. Especially if you lived the life of Cinderella earlier this summer and made some pesto and some pickles that you can grab.

Mine had lettuce, tomato, bread and butter pickles, sharp cheese, roasted peppers, and pesto.


Mmmmmm.

Friday, August 19, 2011

Fresh Tomato and Basil Pasta Sauce

We have tried growing a small garden for the past couple of summers. Last year was mildly successful. We got quite a few tomatoes, a few chile peppers, and fed some very young basil, cucumber, and zucchini plants to the bugs.

This year we have had a bit more successful. The tomatoes have been gorgeous; the basil managed to grow to a size that can handle the bug infestation better. Since Abundant Harvest is keeping us up to our ears in zucchini and cucumbers, we felt no need to try to grow those. We did add tomatillos this year. So far, the plants are filled with tiny little fruits that seem to be growing steadily, although slowly. The plants are gorgeous, though. They are leggy and bright green and have adorable little yellow flowers all over them.  I don't mind that they are using up valuable garden real estate that could have seen a couple of rounds of something else. Besides, how could I possibly use up a couple of rounds of something else? 

This week we seemed to have about a million tomatoes come ripe all at the same time. I went ahead and brought them all in, combined them with the tomatoes that I got in the AHO box, and made a batch of pasta sauce for the freezer. There is something amazing about picking the tomatoes, and then while they are still warm from the sun, washing and chopping them up. It's lethargic to work with something that fresh.

I think I may never have to go grocery shopping again. For the rest of my life.

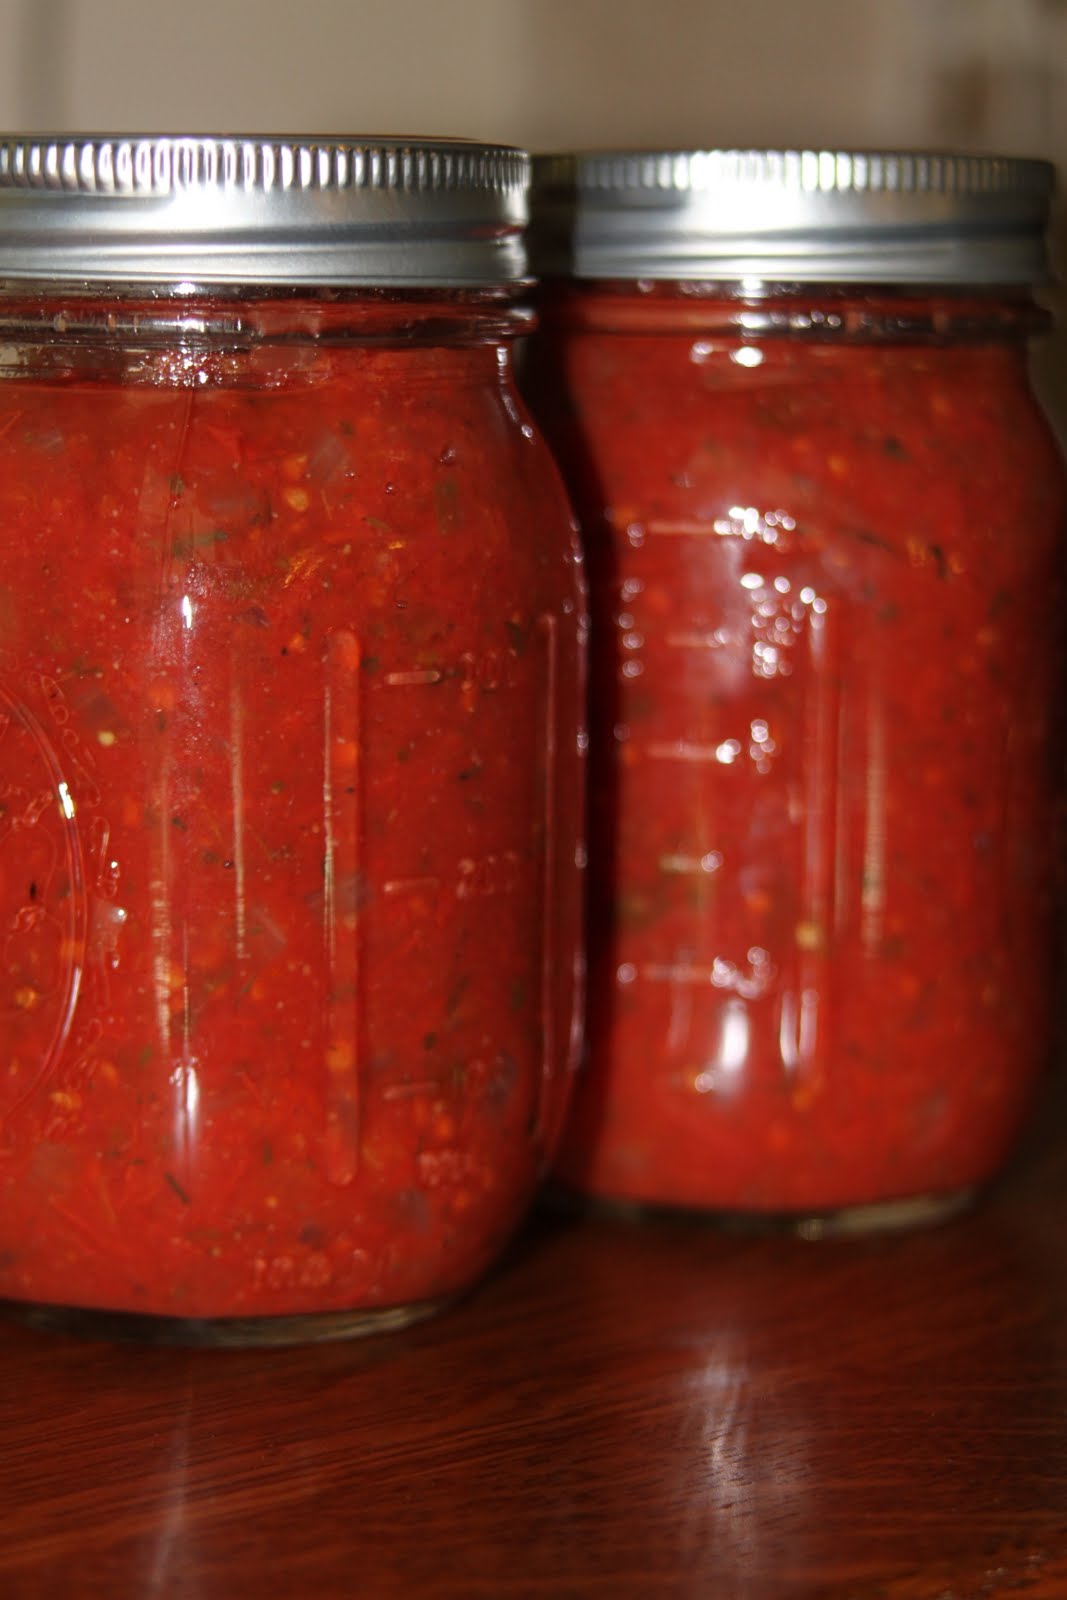
Pasta sauce isn't difficult. It's just a matter of pureeing the tomatoes, adding some spices, and letting it all simmer and meld for a long time. Plus, it sure smells good while it simmers for a couple of hours!


Fresh Tomato and Basil Pasta Sauce
I cannot vouch for the acid level of this sauce, so if you want to can it you need to do it in a pressure canner. Unless, of course, you know a lot more about food safety than I do. As for me, I just put it in the freezer.


I based this recipe on the one in Animal Vegetable Miracle, and it can easily be multiplied to make a big batch of sauce. It is so easy, but long, that you might want to make a whole bunch while the tomatoes are ripe, to use all year.

2 quarts tomato puree (about 6 pounds tomatoes, hulled and pureed in a blender or food processor)
1 large onion, diced
1/4 cup fresh basil, chopped
1 Tablespoon honey
1 Tablespoon dried oregano
1 teaspoon salt
1 teaspoon thyme
1 teaspoon garlic powder
1/2 teaspoon pepper

Saute onions in a large pot, until soft and translucent. Add pureed tomatoes and all of the seasonings. Bring it all to a boil and then reduce to a simmer. Simmer on low heat for about 2 hours, until the sauce is a thickness that you like. Stir occasionally (more frequently toward the end).

Pour into jars or freezer bags and freeze (or refrigerate if you plan to use it soon).


Monday, August 15, 2011

basil pesto

As I mentioned last week, this here little blog is now adhering to the concept of Meatless Mondays.

I have decided to start buying free-range, organic, grass-fed beef and chicken, and it's not as cheap as buying the equivalent meat in a supermarket or at Costco. However, here's the thing. The meat at Costco and the supermarket isn't the equivalent. Once I started reading about feed lots and factory farms and the stuff that the animals consume (as in cheep feed, antibiotics, and hormones) I decided I just can't give that stuff to my kids.

I am not so much worried about the chances of them dying of e coli or mad cow disease. I realize that the chances are very slim, and there are slim chances that they could die form anything at any moment. Lightning might strike one, or a plane could crash. If I lived my life worried about the things that could happen, I would have them all stuck in the house, wrapped in bubble wrap and eating only organic water chestnuts.

I am more concerned about the things that will happen over time. And my kids have a lot of time left for things to build up in their systems. (Let alone all the things building up in our ecosystems). Studies are showing that kids are hitting puberty earlier and earlier (thanks, in part, to hormones in the milk and meat), which leads to problems physically and socially. Doctors are finding kids who are obese, and yet malnourished (thanks, in part, to food that is primarily made of soy and corn... and yes, even cows are primarily made of soy and corn). A huge percentage of the food we eat is processed and sold by a very few companies, with very few ingredients. We are also in a race to keep developing new antibiotics faster than the diseases are developing resistance to them. The diet the food animals are being fed is so different than the diet they would have had naturally that the animals constantly get sick. Rather than change the diet, though, the factory farms just treat the sickness, by adding antibiotics right into the very food that weakens the animals in the first place. I don't want my kids' bodies to have a baseline of antibiotics already in their systems from the meat they eat. I want them to be able to fight disease.

There are so many ways to fight the problems in our food supply. One is to eat more fruits and veggies than we are currently eating. Another is to avoid the empty calories and processed foods that we are inundated with. We need to eat a bigger variety of foods, and we need to be careful about where we get the food, in order to avoid eating pesticides, antibiotics, meat from diseased animals, and chemicals.

One of the things I am focusing on is eating better meat. However, I do realize that it costs more. I am glad it does, because I find something wrong with 50 chicken nuggets for $9.99. That can't be quality food. I am willing to pay the money that the farmer requires to keep his livestock healthy and happy. I don't think $1.99 a pound is a bargain when I think about what I got for my $1.99.

I haven't found a tree (organic or otherwise) that grows money, however.  I can't afford to buy great meat as much as I was able to buy bad meat. And so, we will eat less meat.

I had a neighbor years ago who had moved here from Afghanistan. As she was preparing food for an Eid celebration, she mentioned to me that she would be cooking different dishes than she usually feeds her family. She said, "This is a party to celebrate the end of a month of fasting. I will have to honor my guests by serving them meat. Ordinarily we don't eat much meat."

I think I need to readjust my way of thinking to be more like that. Meat is a luxury. I don't plan to become a vegetarian, but I don't need to eat meat at every meal. It can become a special food. I don't plan to fast every day for a month either, but I am sure that the more I go without meat, the more I will appreciate it when I eat it.

I am also not going to make a huge stink about it. I won't turn away dinner at a friend's house if she buys her chicken breasts at Costco. I won't avoid restaurants (although I may opt for meatless entrees). As it is, though, I have this huge box of vegetables to eat my way though every week, so I am not going to restaurants much these days anyway!

And so, Meatless Mondays. I will certainly have more meatless days than just Monday. I just want to make sure that at least once a week we eat no meat. I figure if I make a point to do it on Monday, and I happen to eat meatlessly any other days, all the better.

There we have it. The long-winded version of why I made pesto. But wait! There are other reasons to make pesto. Don't do it because you are denying yourself meat. Do it because it is delicious, versatile, and easy. Do it because it freezes well, so you can have quick delicious meals any weeknight you want. Do it because basil is the food of the gods, and there could never be enough ways to enjoy it.


Basil Pesto
2 cups packed fresh basil leaves
2 garlic cloves
1/4 cup cashews or pine nuts (I happened to have cashews on hand, and although they have different tastes, both work well)
2/3 cup olive oil
salt and pepper to taste
1/2 cup parmesan cheese

Place the basil, garlic, and nuts in a food processor and pulse until it is chopped.
Add the oil. (If you plan to freeze it to use later, only add 1/2 cup of the oil at this point. If you are going to use it right away, add it all). Add salt and pepper and cheese and pulse until it is smooth.

If you are going to freeze it, put it in a airtight container, and pour the rest of the oil on top (this will help it keep the beautiful bright green color, and keep it fresher).

The pesto works great with pasta, on pizza, or spread on crostini. You can also use it to flavor chicken or fish. On Tuesday.

I used my pesto to make a pizza. I used this pizza crust recipe. After rolling out the dough, spread a thin layer of the pesto over it. Top it with fresh mozzarella slices and slices of ripe tomatoes.

You can grill it (like I did) or cook it in the oven. Either way, it's a little slice of heaven.


Friday, August 5, 2011

Pad Ka Prao

You know how those urban legends go? "One time, my friend's neighbor's grandma's sister...."

I fel like I am starting a story like that. 

There is this family. And somehow they have a connection to my husband's family. I think perhaps it goes like this:

My husband's neighbors (from the neighborhood he lived in as a kid) had a son. The neighbor's son's wife's sister and her husband opened a little Thai restaurant in Los Osos, California. We were lucky enough to get to go to this restaurant one day, when the neighbor, the wife, and the sister were all present. Which seemed to make us like instant family.

This restaurant, called Noi's Little Thai Takeout has the very best Thai food I have ever eaten. In my life. And I am a HUGE fan of Thai food.

Los Osos is a small town, and Noi's is a small restaurant (a couple of tables inside, a couple of tables on the porch). But there is nothing small about the flavors of their food. Or the line that forms to get the daily curry before it sells out each afternoon.

Being that were closelikethis with Noi and Doi (the sister, who at that time was a major part of running the restaurant), we were lucky enough to get a cooking lesson.

That means that we got the recipe for the most delicious Thai dish ever. 

Pad Kra Prao. (My Thai is a little sketchy, but I believe it translates to Chicken with bell peppers and basil). Which works out well, because as it turns out, it is chicken with bell peppers and basil. Isn't that nice? I like Thai food names. They are pretty straightforward. Unlike, say, Welsh Rabbit (I know, it's really rarebit, but both names are used), which has nothing to do with rabbits, but rather is a glorified cheese sandwich. Or a bearclaw that contains no bear, or a mincemeat pie with no meat.


Pad Ka Prao has become a favorite of not only myself and my husband, but also plenty of our friends and family, as we now serve it on our camping trip every summer. It is generally cooked in a wok, but a large skillet will do (especially if you are camping). Serve it alongside rice, and you have a dinner fit for the gods.

We couldn't figure out how to keep basil fresh in our ice chest,
so we just brought the whole plant. It cost the same as a
much smaller bunch of cut basil in the market!
You can buy chili sauce in a jar at the market. You can also make it, and someday if I can get my husband to write the recipe down for me, I will be happy to give it to you.


Also, this recipe calls for fish sauce. I ordinarily do not, under any circumstances, recommend fish or fish products in anything that you are creating for human consumption. However, I do make an exception here. If you promise not to smell the fish sauce before you add it in, I will allow you to use it. It really doesn't create any fishiness in the dish, and it does enhance the flavor. This, too, should be available at your supermarket. If you can't find it, you can substitute soy sauce. It is a close second.

Finally, this dish calls for white pepper. White pepper is very dusty, and a little goes a very long way. Be super careful the first time you use it... you can always add more later! If you can't find white pepper, or you are tired of gathering a million different ingredients for this dish, go ahead and use black pepper. The white adds a little zing that the black won't give you, but you'll still love the results either way.

Pad Ka Prao

4 Tbsp. Garlic
4 Tbsp. Thai chili sauce
1/2 pound chicken, cut into very small bite-sized pieces. (this time we did beef... but I don't know how to say beef ka prao. You can use either.)
1 Tbsp. brown sugar
1-2 bell peppers, cut into small pieces
2 large handfuls of Thai basil (or regular basil)
1/2 cup bamboo shoots
1/4 cup chopped green onions
fish sauce
white pepper

Heat the wok to very high, and then lower the heat to medium-high.

Add garlic and chili sauce. 

Add the chicken and stir fry until cooked through.

Stir in the sugar. Add the bell peppers and stir-fry just until tender.


Add the bamboo shoots, basil, green onions, and continue to stir-fry until the basil is wilted.

Just before taking out, stir in a splash of fish sauce.

Before serving, sprinkle on a teeny bit of white pepper.


Serve it hot, along with white rice. Enjoy!


Thursday, August 4, 2011

Spring Rolls

After driving halfway up California's Great Central Valley, and visiting Peterson Family Farm, we arrived at our campground.

AAAAHHHHH.

I love camping. I was trying to figure out why it seems so relaxing, when in reality many things are more difficult while camping. For example, washing dishes:

At home, I load the dishwasher (theoretically I do this as I create dirty dishes), pop in the detergent, and press "start."

While camping, I walk to the water spout to fill a dishpan. Then I walk back to fill a large pot. I place the pot onto the stove to heat the water. Once it boils, I divide the cold water and the hot water so that I end up with two pans of very warm water. One gets soap, the other is for rinsing. Then, I scrub each item in the first pan, transfer it to the rinse pan, and then place it into a drying rack. When they are all done, I have to throw the water out, place the dish rack into one pan, and invert the other pan over it all, in order to keep it dust-free.

Really, being at home is much easier, right?

Well, except.

At a campground, I have no floors to sweep, mop, or vaccuum. I have no beds to make (unless you count throwing the sleeping bag back to it's proper side of the tent). I have no washing machine or dryer to run. I have no windows to wash, furniture to dust, or showers to scrub. I also have no appointments to keep, errands to run, or practices and classes to shuttle kids to and from.

It's lovely.

As I mentioned, eons ago, we grabbed our Abundant Harvest box on the way to the campground. Meaning that there were all sorts of yummy fruits and veggies to consume during the week. Fortunately, we also had friends and family there to share in the harvest.


One fun use for many veggies was spring rolls. This was actually my mom's idea, and she got my kids and their friends involved right alongside the adults, in making this delicious appetizer.


They are super nutritious (all sorts of raw vegetables) and easy to make (very little actual cooking). Once the chopping was done, the kids pretty much took over, and the adults got busy eating the spring rolls as quickly as the kids could build them.


Spring Rolls

First, you need to buy spring roll wrappers. I have only seen them at Asian Markets.


It is an extra errand to run, but as you can see, they are certainly reasonably priced! This package didn't say how many it contains, and they were being eaten faster than I can count. However, I'd be willing to bet that for $1.49, we made at least 80 spring rolls.


Spring roll wrappers are made out of rice flour, water and salt. They are rolled out to be extremely thin, and then dried on bamboo mats.


They are almost transparent and completely dry (almost fragile) when you take them out of the package. After dipping them into warm water for a half-minute or so, they become pliable.


The other specialty ingredient is rice noodles. These can probably be found in any supermarket, but you will find them for a ridiculously low price if you get them at the Asian Market while you are picking up your spring roll wrappers. Cook the noodles according to the directions on the package. (Pretty much like cooking any pasta, but way faster). This is the only cooking you have to do.

Now, chop up your veggies. They should be chopped into match sticks. I used (of course) the stuff I had on hand, but any combo is bound to be good. I had carrots, basil, bell peppers (red and yellow), summer squash, lettuce, and cilantro. You could add almost anything. Some things that come to mind are bean sprouts, cucumber, celery, mushrooms, or radishes.


Once you have assembled your supplies (wrappers, cooked noodles, chopped veggies), you can begin rolling.

Take a wrapper, and submerge it in warm water until it is soft enough to fold without cracking (20-30 seconds). Lay it out and begin piling ingredients onto one side of it. Remember that it is small and needs to roll up, so go easy on the filling! A couple of pieces of each veggie, and bit of noodles is all it takes.

This one is filled very generously!
Once you have gotten all the good stuff on there, roll it and tuck the ends in as you go. (Like a burrito).


Since we had a whole group of rollers (ranging in age from 7 to... shall we say... adults?), we ended up with a whole range of rolling styles. Some were perfectly done.


Others looked a little more... creative.


But all of them were delicious!

Ordinarily, I would love to artfully display a platter-ful.
This time, though, I had to snap quickly. These hungry
campers weren't waiting to eat them! I don't think we ever had
more than four on the plate at any one time.


Once they are rolled, dip them in the most delicious dipping sauce ever. 

1 cup hoisin sauce
1 Tablespoon peanut butter
1 teaspoon rice vinegar
1/4 cup chopped peanuts

Mix together hoisin sauce, peanut butter and vinegar. If it seems too thick, you can stir in a little water. Top with chopped peanuts.


Friday, July 22, 2011

Tomato, Basil, and Feta Salad

Although yesterday I admitted to buying a whole bunch of fruit just before we head out of town for a week, I really am working furiously to get all of the perishable fruits and veggies eaten up before we leave them to die a lonely death in an unoccupied home.

Plus, there is just something about a picnic at the beach that begs to include a nice crisp cool veggie salad.

As luck would have it, I happened to glance down at the Abundant Harvest Organics newsletter while I was bustling around in the kitchen doing way too many things at the same time. And, as luck would have it, there was a recipe for Tomato, Basil, and Feta salad right there at the bottom of the newsletter. Asking only for things I already had on hand. Especially cucumbers. I had just gotten ahold of the zucchini population when I was overwhelmed with the cucumbers. I need to use up the cucumbers.

So, I quickly abandoned everything else going on in the kitchen, got out my trusty cutting board, and got to work slicing and dicing.

The results? A cool, fresh salad that travels well, tastes delicious, and makes you feel good about stuffing yourself silly.

Tomato, Basil, and Feta Salad

    • 1 pint cherry tomatoes or 3-4 tomatoes halved and diced
    • 1 cucumber, peeled and chopped
    • 1 onion, chopped
    • ¼ cup fresh basil leaves cut into thin strips
    • 3 tbsp olive oil
    • 2 tbsp balsamic vinegar
    • 3 tbsp crumbled feta cheese
    • Salt and pepper to taste
In a large bowl toss together tomatoes, cucumber, olive oil, basil, onion, balsamic vinegar, and feta cheese. Season with salt and pepper. 

I enjoyed this salad immediately, a few hours later, and the next day at the beach. I have to say it is good fresh and after a day of sitting. Feel free to make it ahead if you want!


In other exciting news, the route to our secret campground takes us directly past the Peterson Family Farms, where Vernon Peterson reigns supreme. What? You don't know Uncle Vern? You're missing out. He's the wonderful man who had a vision for people to be able to afford good, fresh, organic produce without paying a premium for the pleasure. He started and runs Abundant Harvest Organics. In other words, he has changed my life for the better. And, I'd be willing to bet, thousands of others.

Since his farm is right on my path to camping bliss, I have arranged to meet him at his farm and let the kids see from whence their produce comes. I am so excited!!!  I hope to have pictures to show you when we get back. Plus, we'll be picking up our weekly box of produce on our way out of town, so after I get back, perhaps I will have some pictures and descriptions of how we tackled the box in the great outdoors.

Meanwhile, I am hoping to get a couple of posts done ahead of time to keep you coming around while I'm gone.  After all, I have been furiously cookin' up the surplus around here!

Thursday, July 14, 2011

Quinoa Caprese Salad

For most of the summer, I spend my Friday afternoons at the pool. Quite a few mothers (the number ranges from 5-15 on any given Friday) and anywhere between 10 and 40 kids take over the neighborhood pool for a few hours. There is no structure to our afternoon... other than the fact that there are always more hot dogs than there are kids, plenty of junk food to go along with the hot dogs, and something a wee bit more nutritious for us moms to eat.  


If you have been reading my blog for any amount of time whatsoever, it will not surprise you to learn that I usually volunteer to bring some sort of salad or vegetable to our poolside potlucks. 


Last week, it was Quinoa Caprese Salad. I love tomatoes and fresh basil, and both are flourishing in my garden (and my AHO box) this week.  I decided to combine the tomatoes and basil with some quinoa to make a salad that would be easy to transport to the pool, gets better and better as it sits and the flavors meld, and is fresh and yummy. Of course, since there are always plenty of extra veggies around here, I added in a few others. Why not, eh? You can add more veggies if you have them, or skip some if you don't. I had zucchini, celery, and shallots in the fridge, so that is what I used. You could also add diced bell peppers, corn, parsley, peas, or really anything else you want. I don't think there is a possible way to ruin this one.


Quinoa Caprese Salad


1 cup uncooked quinoa
3 tablespoons olive oil
4 tablespoons apple cider vinegar
1 small shallot (minced)
1 medium zucchini (diced)
2 ribs of celery (diced)
8 ounces grape tomatoes (cut in half)
8 ounces fresh mozzarella (cut into small cubes)
about 10-12 leaves of basil, chopped finely
salt and pepper to taste

Cook the quinoa well ahead of time, to give it time to cool. Bring two cups of water to a boil. As soon as it boils, add the quinoa, lower the heat to low, cover and let it simmer for 20 minutes. After 20 minutes, fluff it with a fork. Let it cool completely.

Stir the olive oil and vinegar into the quinoa. Chop the veggie and cheese and stir them in. Add salt and pepper to taste.

Chill completely before serving.

Monday, July 11, 2011

Asian Plum Sauce

Okay, so I mentioned that we were given a gift of plums. Lots of plums.


I am thrilled, of course. It is lovely to receive such a wonderful gift. It is nice that there this person who has a very fruitful tree, who knows that she can't use all of the fruit, and who wants to share it with friends. It is also wonderful that there is this other person who has become obsessed with saving every living piece of vegetable matter in the world and using it for the greater good. And therefore she can't say no to saving the plums from rotting into the soil under the tree.

It's just that I think I have a problem. I keep reading things that tell me how important it is to eat and feed my family organic produce. And how imperative it is to eat things that are in season and locally grown. How doing this will save the environment, protect against cancer, insure that the labor force on the farms is protected, and allow me to enjoy amazing quality fruits and vegetables in their prime, the way they are meant to be enjoyed. I also read about how the USA is exporting potatoes... and importing even more.  And how there are people starving all over the world, because we are growing (and purchasing) huge industrial crops, which have to be altered to be edible, instead of growing food that we can eat and letting everyone else grow food that they can eat.

Okay, so all that adds up to the fact that when there is a piece of fruit, grown in my own neighborhood without pesticides, and there is no fuel consumption or labor force or huge conglomerate corporation to feel guilty about, I feel like I have found the holy grail. It feels sinful to waste the very thing that I am searching for.

Never mind that fact that there are about 700 holy grails in my kitchen right now. I can save each and every one of them. I can!!

So, this week it is the plum. We canned and baked and froze and ate 23 pounds of cherries. Then we canned and cooked and ate close to the same amount of apricots. And now, we have plums.

Remember when I talked about stone fruits? And how there are clingstones and freestones? And how the apricots are so fun and easy to work with because they are freestones and the pit practically jumps out of the fruit?

Well, meet the plum. The clingstone plum.

Here is the irony: If a plum is ripe, it is so amazingly soft and sweet that you want to freeze forever the flavor, scent, and texture. But, the fruit clings so forcefully to the pit that you also want to curse and cry and hire someone to get the fruit out for you. On the other hand, if you can get to the fruit before it gets quite so ripe, the pit is a little easier to get out.  Of course, the fruit is tart and makes your face squinch up when you eat it. What is a plum eater to do? Use the different stages of ripeness for different purposes, and just accept that the path isn't going to be easy, but the destination is all worth it. Like many things in life, it is worth working for.

Here is an almost-ripe plum cut in half. See how the stone is pretty much free of the fruit? But the fruit is pretty firm still, and not very juicy (or sweet).


Here, on the other hand, is a very ripe plum. The fruit clung to the pit, and almost none came off with the peel. But it sure is nice and soft... and sweet and juicy!


This very ripe plum will require some effort to get the pit out. My recommendation is to use these very ripe fruits for sauces and jams, because the fruit all gets mushed up together anyway, and it doesn't matter how much you mangle it in your efforts to get the pit out. Save the lesser-ripe fruits for recipes where you are going to want pieces of plums to look like pieces of plums.

The first thing I did with the plums was to make plum sauce... the sauce that is used in many Asian recipes as a base for stir-frys. I LOVE plum sauce, and it makes meals very easy to put together on busy weeknights. Having a few jars of this in the house is going to make life much simpler in the months to come. Tomorrow I will give you one suggestion of how to use plum sauce in a very simple, quick stir-fry dinner.

For now, though, we must start by making the sauce. I actually tried two different recipes, and one seemed so very far superior in the final flavor that I am not going to bother giving you the other recipe.

I selected the darkest and softest plums for this sauce. I wanted to get to them before they rotted, and it worked well to have them mushy in cooking this sauce.

I started to cut them in half and twist apart the sides, but they were so soft and ripe that I ended up just squeezing the pit out with my fingers, and trying to pull as much fruit off of it as possible. You want a balance of the sweet fruit and the tart skin for this recipe, but in cases where the plum was so ripe that the fruit easily slid off of the skin, I went ahead and threw out the skin. I probably used about half of the skins in the long run. Other than getting the plums pitted, and measuring out ingredients, this recipe is very easy (although time-consuming).


Asian Plum Sauce

6 cups chopped, pitted red plums
1 1/2 cups brown sugar
1 cup sugar
1 cup vinegar
1 small onion, minced
1 teaspoon crushed cried red chili pepper flakes
4 garlic cloves, minced
1 tablespoon fresh ginger, minced
2 tablespoons soy sauce
1 tablespoon fresh basil, minced
1 tablespoon fresh tarragon, minced

Combine all ingredients in a large stockpot, and cook over medium heat for about 1 1 /2 hours, until thick and syrupy.

Fill jars, leaving 1/4 inch headspace. Wipe rims of the jars, place lids and rings (fingertip tight) and process in boiling water for 15 minutes (adding time for elevation). Turn off heat and let jars sit for 5 minutes before removing from water bath. Remove from water and let sit, undisturbed, for 12 hours before touching.


Come back tomorrow for a suggestion for using the plum sauce!