New Here? Read The Story behind the Box

Showing posts with label plum. Show all posts

Wednesday, August 10, 2011

Plum-Vanilla Syrup

My kids return to school a week from today. My baby is starting kindergarten, and I keep having dreams that the teacher has to come up to me and tell me it is time to leave, that I can't stay at school with him all day. It isn't pleasant. He is a ton of fun to have around, and I am gonna miss him. 

On the one hand, I don't want summer to end. Ever. I love taking the kids to the beach, museums, parks, gardens, and swimming pools. I love sleeping in. I love staying in pajamas well past noon.

On the other hand, if these kids lose one more pair of flip flops, or make one more mess that they don't want to clean up, or squabble one more time, I might lose my mind. It will be kinda nice to have them all gone, making their messes somewhere else for a few hours a day.

It might take a couple of cocktails to get me through the end of summer. Then again, it might take me a couple of cocktails to get me through the first day of school.

Either way, I better be prepared.

Lucky for me, I found this recipe for Plum Vanilla Syrup. It is a great way to hang on to these last days of summer. This delicious syrup is really quite simple... just vanilla simple syrup and plums. 

The possibilities for it are endless, though.

I used it to make a cocktail, by mixing it with vodka and club soda. You could make a bellini by adding it to Prosecco. Or a kid-friendly, homemade, dye- and corn syrup-free soda by just mixing it with club soda or sparkling water. I can imagine it poured over ice cream, or even pancakes, or drizzled over some toasted pound cake.

Plum-Vanilla Syrup
I got the recipe from The Farmer's Daughter, who happens to be one of the growers who contribute to my Abundant Harvest Organics box, and also blogs about what she does with the stuff she grows.

1/2 cup water
1/2 cup sugar
1 vanilla bean
8 ripe plums, chopped

First, slice the vanilla bean lengthwise and scrape the seeds.


In a medium saucepan, combine the sugar, water, and vanilla bean. Bring to a boil, lower the heat, and simmer for about 5 minutes. Add the chopped plums and simmer for another 5 minutes. 

Let it cool. Remove the vanilla bean, and pour the rest into a blender. Puree until smooth.

Now, have fun with it. I sure did!


Monday, July 18, 2011

plum syrup and plum grilling sauce

And so, after making plum sauce and plum jam and plum galette and plum cake, my plum supply was dwindling. Finally.


Dwindling but not gone, that is. Luckily, I found another recipe to use up the rest of the plums. This one, happily, makes two different products at the same time! And it's easy! I promise!


Using a big pile of plums, you cook them for a bit, and strain out the syrup to store for use on pancakes and whatnot. Then you take the leftover plum solids, add a few more ingredients and puree it into a sauce for grilling ribs, chicken, pork, or whatever else you like to put on your grill.


Plum Syrup and Plum Grilling sauce
(from neighborhoodfruit.com)


3 pounds very ripe plums
1-2 cups sugar
1 jalapeno pepper
1-2 teaspoons salt
1 red onion
1 Tablespoon olive oil


First, we make the syrup. Take all the plums and mush out, smoosh out the pits. Don't worry about how much you destroy them in the process, it's all getting pureed later. Just get the pits out the best you can, and save all the juice, pulp, and skins.


Add some of the sugar to the plums in a large pot, and simmer it all for about 15-20 minutes. If it is dry, you can add water. If your plums were super ripe, they should be juicy enough, though. While it simmers, you can add more sugar if you like. I used about 1 cup total, and it tasted great. (My plums were extremely sweet and ripe when I started.)


After 20 minutes or so, turn off the heat and let it cool a bit. Place a colander into a large bowl, and strain out the syrup. 


Now, we make the grilling sauce.


Meanwhile, chop the onion and caramelize it in a pan with the olive oil. 


Add the cooked onions, the plum solids, the pepper, and the salt to a blender. Puree it all until it is smooth. Voila! You're done! It's a great sauce to grill with!


You can keep both the sauce and the syrup in the fridge to use up int he next few weeks. If, like me, though, you have too much food in your fridge and you want to save it for future use, let's can it.


Pour both into your jars, and be sure to label which is which!


If you need to read about how to can, I suggest this document.

If you already know about canning, here is a chart for how long to process it:


( I couldn't find the processing time for plum syrup, but every other syrup I found was 10 minutes for pints or quarts at 0-1,000 feet, 15 minutes at 1,001-6,000 feet, so that is what I went with.)


Table 1. Recommended process time for Fruit Purees in a boiling-water canner.
 Process Time at Altitudes of
Style of PackJar Size0 - 1,000 ft1,001 - 6,000 ftAbove 6,000 ft
HotPints or Quarts15 min2025


Friday, July 15, 2011

plum galette

Although I took a momentary plum vacation in order to hang out at the pool with my kids, my friends, my friend's kids and my kid's friends, it didn't last nearly long enough. On the other hand, in terms of how quickly fruit ripens during these hot summer days, an afternoon at the pool is perhaps a bit too long to stay out of the kitchen. Ay me.


Anyway, before I took a break to talk about salads and swimming and hot dogs, we had been discussing plums. And by "we," I mean me. And by "discussing," I mean I was spouting off information and opinions that you may or may not give a whiff about. And by "you," I mean... is there a you? Is anyone out there reading this? Hello? Anyone there?


Right. So back to the plums. Remember how I said that plums are clingstone fruits, and that when they are fully ripened they are all but impossible to get away from their pits?


Despair not! There are great things you can do with them while they are still a bit firm. When they have gotten their beautiful red skin, but before they are too soft, they are tart (but still flavorful), and much easier to pit without destroying the shape. In other words, perfect for baking.


During the course of this chaotic frantic bountiful fruit-filled season, I have made cakes, pies, muffins, and cookies. Being as I am one to get bored easily, I felt a need to try something different this time. 


I went for a galette. Look up any recipe for a galette of any variety, and somewhere in that recipe you will find the word "rustic." I am not saying it's a bad thing, it is simply true. One can't bake a galette without appreciating its rusticness (rusticity?). At least those are the findings of my anthropological study of galette recipes.


Be that as it may, I made a rustic galette. The rusticness refers to the free-form, casual shape and lack of fussiness in this almost-pie. (By "almost" I mean it really is a pie, but there is no pie dish involved, so we have to call it something else. Something a little more... rustic). It couldn't be easier to make... plums tossed with a little sugar and flour, piled onto a crust that doesn't have to fit a pie or tart pan, folded up and thrown in the oven. Voila! 


Served alongside vanilla ice cream, the tartness of the plums, the sweet syrupy filling and the buttery crust are to die for. It's just a perfect balance of sweet and tart, warm and cold. This dessert, as easy to put together as it is, is a sight to behold with the yellow egg-brushed crust and the ruby red plum juice. It's even better to taste.


Plum Galette
(Everyday Food)


1 cup all-purpose flour, plus more for work surface
1/4 cup fine yellow cornmeal
1/2 teaspoon sugar
1/2 teaspoon salt
1/2 cup (1 stick) cold unsalted butter, cut into small pieces
1 1/2 pounds red plums, pitted and sliced
1/2 cup sugar
1 tablespoon all-purpose flour
1 large egg yolk mixed with 1 teaspoon water

In a food processor, pulse flour, cornmeal, sugar, salt and butter until mixture resembles coarse meal with some pea-sized pieces still remaining. Add 2 tablespoons ice water. Pulse until dough is crumbly but holds together when squeezed. If needed, add a teeny bit more ice water. 
Turn dough out onto a floured work surface and knead a couple of times. Flatten dough into a disk, wrap it in plastic, and refrigerate at least one hour.
After your dough has chilled, line a rimmed baking sheet with aluminum foil or parchment paper. (It will leak juice later as it bakes, and you'll be glad you don't have to scrub baked-on plum juice off of your pan).   Flour your work surface and the top of the dough and roll out to a 1/4 inch thickness. Transfer dough to prepared baking sheet. 
Preheat oven to 400 degrees. In a large bowl, mix together plums, sugar, and flour. Mound plum mixture in center of prepared crust, leaving a 2 inch border all around. Fold border over edges of fruit, as rustically as you want. Brush dough with egg.
Bake tart until crust is brown and filling is bubbling and leaking all over your tin foil-covered pan, about 45 minutes. Transfer baking sheet to a rack, and let cool for 20 minutes. Slice and serve warm, with vanilla ice cream.


This post has been linked to Cast Party Wednesday

Wednesday, July 13, 2011

plum jam

I am really starting to hate big pots of boiling stuff. Especially big pots of boiling jam that is viscous and therefore clings to the back of your fingers and burns them when you spill some of it. And makes lots of blisters that continually get brushed against or bumped and make your eyes well up. And still there are piles of fruit that you can't just ignore.

Amongst other things. There are other things I hate too, but that is the main one for today.

But, onward! Forward march!

Today, it was plum jam. Despite the burns and the exhaustion, despite the sweat and the tears, plum jam is just so sweet and delicious.  It's worth it all.


Plum Jam
(This recipe makes about 8 1-pint jars)

Rinse, chop, and remove pits from about 4 pounds of plums. This is another recipe that works great for those really really ripe soft plums. Just squish them in half, and mush/pull/scrape as much fruit as you can from the pit. You can keep some skins and throw away some. Whichever skins separate easily from the flesh went into my composting bin. Those that stuck a little more carefully stayed in the pot. The skins contain the most tartness, so consider that in how many you want keep. Keep on pitting and chopping and squeezing until you have two quarts of plum bits.

Combine the plums, 6 cups of sugar, 1 1/2 cups of water, and 1/4 cup lemon juice in a large stockpot. Depending on how juicy your plums are, you may not need all of the water. It just needs to be liquidy enough to dissolve the sugar.

Cook, stirring constantly, until it reaches the jellying point (about 220 degrees at sea level). Just be careful. 220 degrees does not feel good spilled on your hand.

Here is that fabulous explanation for knowing when your jam is done.

When it is done, you are ready to can it for future use!

If you need to read about how to can, I suggest this document.

If you already know about canning, here is a chart for how long to process it:


Table 1. Recommended process time for Plum Jam in a boiling water canner.
 Process Time at Altitudes of
Style of PackJar Size0 - 1,000 ft1,001 - 6,000 ftAbove 6,000 ft
HotHalf-pints
or Pints
5 min1015


*This chart is from the National Center for Home Food Preservation. How official is that?

Tuesday, July 12, 2011

quinoa with green beans and chicken in plum sauce

As I promised yesterday, here is an easy-peasy dinner to make with your new plum sauce! The plum sauce has enough complexity and enough different ingredients that you get to take tonight off and create dinner out of just five ingredients, but it will taste like you slaved all day. Lucky you!

I used the plum sauce that I made out of a very small percentage   a tiny little dent in the pile   some of the plums we graciously received from a friend. You can use my plum sauce recipe, of course, or you can buy plum sauce in a jar. It should be on the Asian/Ethnic Foods aisle of your market, and if it isn't, it will surely be in any Asian market.

All of my kids ate this up... and the little one asked for seconds, and then asked for thirds! Will wonders never cease. Of course, I must add the caveat that he had spent the day at karate camp. He needed to replace many many burned calories, and he was also interested in consuming some vegetables in the hopes of someday being as strong as Casey, one of the camp instructors and my son's new idol.

So, combine a day full of exercise, one strong and fun teenager to look up to, and some delicious plum sauce, and any kid will eat his green beans.

As a matter of fact, they ate it all up before I got a single picture. Sorry!!

Quinoa with green beans and chicken in plum sauce
(serves four)

1 cup uncooked quinoa
1/2 pound green beans, rinsed, ends trimmed, and cut into 2 inch lengths
olive oil
1/2 pound chicken breasts, cut into bite-sized pieces
1/2 cup Asian plum sauce

Bring 2 1/2 cups of water to a boil. Add green beans and cook for about 5 minutes, until they are tender-crisp.

Meanwhile, heat a wok or large frying pan over high heat. Add oil to hot pan.

When the beans are ready, lift them out of the boiling water with tongs, allowing the water to continue boiling. Shake excess water off each tong-full of beans, and toss them into the wok. (Be careful, the water droplets left on the beans will spit in the hot oil).

Add the quinoa to the pot of boiling water, and turn the heat down to the lowest setting. Cover the pot and let it simmer for 20 minutes.

Add the chicken breasts to the green beans, and stir fry until the chicken is cooked through. Add the plum sauce and stir until it is all coated.

Transfer the quinoa to a serving bowl, top with the green bean/chicken mixture, and serve warm.

Monday, July 11, 2011

Asian Plum Sauce

Okay, so I mentioned that we were given a gift of plums. Lots of plums.


I am thrilled, of course. It is lovely to receive such a wonderful gift. It is nice that there this person who has a very fruitful tree, who knows that she can't use all of the fruit, and who wants to share it with friends. It is also wonderful that there is this other person who has become obsessed with saving every living piece of vegetable matter in the world and using it for the greater good. And therefore she can't say no to saving the plums from rotting into the soil under the tree.

It's just that I think I have a problem. I keep reading things that tell me how important it is to eat and feed my family organic produce. And how imperative it is to eat things that are in season and locally grown. How doing this will save the environment, protect against cancer, insure that the labor force on the farms is protected, and allow me to enjoy amazing quality fruits and vegetables in their prime, the way they are meant to be enjoyed. I also read about how the USA is exporting potatoes... and importing even more.  And how there are people starving all over the world, because we are growing (and purchasing) huge industrial crops, which have to be altered to be edible, instead of growing food that we can eat and letting everyone else grow food that they can eat.

Okay, so all that adds up to the fact that when there is a piece of fruit, grown in my own neighborhood without pesticides, and there is no fuel consumption or labor force or huge conglomerate corporation to feel guilty about, I feel like I have found the holy grail. It feels sinful to waste the very thing that I am searching for.

Never mind that fact that there are about 700 holy grails in my kitchen right now. I can save each and every one of them. I can!!

So, this week it is the plum. We canned and baked and froze and ate 23 pounds of cherries. Then we canned and cooked and ate close to the same amount of apricots. And now, we have plums.

Remember when I talked about stone fruits? And how there are clingstones and freestones? And how the apricots are so fun and easy to work with because they are freestones and the pit practically jumps out of the fruit?

Well, meet the plum. The clingstone plum.

Here is the irony: If a plum is ripe, it is so amazingly soft and sweet that you want to freeze forever the flavor, scent, and texture. But, the fruit clings so forcefully to the pit that you also want to curse and cry and hire someone to get the fruit out for you. On the other hand, if you can get to the fruit before it gets quite so ripe, the pit is a little easier to get out.  Of course, the fruit is tart and makes your face squinch up when you eat it. What is a plum eater to do? Use the different stages of ripeness for different purposes, and just accept that the path isn't going to be easy, but the destination is all worth it. Like many things in life, it is worth working for.

Here is an almost-ripe plum cut in half. See how the stone is pretty much free of the fruit? But the fruit is pretty firm still, and not very juicy (or sweet).


Here, on the other hand, is a very ripe plum. The fruit clung to the pit, and almost none came off with the peel. But it sure is nice and soft... and sweet and juicy!


This very ripe plum will require some effort to get the pit out. My recommendation is to use these very ripe fruits for sauces and jams, because the fruit all gets mushed up together anyway, and it doesn't matter how much you mangle it in your efforts to get the pit out. Save the lesser-ripe fruits for recipes where you are going to want pieces of plums to look like pieces of plums.

The first thing I did with the plums was to make plum sauce... the sauce that is used in many Asian recipes as a base for stir-frys. I LOVE plum sauce, and it makes meals very easy to put together on busy weeknights. Having a few jars of this in the house is going to make life much simpler in the months to come. Tomorrow I will give you one suggestion of how to use plum sauce in a very simple, quick stir-fry dinner.

For now, though, we must start by making the sauce. I actually tried two different recipes, and one seemed so very far superior in the final flavor that I am not going to bother giving you the other recipe.

I selected the darkest and softest plums for this sauce. I wanted to get to them before they rotted, and it worked well to have them mushy in cooking this sauce.

I started to cut them in half and twist apart the sides, but they were so soft and ripe that I ended up just squeezing the pit out with my fingers, and trying to pull as much fruit off of it as possible. You want a balance of the sweet fruit and the tart skin for this recipe, but in cases where the plum was so ripe that the fruit easily slid off of the skin, I went ahead and threw out the skin. I probably used about half of the skins in the long run. Other than getting the plums pitted, and measuring out ingredients, this recipe is very easy (although time-consuming).


Asian Plum Sauce

6 cups chopped, pitted red plums
1 1/2 cups brown sugar
1 cup sugar
1 cup vinegar
1 small onion, minced
1 teaspoon crushed cried red chili pepper flakes
4 garlic cloves, minced
1 tablespoon fresh ginger, minced
2 tablespoons soy sauce
1 tablespoon fresh basil, minced
1 tablespoon fresh tarragon, minced

Combine all ingredients in a large stockpot, and cook over medium heat for about 1 1 /2 hours, until thick and syrupy.

Fill jars, leaving 1/4 inch headspace. Wipe rims of the jars, place lids and rings (fingertip tight) and process in boiling water for 15 minutes (adding time for elevation). Turn off heat and let jars sit for 5 minutes before removing from water bath. Remove from water and let sit, undisturbed, for 12 hours before touching.


Come back tomorrow for a suggestion for using the plum sauce!

Thursday, June 9, 2011

It's my party and I'll bake if I want to

Happy birthday to me!

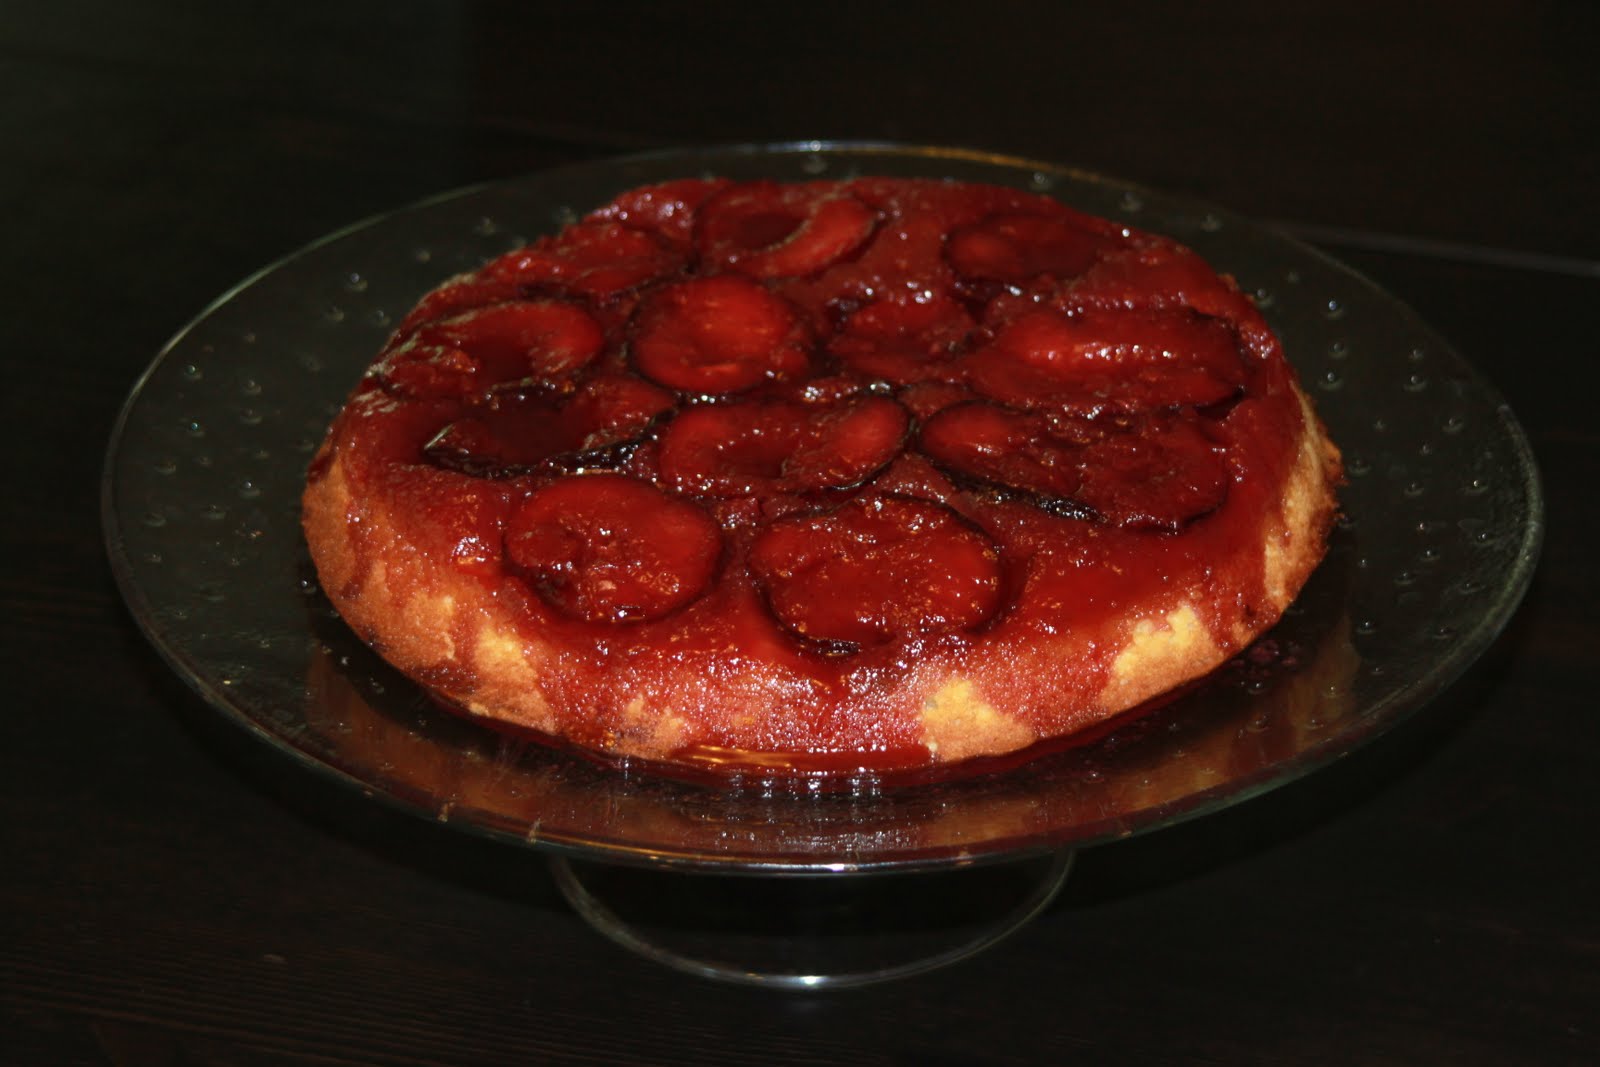
Plum Cake Tatin