New Here? Read The Story behind the Box

Thursday, June 30, 2011

Canned cherry pie filling

Well, just as I was getting into the groove of cherry, cherry, cherry (Doesn't that make you want to test your luck at a slot machine)...

It was time to pick up our weekly box from AHO. In the newsletter, it was explained that the stone fruits are all ripening with lightning speed. This timing is compounded with two facts: One is that these are organic fruits (and therefore haven't been treated with any sort of fungicide). The other is that there was a big, unexpected rain recently (and although I don't understand exactly why, this was bad timing for the ripening fruits). Altogether, this all adds up to the fact that these babies can go from ripe to mush very very quickly. You have to be ready to grab and eat them during a very small window.

For this reason, the farmer sent out crates of extra fruit. That way, anyone who had some bad pieces could help themselves to extra/replacement pieces.

I got to the pick-up site at the tail end of the time slot for picking up the produce. Lucky me! The gal who coordinates the produce pick-up asked me to take as many apricots as I thought I could possibly use. There were still tons left and no one else to claim them.

So, I got a big box and filled it up pretty well. From what I can estimate, I must have gotten 16 pounds or so of apricots.

Remember, though, that these apricots have no fungicides, and go from ripe to rotten at lightning speed.

That put me into a tailspin. Now I had a fridge full of cherries that were picked at the last moments of ripening, and a huge box of apricots on the counter, threatening to turn into a box of mush at any second.

Let's just say that cherry week needed to come to an abrupt end. Which means that coming up real soon is apricot week. I am chomping at the bit to make apricot syrup, and we'll see what else happens!

I decided to quickly turn the remaining cherries into cherry pie filling and get it canned, so that I can use it later for pies. Won't I be happy to have a cherry pie next winter?


If you want do this too, use the recipe for filling that I used here, and double or triple (or more?) it as you need. I had so many cherries that aren't going to last long, that I made enough for 3 more pies. Of course, there are many other uses for cherry pie filling... topping ice cream, garnishing cheesecake, making hand-held pocket pies, and layering with yogurt and graham cracker crumbs are some of my favorites.

Once the pie filling is done, put it into jars to store. A batch of enough filling for one pie just about perfectly fills 2 pint jars.

After filling the jars, go ahead and preserve them.

Fill each jar to 1/4 inch from the top. Wipe the edges of the jar clean. Place a lid on each jar, and screw on the band until it is finger-tip tight. Place the jars into a large pot of water, and boil for 10 minutes. (for higher elevations, check this chart for processing times). The water level needs to be 1-2 inches above the top of the jars. After 10 minutes, remove from the water using a jar lifter (or tongs). Let them sit, undisturbed for 12-24 hours. You will know if they are properly sealed if you press on the lid and it doesn't give at all.


This way, you have home-made cherry pie filling any time you need it!


*This post is dedicated to my friend, Sue. She's my cherry pie filling inspiration.

Tuesday, June 28, 2011

Potato feta pizza

Okay so even though I have a million cherries to enjoy and preserve for future enjoyment, it seems my family still needs to eat. As in meals. The kids don't seem to like it so much when they ask for something to eat, and I hand them a handful of cherries. For lunch.

The kids have been swimming almost every day, which helps them work up appetites that astound me. They wolf down their meals, ask for seconds, and need a snack mere minutes later, it seems. I love that they are getting lots of sunshine, exercise and nutritious food. It is what childhood is supposed to be! But it sure keeps me running circles in the kitchen, between the cooking, serving, and cleaning up.

And I really want to just play with cherries!

So, it order to keep up my pace of canning cherries and making pies, but also make sure my family doesn't pack up and move into the Taco Bell dining room, I had to do something about dinner. Something quick, easy, and filling.

Served along side a big salad and a bowl of fresh fruit, this did the trick:


Potato Feta Pizza

1 batch pizza dough (you can make your own, but I was in the middle of lots of other projects, so I grabbed Trader Joe's pizza dough. It's very handy and pretty darn good.)
2-3 tablespoons olive oil
1 cup crumbled feta cheese
1 potato, sliced thinly
salt and pepper to taste
2-3 teaspoons dried or fresh rosemary

Roll the pizza dough out onto a baking stone or baking sheet, and brush with olive oil. Sprinkle feta evenly, and lay the potato slices out in a single layer. Sprinkle with salt, pepper, and rosemary to taste. Bake at 375 degrees for 10 minutes, until the crust is browning and the potatoes are cooked through.

Monday, June 27, 2011

Cherry muffins

Every Sunday morning, I get up at the crack of dawn (and even before dawn in the winter months) to walk about 10 miles with my friends. We are training because every year, about 8 or us do a 60-mile walk for breast cancer. It takes a lot of warm-up walks to make sure you are ready to walk all day for three days straight!

Anyway, our tradition has been to get up early on Sunday mornings, because that seems to be the only time that works well for most of us to get together regularly. These Sunday mornings are one of my favorite times of the week, because for 10 miles, I get to laugh, cry, commiserate and celebrate the things that have happened to each of us during the week. We give and get advice from one another, we share stories about our families, and we compare opinions of books, movies, TV shows, current events, etc. We quite often get into the realms of politics and religion. I think that these couple of uninterrupted hours we have together every week have made these friends some of my closest and favorite people.

At the end of 10 miles and a very early alarm clock, though, I come home exhausted! And hungry! (I certainly don't wake up any minutes sooner than I have to, in order to do something so banal as eating breakfast).

Yesterday was no exception. This week, due to having a load of very ripe cherries, I went for a batch of cherry streusel muffins. These are similar to blueberry muffins, but the cherries, due to being a bit heartier, don't break down and "bleed" as much. This makes the muffin nice and white, and the cherries stay juicy and beautifully red. They are very easy to make, and quite delicious!


Cherry Muffins

2 cups flour
3 teaspoons baking soda
1/2 cup sugar
1/2 teaspoon salt
1/2 teaspoon cinnamon
1 egg, lightly beaten
1/4 cup canola oil
1 cup milk
2 cups cherries, rinsed, pitted and halved

Streusel topping:
2 Tablespoons cold butter
1/2 cup sugar
1/2 teaspoon cinnamon
2 teaspoons flour

Preheat the oven to 375. Grease the bottom of a muffin pan (12 muffins) or use paper liners.

Stir together flour, sugar, cinnamon and salt. Add egg, oil, and milk, and stir until just combined. Gently fold in cherries.

Divide the batter evenly between the 12 muffin cups.

For the streusel topping, cut the butter into the sugar, cinnamon and flour, until it resembles coarse sand. Sprinkle this over the muffin batter.

Bake for 20-25 minutes, until the muffins are golden brown.


this post has been linked to Fresh Food Friday

Saturday, June 25, 2011

My Miss American Pie

Cherry week continues around here...


I sort of felt like if I didn't make a cherry pie, I would have to be considered unAmerican.


After the kids went to bed, my husband and I enjoyed a quite couple of hours in the kitchen. He was in charge of the crust, and I did the filling. Then we put it all together, popped it in the oven, and enjoyed a little toast while we cleaned up every blessed bowl, measuring cup, bit of counter space, and utensil we own.

aren't we cute with our his and hers computers open to our recipes?

Cherry pie just looks so very homey and classic. It really isn't hard to make at all. Just a few ingredients, a short time at the stove, and then you get to sit back and smell the delicious aromas of the buttery crust and sweet cherries baking in the oven.


I added a teeny bit of almond extract to my pie, to give it just a little more depth of flavor. You certainly don't need to do this. Fresh cherries have so much sweet juicy flavor that they stand alone quite nicely.


Cherry Pie

About 5 cups of cherries, rinsed and pitted
1/2 cup water
1 cup sugar
4 tablespoons cornstarch
1/4 teaspoon almond extract

Combine all ingredients, and bring to a boil. When you start, it will look like cherries in milky white liquid. As it comes to a boil it will magically turn into cherries in thick pink liquid. Lower heat and simmer for 10 minutes, stirring frequently. By the time you are done, it will be deep red, beautiful cherry pie filling.


Let it cool a bit before filling the pie crust.


I am sure you have your own recipe for pie crust? If not, I believe there is a recipe in every cookbook and baking website ever created. If you want, I can give you mine, but I don't think it is very different than anything else out there. Of course, you can also buy a refrigerated pie crust that's already rolled out for you. It sure makes the whole project quicker and simpler! Go ahead do what works for you. I certainly won't judge you.

Roll out the bottom pie crust, and lay it in your pan. Fill with cherry mixture. Cut the top pie crust into 1/2 inch strips.

Lay 5-6 strips across the pie.


Fold back every other one, and lay a cross piece. Fold the original pieces back down, and repeat with the skipped slats from before.


Continue like this until the crust is complete. Pinch off any bits that are hanging over the edge, and flute the crust.

Cover the edges of the pie in tin foil and bake at 425 degrees for 35-45 minutes (removing the foil for the last 10 minutes or so, so the crust can brown). When the crust is golden brown, it's done!


Friday, June 24, 2011

With a cherry on top

We all went cherry picking yesterday... 


As we loaded up the car to head out, my husband asked me "Which farm do you want to go to? And are they open today? At what time?" I answered, "I guess the same one we went to last time. I didn't check to see if they are open. It's June. They usually open every day in June. If they aren't open, I am sure there is a different farm that is." Clearly, I did no planning for this trip. 


It was a beautiful (but hot) morning in the Leona Valley, where there are more cherry farms than you can shake a stick at.


When we got to the farm, the farmer informed us that it was the last two days that the farm would be open, and that there are still plenty of cherries, but we would have to search for them. The bonus, of course, is that everything left is completely ripe. Heh. Good thing we didn't wait until next week! I guess my lack of planning panned out (this time).


Between my three kids, one extra friend, and my husband and I, I think we ended up with more than 20 pounds of cherries. I'm sort of glad we had to search for them. Imagine how many they would have picked if every branch had been loaded down, like it was last year!


My daughter and her friend went off on their own, reading the chart at the farm, locating the different types of cherry trees, and harvesting specific varieties. They climbed high up into the branches to pick their cherries, and filled their buckets up to overflowing.


My youngest son proclaimed himself to be in charge of the lowest branches. He walked around half-stooped, winding in and out of trunks to find the cherries that had been missed due to being directly underneath leaves and out of the line of sight of anyone over 4 feet tall.


My middle son went for volume. He filled a couple of buckets by looking for the trees that had the most cherries, and then getting to work all in one place.


So now I have the happy task of cherry cooking. As we drove home, we discussed what we will be doing with all of these cherries. We sounded a bit like Bubba Gump...


"Cherry pie... Cherry cobbler... cherry cheesecake... cherry jam... cherry vanilla shakes... cherry chocolate cake... cherry salsa..."


First up was some cherry jam. 


I am reading a book right now, "Animal, Vegetable, Miracle" by Barbara Kingsolver. I am planning to do a little review/recap when I finish reading it. For now, though, let me say that it is about the importance -- as well as the benefits and the obstacles -- of eating locally produced food. I was very excited to buy some local fruit, get it off the tree and made into jam all on the same day. It doesn't get much fresher than that!


Cherry Jam


4 cups cherries, washed, pitted and chopped up very finely
1/4 cup lemon juice
5 cups sugar
1 package pectin


Prepare the cherries. Combine the cherries and lemon juice, and slowly stir in the pectin. Place it on the stove, and bring to a full boil. Add the sugar, all at once, and stir to combine. Bring it back to a full boil, and cook for one more minute, stirring constantly. Remove from heat. Scrape the foam off the top. 


 Ladle into hot jars (The jars need to be hot so that the glass doesn't crack when the hot jam is poured in.) Fill each jar to 1/4 inch from the top. Wipe the edges of the jar clean. Place a lid on each jar, and screw on the band until it is finger-tip tight. Place the jars into a large pot of water, and boil for 10 minutes. (for higher elevations, check this chart for processing times). The water level needs to be 1-2 inches above the top of the jars. After 10 minutes, remove from the water using a jar lifter (or tongs). Let them sit, undisturbed for 12-24 hours. You will know if they are properly sealed if you press on the lid and it doesn't give at all.


This recipe makes 7 half-pint jars, plus a little extra for enjoying right away.

Thursday, June 23, 2011

What's black and white and red all over?

Black and white bean chili, of course!

Although it has been about a million degrees here this week, for some reason my husband requested vegetarian chili for dinner.

So, being the fabulous wife I am, I hopped to it. To be fair, he didn't so much request is as answer my plea for someone else to please just decide what we should eat all week forgoodnesssake.

Come along with me as I take this pile of fresh summer vegetables and turn it into a delicious pot of chili.


This chili contains quinoa, which makes it more filling (and adds all of the healthiness you could ever ask for), as well as two kinds of beans and the veggies. I recommend doubling the recipe... leftovers are almost better than the first round, and it will freeze very well. So you can... you know. Save it. For a rainy day, when the weather actually lends itself to curling up with a nice warm bowl of comfort food.

It cooks all day in a slow cooker, so you really can make it in the summer without slaving over the stove or heating the house too much.

First, mince 2 jalapenos as tiny as you can, and chop up two green onions, half a red onion, half a red bell pepper, half a green bell pepper, and a stalk of celery.


Saute these in about a tablespoon of olive oil for a few minutes, then add the spices:


1 teaspoon cumin
2 teaspoons coriander
1 teaspoon paprika
1 teaspoon dried basil
1/2 teaspoon thyme
1 bay leaf

Continue to cook these together for another minute, and then remove from heat.

Drain and rinse a can of black beans and a can of white (navy) beans, reserving the water from the white beans.


Add enough water to the bean water to make 3 3/4 cups total.

Put the beans, the veggies, the water, 1 cup of tomato paste, and 1/2 cup uncooked quinoa into the crockpot. Cover and cook on low for 6-7 hours.

Just before serving, add 1 tablespoon soy sauce and 1 tablespoon molasses and mix completely.

Serve with shredded cheese and sour cream.


p.s. We went cherry picking this morning and came home with scads of cherries. Cherry week is a-comin'!

Monday, June 20, 2011

back to the basics

I'm gone for a long weekend, enjoying my little brother's wedding to a great gal.

Just thought I would leave a picture to remind you to enjoy life's simple pleasures.


Maybe when I get back I'll report to you on some new delicacy I tried while dining out three meals a day.

Or maybe I'll come refreshed and ready to try some great new recipes.

Or maybe I'll never come back... you can try looking for me by the pool. I'll be the one with a margarita in her hand.

Caprese Salad

Layer slices of tomato, fresh mozarella, and basil leaves on a plate. Drizzle with olive oil, and enjoy.

That there is the taste of summer.

Friday, June 17, 2011

just peachy

I just can't get enough of summer! It is beautifully hot around here and I am soaking up the sunshine and the outdoors just as much as I can.

We are eating most meals outdoors, which means: less mopping and sweeping indoors, which means: more time outdoors! It is such a happy cycle.

I am also trying to do most of my cooking outdoors. I love my grill. It makes me happy. The kids are all around me while I cook, doing their busy kid things... riding bikes, kicking a soccer ball, climbing trees.

Today, it was grilled chicken breasts with peach salsa. I think I may have died and gone to heaven.

The salsa is sweet and spicy, tangy and fresh. It livens up the chicken (which I marinated in a simple olive oil and lemon mixture), and makes the meal really unique. As a matter of fact, I am considering buying a whole bushel of peaches and canning some of this stuff with the peppers and mint my husband is growing in our garden. I'll let you know how that idea pans out.


Peach salsa
4 ripe peaches
2-3 Tbsp chopped shallots
1 jalapeno, chopped (stem, seeds and ribs discarded)
Juice of a lemon
2 Tbsp chopped fresh mint
2 Tbsp minced ginger
1 teaspoon sugar
Salt and black pepper to taste

Just chop all the ingredients and stir to combine... at least a couple hours before you are going to eat it, so it has a chance to meld.

(This recipe is my own special little take on the one I found here.)

Thursday, June 16, 2011

Pretty sneaky, sis.

As you may or may not recall, last week I was complaining musing about trying to get my kids to eat enough any amount whatsoever of vegetables.

I decided, last night, to revisit the concept of hiding the vegetables in a pureed form. It really does work. The pasta I concocted last night contained three tomatoes and a large bunch of chard, and no one was any the wiser. They all ate their fill of it and said they liked it! I am not sure how much of a serving of veggies this counts as, exactly, but it is certainly a step in the right direction!

Of course, I also set out a dish of carrot sticks ... I know they would be suspicious that the veggies were in the pasta if they didn't see them next to the pasta. I also garnished it with a sprig of basil. They somehow believe that basil is flavoring, while chard is a veggie. Basil in sauce is acceptable; chard in sauce is just mom being mean, again. I knew the basil would be a perfect foil to account for the slightly greenish-brownish coloring of the chard sauce.

I feel so sneaky.

This dish was very simple, used a minimal number of pots and pans, was quick and healthy. What more can I ask of a weeknight meal?

For your healthy pleasure, past with chard-tomato-cream sauce:

3 medium tomatoes, cut into large chunks
1 bunch swiss chard
3 cloves garlic, minced
1/4 cup parmesan cheese
1 Tbsp. dried Italian herbs
1 pound pasta
1/4 cup heavy cream

Bring a large pot of water to a boil.

Cut up the chard into large pieces, and when the water is boiling, add the chard. Let it cook for a few minutes (until the chard is getting wilty), and then lift out the chard with a pair of tongs. Also remove a half cup of the boiling water.

Begin to cook the pasta in the boiling chard water. Cook it for a couple minutes less than the recommended time (it will continue to cook later with the sauce).

Place the cooked chard in a blender with the tomatoes, diced garlic, herbs, parmesan cheese and cooking water. Puree until it is smooth.

Once the pasta is done, drain it and toss it in the pot with the chard-tomato sauce. Add the cream and toss until combined. Let it all cook over low heat for a few minutes until the sauce thickens a bit.


Mangia!

Wednesday, June 15, 2011

drinking my vitamins

They say that bad luck comes in threes... well this week I had a set of three circumstances that ended up in some very good luck.

1. The fruit that we have been getting in the AHO box lately is absolutely beautiful. There are peaches, nectarines, plums, cherries and strawberries. The kids are eating tons of it. I am so happy!

2. Recently we were on a day trip that took us past a honey farm. We stopped and grabbed a few jars of local honey (having heard that it might help with my husband's seasonal allergies).

3. I had a cocktail recently that contained honey syrup, and I have been wanting to play around with it ever since. Honey syrup is simple ...  honey dissolved in an equal amount of warm water.

Let's now introduce my honey, my fruit, and the concept called "cocktail" to each other. I think three is definitely company in this case.

This is a light and refreshing summer drink, best enjoyed outdoors either in full sunshine or by the light of tiki torches.


Honey and Nectarine Cocktail

1 nectarine, sliced into 8 wedges
2 ounces honey syrup
1 ounce Rose's Lime Juice
3 ounces vodka
club soda
mint

Place 4 slices of nectarine in each of two tall glasses. Pour equal amounts of the honey syrup into each glass. Mash it up a bit. Add half the vodka and half the lime juice to each glass and stir. Add ice and enough club soda to fill the glass, and garnish with mint.

Monday, June 13, 2011

heirlooms

In honor of my husband, who celebrated his birthday this weekend, here is a little story about his mom.

One day, she sent him a note (he lived about 60 miles or so from her) and included 3 recipes, written out on index cards.

They were for zucchini bread, pumpkin bread, and banana bread.


These were definitely things that she had baked for her family over the years, but she wasn't a huge baker. She was more of a spaghetti night, taco night, kind of mom. They ate family meals together growing up, but nothing gourmet or fancy. Just yummy and filling. These recipes are the same... there is nothing particularly special about her breads. They are just what you want pumpkin and zucchini and banana bread to be. Delicious, sweet, and familiar.


I don't think he asked for these particular recipes. I imagine that she just thought it would be a good thing for him to have... maybe in a moment of missing her son, or of wanting him to have a little taste of home. Maybe she knew how little money he was trying to survive on (as a university researcher just out of college), and thought that he might want to be able to have a cheap treat.


Whatever the reason, as it turned out, these three recipe cards would end up being the only things he has that have her handwriting.


I don't think she knew that... I don't think he realized it until he came across them, stored in a desk, much much later. But as it turns out, the comfort of the warm tasty bread is only as important as the recipe itself. She died a few months later, after battling cancer for years and years.


Zucchini Bread

Combine in a large bowl:

1 ¾ c. flour
½ tsp. salt
1 ½ tsp. baking powder
½ tsp. soda
1 tsp. cinnamon
1 c. sugar

Add and mix thoroughly:
2 eggs (slightly beaten)
1/3 c. oil
1 t. vanilla
¼ c. milk
1 c. zucchini (shredded, unpeeled)

Pour into greased loaf pan (2-3 mini loaves). Bake at 350 for 50-60 minutes (45 mins for mini loaves)

Friday, June 10, 2011

Cheesy.

In my ranting and raving the other day about how my kids don't eat their veggies, and about how I have tried all the tricks there are with varying degrees of   mild   no   very little bits of success, I forgot my number one way of getting them to eat the veggies.

Cheese. Smother the junk in cheese.

Last night, I made a zucchini casserole (that I found here), and all three kids ate it. I wish I had taken pictures of it to show you, but really it isn't that beautiful. It is, however, tasty and quite serviceable when trying to make zucchini magically disappear off of plates and reappear in bellies. It turns out almost like a lasagna without the noodles. I served it alongside grilled sausages and sliced peaches, and I think that we got much closer to having half of the plate filled with produce items.

Of course, an hour later all three kids wanted a grilled cheese sandwich. They totally ruined the ratio, but oh well. For an hour there I felt good about it all.

Zucchini and tomato casserole

2 large zucchini, yellow squash, or a combination
1 Tbsp. olive oil
1 tsp. Italian seasoning (or a combination of thyme, rosemary, basil and parsley)
3 garlic cloves, minced
1/2 onion, minced
3 large tomatoes
2 cups cheese -- a combination of mozzarella and parmesan

First, slice the zucchini into 1/4 inch slices, and set aside.

Heat the oil in a saucepan over medium heat. Saute the onions for about 3 minutes, until they are starting to soften. Add the garlic and Italian seasoning, and cook for another minute or two, until it is very fragrant. Cut the tomatoes into 6 pieces or so, and add them. Cook over medium heat, until it cooks down to about a cup. It should be thick but not dry.

Arrange a layer of  the slices of zucchini into a 8x8 pan. Cover with 1/3 of the tomato mixture (it won't spread perfectly evenly, but that's okay). Cover this with 1/3 of the cheese. Layer again with zucchini, tomato, cheese. Layer again the zucchini and tomato, but leave off the last layer of cheese for now.

Bake it at 400 for 20 minutes. Then, add the last layer of cheese, reduce the heat to 375, and bake another 20 minutes.

Thursday, June 9, 2011

It's my party and I'll bake if I want to

Happy birthday to me!

Plum Cake Tatin

Wednesday, June 8, 2011

I'm eating a lamb's what?

One of the surprises I got in the CSA box this week is Lamb's Quarter. The name makes it sound like it would make a great roast and the centerpiece of Easter dinner. The appearance, though, lets you know really it is best used for kids who want to make crayon rubbings.


Of course, I'm kidding. I let no kids color with my dinner before I ate it. 

I did, as is my hobby, look lamb's quarters up on Wikipedia. Once again, I was not disappointed. I found out it can also be called pigweed, goosefoot, or fat hen. Why all the animal names for something that is so clearly a plant? I mean, so very much a plant, that if I hadn't received it in a box of produce, I most certainly never would have even considered it to be a food item.


Admit it, composters out there... this looks more like a brown than a green, doesn't it?

Of course, after having my little chuckle over the most vegetarian goose/pig/hen/lamb that ever got eaten, I read on about it nutritive properties and the varied uses for it. Which are: this is related to spinach, tastes like spinach, and can be used like spinach. Which, of course, begs the question: Why not just use spinach?

I'm so glad you asked. There is a very real answer to why lamb's quarter should be used instead of spinach. And that is, because lamb's quarter is what is in my box this week, and spinach isn't. 

Really, though, as far as I can tell, lamb's quarter is a little bit milder in flavor, tougher in texture, and has a wee bit more nutritional value than spinach. Other than that, there is no real reasons to choose one over the other. It can be used, like spinach, in a stir-fry, salad, lasagna, quiche, etc.

Having never tried it before, I went for a recipe that would mellow it through the sheer strength of the other flavors. As it turns out, it is a bit tough, but very very mild in flavor. I certainly would be happy to try it again in a different recipe. For this week, though, it became a part of a Greek Salad. I adapted this recipe from one I found on Prodigal Gardens.


Greek Lamb's Quarter Salad

1 bunch of lamb's quarter, de-stemmed (about 3 cups of leaves) 
2 medium tomatoes
2 cucumbers
1/2 cup crumbled feta cheese
1/4 cup dill, finely chopped
1/4 cup minced red onion
1 clove garlic, minced
1/3 cup green olives, cut into quarters

Toss all the salad ingredients with the dressing, below:

1 1/2 tbsp. lemon juice
1 1/2 tbsp. balsamic vinegar
1/2 cup olive oil
1/4 tsp. ground black pepper
2 tsp. fresh oregano

Measure all ingredients into a jar and shake well.


Tuesday, June 7, 2011

MyPlate vs. My Plate

Have you seen the new government recommendation for nutrition? This food plate icon is supposed to replace the food pyramid that the youths are learning about these days in school. You know the pyramid. It's the one that replaced the square meal that I learned about in school.

ht_new_food_plate_nt_110602_wg.jpg


Anyway, I like the plate. It is simple and easy to understand, and it makes sense for any size plate or appetite. 

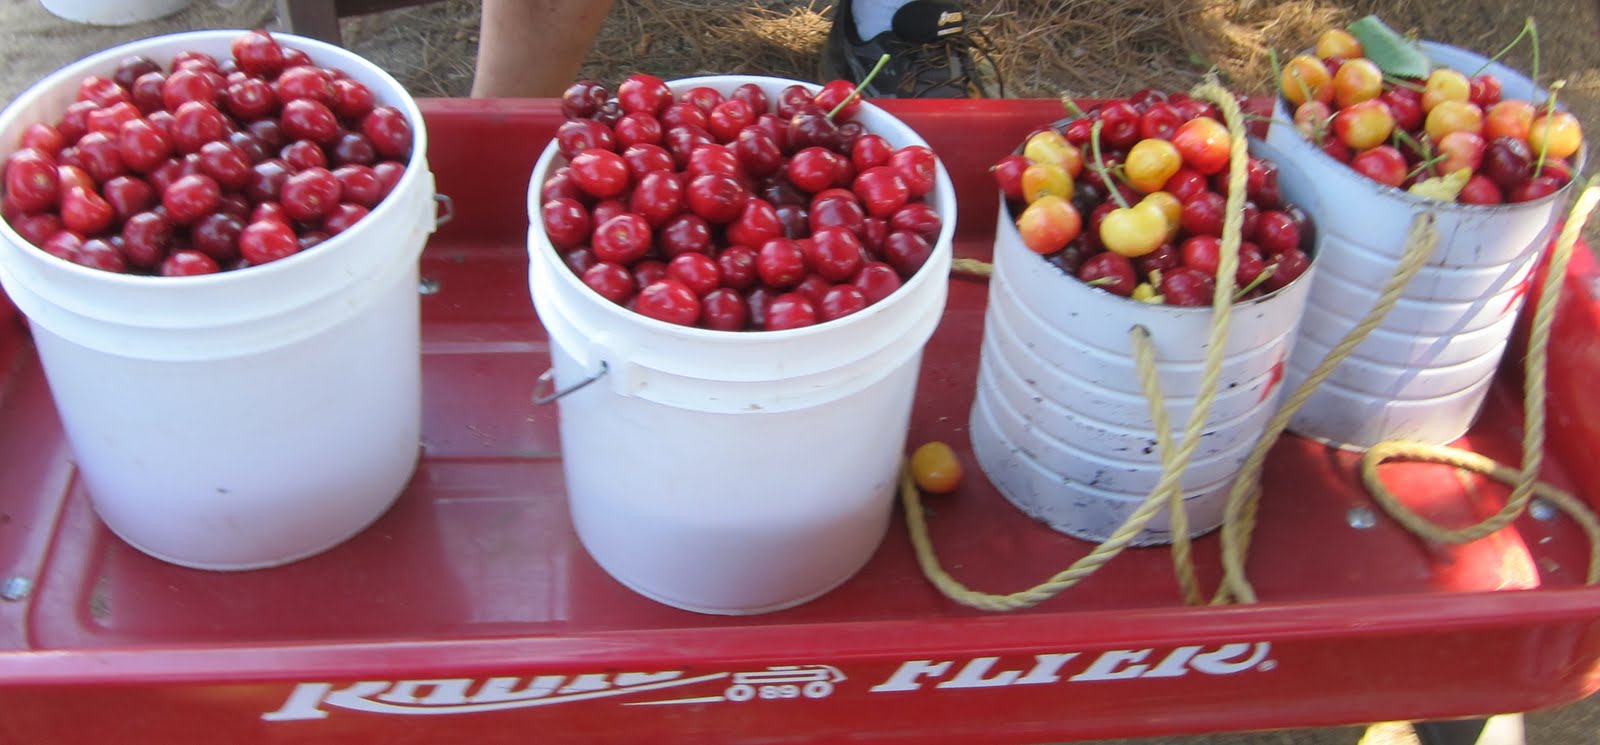
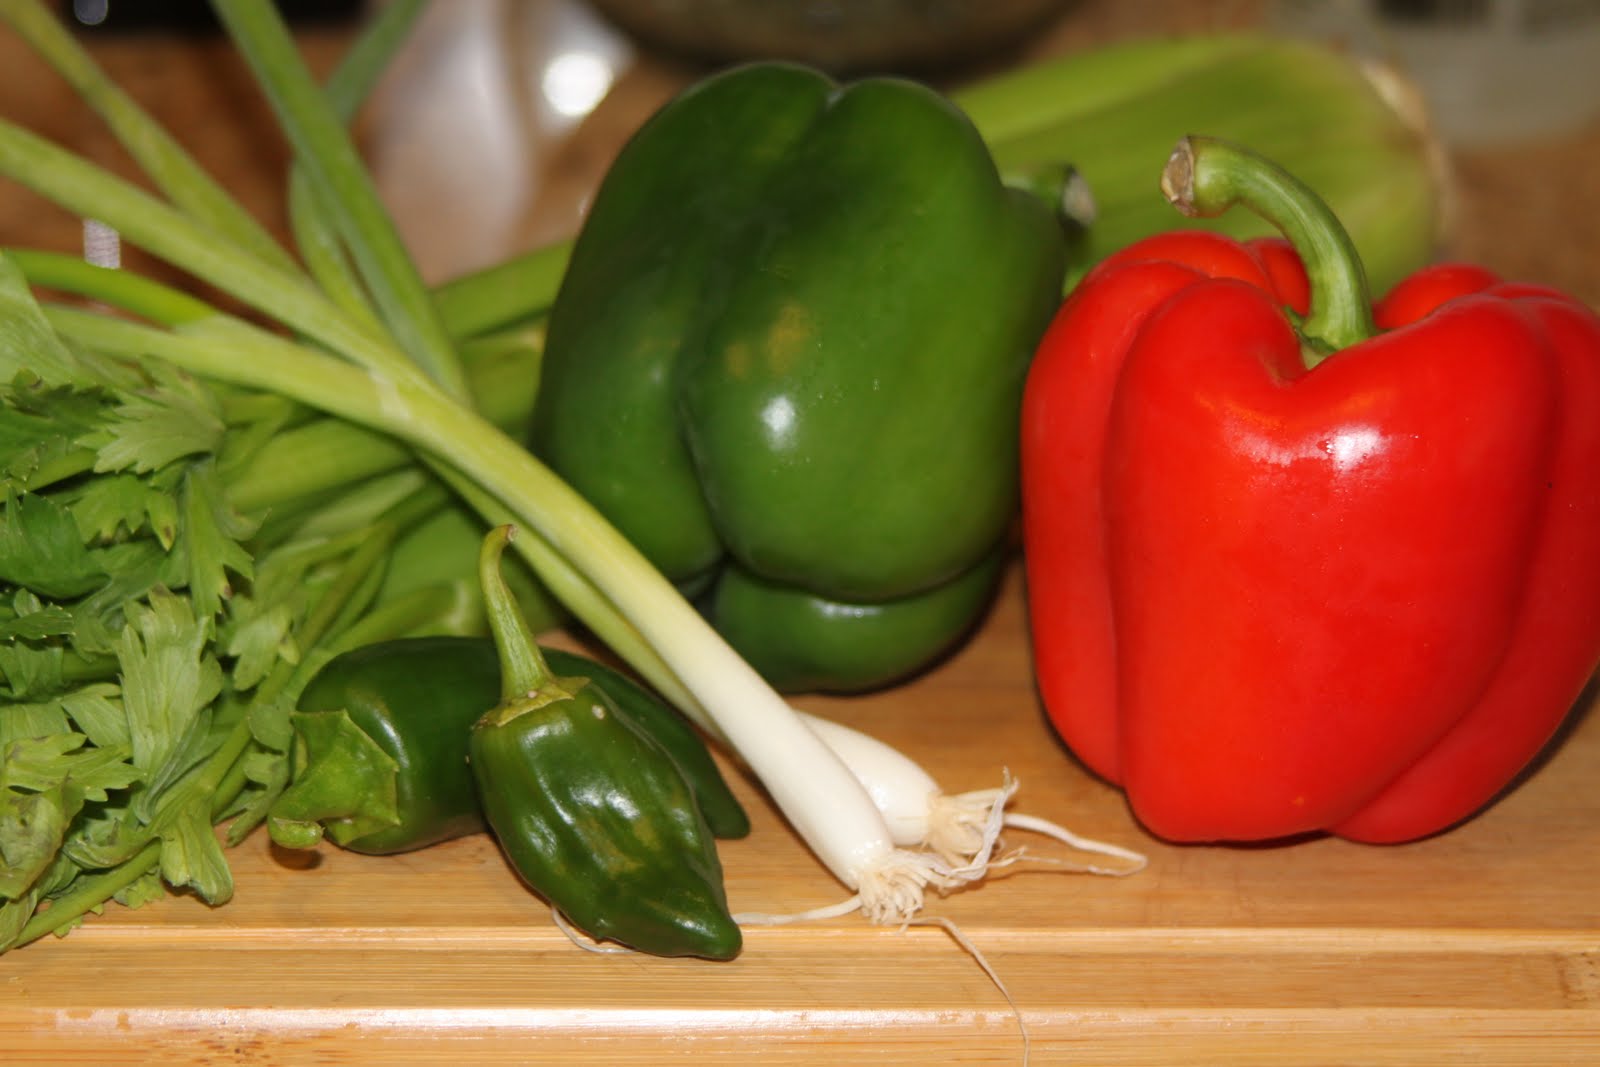
However, a complete half of the plate is taken up with fruits and vegetables. Just when I thought I was making headway with my kids and their eating habits, this comes along to show me how very far I have to go. Around my house, the plates tend to look a little more like this:


At least that is what my kids actually eat off of their plates. I could probably serve them a plate that looks like the one that the gov'mint recommends, but in reality, the stuff that gets eaten is not represented by the red and the green here. 

I like it when I view it as a goal; I feel like my husband and I eat pretty much like this plate recommends we should. I just wish I could get the kids to eat that way also. I realize that we aren't alone... according to an article I saw today, only 16 percent of kids in my kids' age range are getting that much (and even that is if you count potato chips and french fries as veggies, juice as a fruit).

The article is on CNN.com, and it also offers ten tips on how to get your kids to eat their vegetables.

Believe me, I could use some tips. I am willing to try anything to increase the consumption of veggies and decrease the consumption of sugar around here. It's just that I really don't think that most of these work in real life. At least in my life.

Let's take these ten tips one by one:

1. "Get them while they're hungry." The idea is to offer veggies to kids when they are so hungry that they'll eat anything. I will agree that this works to an extent, but if the kid is adamant about not eating a particular food, he ain't gonna like it any better when he feels hungry. In my house a hungry kid is a whiny, cranky kid. Trying to make him feel better via brussels sprouts is not a great solution. Just tonight, as I was writing this post, the kids started in with "I'm hungry. What's for dinner? What can I eat?" I thought I would put this tip to the test, so I chopped up some carrots and set them on the table, saying "You can start with this while I finish up the rest of dinner." What happened? The kid who loves carrots ate almost all but two of them. The kid that thinks that carrots are okay if you have to have a vegetable, ate the other two. The kid who doesn't like carrots decided he really wasn't that hungry after all. My conclusion: If you have a kid who likes a particular veggie, this might work to get him or her to eat a little more of it. If a kid doesn't like the veggie, he will hold out until something better comes along. At this point, I am not sure I want to know if my kids could get hungry enough that they are willing to bite the hand that feeds them.

2. "Institute the 'no thank you bite' rule." This tip is to make your kid eat at least one bite of everything they are offered, and that eventually, enough exposure will make them grow to tolerate any particular vegetable. Believe me, I have tried this. The article doesn't account for kids who will spend an hour or more whining, crying, falling out of their seat, or arguing about trying that one bite. It doesn't account for kids who get so worked up that when they do try the bite, they gag on it, bringing it back up along with everything else they have eaten in the past few hours. Nor does it account for the fact that there are just some things that some people don't like. I myself don't like eggs. I will eat them if I have to, and I have eaten eggs many many times in my life. However, I really don't like them, despite the repeated exposure to them. I imagine it is the same for kids and their veggies. Eating one bite at a time of something you just don't like is unlikely, in my opinion, to make you like it. Around here, it just invites a power struggle that leaves me wondering if getting that one bite in that little belly is really worth it.

3.  "Make up cute names." The idea here is to entice your kids to eat veggies if the name is something funny. The person quoted in the article swears that her kids eat brussels sprouts when they are called "Hero Buttons." I will admit that I have used this one with some success... my kids do like to pretend that they are dinosaurs and that the broccoli is trees. That only works to an extent too, though. They don't care what you call it by the time they hit about age 5 or 6... I can't see my 9-year-old buying it if I tell her that lettuce is really GreenGirl's cape.

4.  "Shop with your kids." I've tried this too. Unfortunately, they don't want to buy vegetables any more than they want to eat vegetables. I have tried conning them into putting produce in the cart... but they are too busy pulling the cart toward the dairy aisle to ask me for pudding cups (which I have never bought and never will buy, so why don't they get a clue and stop begging!?!?!).  I say, "Hey, wanna grab some celery for me?" And they say, "Why? Am I going to have to eat it?"

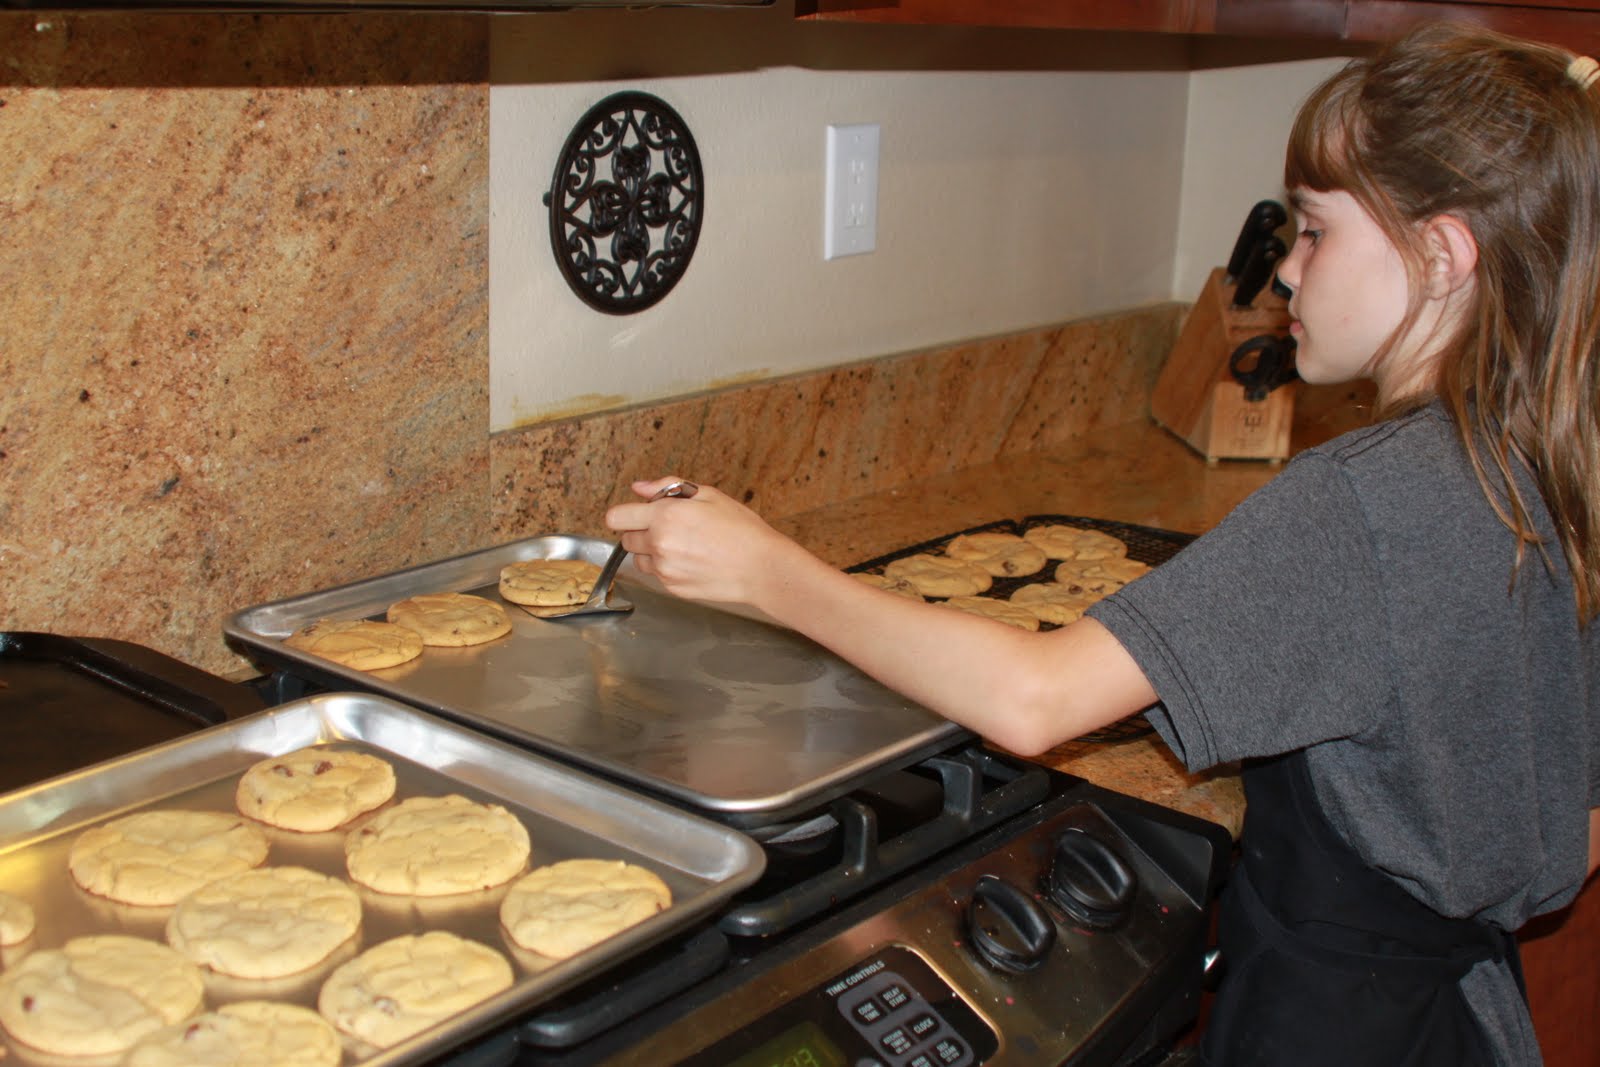
5. "Cook with your kids." I do like this one. It is true, they take pride in their work and they want to eat their own creation... at least until they taste it. It works for getting them to try something, but that novelty wears off pretty quickly. Tasting one bite of a food is hardly going to fill up that big green wedge on the plate icon up there. I admit, they like the cooking. They like chopping and stirring and measuring. They like making foil dinners when we camp ... but they are very picky about which vegetables they include (read: potatoes and carrots. only.) I just can't always involve them while I cook, though. Life is just too busy.

6. "Have a 'veggie night'." The idea here is that if there are only vegetables, they aren't competing with tastier options. Oh my goodness, I can just see the mutiny if I tried that one. I might never even get the kids into their chairs, let alone facing their plates. I also feel hungry about an hour after a meal if there isn't some sort of protein or fat included. I find my self back in the kitchen, snacking one something that really doesn't resemble that plate recommendation. I am not sure how they think this one is possible. 

7. "Hide the veggies." This is the idea of pureeing and shredding vegetables and hiding them in sauces, soups, even brownies. I will admit, this works. I have gotten the kids to ingest lots of things they didn't know they were eating. It takes a lot of time and a lot of advanced preparation... and many of the recipes out there have a pretty low vegetable-to-other ratio. Is the 1/3 cup of spinach puree really worth it when it is surrounded by a pan of brownies? I do shred veggies into spaghetti sauce, hide them in lasagna, and I've baked them into muffins. It is assuredly better than not getting the vegetables; it just certainly isn't filling the big giant green corner of that plate up there!

8.  "Make fruits and vegetables the easy option." The idea here is to make it as easy to grab a bunch of carrot sticks as it is to grab a handful of crackers or a cookie. I will agree that this works with fruit... if I set a bowl of grapes or pre-peeled orange wedges out, it will disappear quickly. If I put individual cups of applesauce in the fridge, they will be gone before I know it. However, for my family, it just doesn't work with veggies. I have set out a bowl of carrots and some Ranch dressing... they ask "What else can we eat?" I have presented a plate of celery and peanut butter as the after-school snack; They say "Isn't there anything else?" 

9.  "Let them use fun gadgets." This is the idea of letting the kids run the food processor, blender, etc. My kids do love to make smoothies in the blender... which again gets lots of fruit in their little bodies, but no vegetables. They are happy to throw the vegetables in the food processor, but they aren't fools enough to eat it afterward. 

10. "Bribe with dessert." I kinda like this one. The rule in my house is that you should eat dinner until you feel full, but if there is food on your plate, you get no dessert. I tell the kids that I can't throw away the food on their plate just to get more food out for dessert; it's wasteful. I know there are all kinds of people who would disagree with this one. I understand the argument that if sweets are viewed as a reward, they become an emotional thing that make you feel happier and you associate food with happiness. I don't know how much I believe that, but I do try to make it about waste and proportion, not about actions and consequences. On the other hand, I have watched my kids clear their plates only after they learn that there is ice cream waiting. It's not exactly giving them a love for the vegetable, but it is creating a little more balance.

What about you? Do you have any tips or ideas for getting your kids to eat well?


Monday, June 6, 2011

Morsels on the Move

I'm going to step away from the fresh produce today, to spotlight another cook I know.

She is actually a professional cook, in that she gets paid for her work (something I haven't quite figured out for myself, yet). I guess technically she is a pastry chef, since she does mainly cookies and brownies. And let me tell you, even though she has had no formal training, she makes some delicious cookies and brownies.


Her business is called Morsels on the Move, because she has no storefront. She bakes them all in her home, and hand delivers them by the dozen, fresh out of the oven, to her clients... at their work or their home. She is willing to bake almost anything her customers want, but her specialties are chocolate chip cookies, fudge brownies, and peanut butter cookies. I think she likes it best when a customer says "Surprise me." Then, she gets really creative. Last time that happened, she made chocolate chip dough, wrapped in peanut butter cookie dough, and baked together.


She will fill an order within 12 hours, if needed. She can deliver any time after 6:00 am... which means that a lot of her clients are people who need to take a treat to work or school, who want a home-baked dessert, but who don't have the time or interest to do it for themselves. She delivers to their house in the morning, and they take it with them to the office. I have used her services on more than one occasion when I was pressed for time. Her prices are so reasonable that it is very worth paying for this service.


I had the opportunity to help out recently, when she was up until the wee hours filling an order for a local high school that needed 9 dozen a day for two weeks, as a treat for the teachers who were administering state tests. She is fun to work with... she keeps a smile on her face, maintains her cool, and truly enjoys making these baked goods for her customers. More often than not, she slips a few extra cookies into the package, just because she knows it will make the customer happy.

She also happens to be just shy of 10 years old, and my daughter.


Right now, she is up past her bedtime, filling an order for a friend who wants 2 dozen cookies delivered to her at her son's karate class tomorrow. As always, the order will be delivered complete and on time, with a smile.