New Here? Read The Story behind the Box

Showing posts with label snacks. Show all posts

Saturday, July 14, 2012

Amazing zucchini muffins (with a little bit of lemon)

There is a story that says that if you live where people are the salt of the earth, in the middle of summer, you better keep your doors locked. Not because these salt-of-the-earth neighbors are going to rob you, but because they are likely to drop off a big bunch of zucchini on the seat of your car or in your entryway, making eating it all it your problem.

I would like to think that my neighbors are the salt of the earth, but as of yet I haven't had any wayward zucchini harvests appearing in or on any of my property. (I also haven't been abandoning zucchini on anyone else's doorstep, either, though. The one time I tried to grow it bugs ate the teeny little seedlings down to nothing overnight.). However, it seems that even the farmers need to offload zucchini in great quantities.

My Abundant Harvest box has been... shall we say... generous in its helpings of zucchini and summer squash for quite a few weeks now. It is,,, shall we say... a challenge to keep up with it all.

My kids, who aren't the greatest veggie eaters, won't eat zucchini in any form except zucchini bread and zucchini muffins. (I'm not exaggerating. They even turned their noses up at chocolate chips cookies. Okay, Zucchini Chocolate Chip cookies, but those things are really really good and still they won't eat them).

So, zucchini muffins it is.  Except how many time can I make them without losing my mind?


So I put a little twist on the muffins this week... lemon. Lemon and zucchini go great together, and that is especially true in muffins. The lemon zest in these gives them a whole new life, and really sets them apart from ordinary zucchini muffins. This is most likely going to be the only way I make them from now on! I really like the lemon addition, so in my opinion, more is better. I used the zest from 1 lemon the first time I made these, and doubled it the send time. It was doubly delicious!

Zucchini muffins 

3 cups flour
2 teaspoons baking soda
1/2 teaspoon salt
2 teaspoons cinnamon
1/2 teaspoon nutmeg
2/3 cup butter, melted
1 1/3 cup sugar
2 eggs
2 teaspoons vanilla 
zest from 2 lemons
3 cups grated zucchini (about 3 medium-large zucchini)

Preheat the oven to 350.

Combine the flour, baking soda, and salt and set aside. Using a mixer, beat the eggs and sugar together. Add the vanilla, lemon zest, and butter. Add the zucchini and then slowly add the dry ingredients until combined.

Grease your muffin cups with a little bit of butter. Fill the muffin cups pretty much all the way (these muffins grow tall nicely, and don't really spill over the pan... so it's okay to fill the cups all the way). 

Bake for 25-30 minutes, or until nice and tall and golden brown. A toothpick should come out clean. Let them sit in the muffin pans for a few minutes and then take them out to cool completely.

The original recipe (from Stephanie's Kitchen) said that it makes 12 muffins, but I got 15 out of it, and they were still nice and tall and full.


Enjoy!


Tuesday, April 24, 2012

Parsnip Muffins (adapted from Alton Brown's recipe)

A little over a year ago, I tried a parsnip for the very first time. And then,  (new to the whole veggie box, and unsure of how to best get the vegetables out of the kitchen and into my gullet) I attacked the parsnips with gusto.

And very very quickly overdosed on parsnip.

I was fairly certain that no parsnip should ever pass my lips again. My little brother got married during this past year, and at his wedding the guests were served course after course of absolutely amazing food. Everything was locally sourced and fresh and seasonal and amazing. At the table where I was sitting, everyone raved about the vegetarian pot pie. I dove right in, and came up gasping for air... all I could taste was the parsnip.

However, the world continues to turn and the seasons to change, and the root vegetables to mature. And lo and behold, again came the parsnip. Out of the earth and into my kitchen.

I tentatively put one in a batch of vegetables I was roasting. I ate it nervously, and while I could taste it, it didn't leave me gagging.

This led me to try to give the parsnip another real chance. One relative success I had with them last year was muffins. I couldn't get the kids to eat them at that time, and I was already parsnip-weary, so many of them ended up going to waste. However, as I recalled, they were really pretty nice muffins.


Wow! Give me a year break from parsnips, and a fabulous muffin recipe, and I am a whole new woman!

These things are great! They really are nice and light and fluffy. They are sweet and the nutmeg gives them just enough interest. The kids aren't so afraid of my vegetable antics any more, and they gobbled these muffins all up right away. As a matter of fact, I am going to make more this week.


Parsnip muffins
This is basically Alton Brown's recipe, but I had to convert his measurements from weights into cups, so I thought I would just give it to you the easy way.

2 cups flour
1 teaspoon baking powder
3/4 teaspoon baking soda
1/2 teaspoon nutmeg
1/2 teaspoon salt
3 eggs
3/4 cup plain Greek yogurt
1/4 cup vegetable oil
1 cup sugar
2 1/2 cups grated parsnip

Preheat the oven to 375.
Combine the flour, soda, baking powder and salt in a mixing bowl and set aside. In a mixer, combine the eggs, yogurt, oil and sugar until well blended. Add the parsnip and then the dry ingredients.
Mix until just combined.
Pour into greased (or paper-lined) muffin tins.

Bake for 20 minutes or until they're golden brown and they spring back to the touch.

Makes 16-18 muffins

Sunday, January 29, 2012

vegan butternut squash and pear bread

My daughter's fifth-grade teacher is very very sweet (in addition to being an awesome teacher). She writes me very nice thank-you notes for everything I give her. When I sent muffins to the fifth-grade team, she told me how they all appreciated them at their team meeting, and how the other teachers were so pleased and enjoyed them so much. When I gave her cookies, she told me that her husband had eaten them all in one sitting. When I sent in fudge at Christmas, she thanked me profusely and told me that she was impressed with the variety.

Notice anything amiss? I didn't either...

Until I learned that she is a vegan. Which means she didn't. eat. any. of. the. stuff. I. made.

She didn't want to seem unappreciative, and she didn't want to lie... so she passed it on to her friends and family, and reported back to me how much they loved it all. It was a very gracious way to accept the gifts, in my opinion.

So, this week I decided to make it up to her. I turned one of my recipes for pumpkin bread into a vegan butternut squash version, by leaving out eggs and milk, and using vegetable shortening and apple sauce instead. Then, because the batter seemed a little thick still, I added two shredded pears. The juice from the pears worked well in making the batter seem more right.

For your vegan needs, here it is!

1/2 cup applesauce
2 cups sugar
1 cup butternut squash puree
1 cup vegetable shortening
2 teaspoons vanilla
3 cups flour
1 teaspoon baking powder
1/2 teaspoon salt
1/2 teaspoon baking soda
1/2 teaspoon cinnamon
1/2 teaspoon cloves
1/2 teaspoon nutmeg
2 pears, cored and shredded

Preheat the oven to 350. Spray 2 loaf (or 5 mini loaf) pans with vegetable cooking spray.

In a mixing bowl, combine applesauce, sugar, squash, shortening, and vanilla.

In a separate bowl, sift together dry ingredients.

Fold the dry ingredients into the squash mixture, and fold to combine. Add the pears and stir just until combined.

Bake for 40-45 minutes, or until the top is beginning to brown and a toothpick inserted in the middle comes out clean.

Let sit in the pans for about 10 minutes, and then turn out on a rack to cool.

Wednesday, December 14, 2011

persimmon fruit leather


As I promised yesterday, here is one idea of what can be done with your leftover persimmon puree.


It's so easy your cat could do it. Plus, there is no ingredient other than the persimmon pulp... how great is that?!

Preheat the oven to 250 and cover a cookie sheet with parchment paper. Spread the persimmon pulp in a very thin, even, layer on the baking sheet.

Place the cookie sheet in the oven for about an hour (it may take longer if your pulp is a thicker layer). It is done when it is dry to the touch. It will shrink as it dries, so the result will come out of the oven in a wrinkly, funny-looking form.


As soon as it is cool, it will quite easily peel from the paper.


Cut it into pieces and store in an airtight container. It doesn't last long around here, but it should be good for a couple of weeks.


I got this idea from eHow.

Tuesday, October 18, 2011

apple chips

Got a couple of hours to sit back and let your oven work for you? Want your house to smell great? Want to make a treat that is healthy and delicious?


Well, step right up! This here is the greatest snack ever invented. It will cure bad weather blues, scurvy, and all kinds of aches and pains. It will give your skin a healthy glow, reverse air pollution, and empty the landfills. It will even make your dog mind you.

Okay... at least it is healthy and delicious. And it does make the house smell good. All appley and cinnamony and delicious.

These apple chips require just apples. If they are particularly tart, you may want to add some sugar (I did), and if you like cinnamon with your apples, by all means don't hold back. You won't regret it.

For me, they translate into a good way to transport apples in lunch bags without getting complaints about them turning brown and yucky.

Really, all you do is core the apples and then slice them really thin (get out your mandolin), and bake them for a long time at a low temperature. They are so easy, the hardest part is keeping the kids from eating them before you have a chance to pack them into lunch boxes.

Set the oven to 250. Line a baking sheet with parchment paper. This is a must. You will never scrape them off the pan if you don't.


Lay the apple slices out in a single layer, and sprinkle on sugar and cinnamon as desired. Bake them for 2 hours, until the are dried and crispy.

Thursday, October 13, 2011

Peanut Butter and Jelly Bars

A couple of weeks ago I mentioned some of the things I love, and some of the things I hate about being in the kitchen.

One of the things I love is fixing after school snacks for my kids. I only have one or two mornings that I am home alone while everyone is at school, but I try to use those days to have a little surprise treat for when the kids get back.


Here is a new recipe I tried the other day which was happily gobbled up by some hungry young scholars. Over the summer I had experimented with making some strawberry jam without added sugar. It didn't go over so well. I can't blame the kids, actually. The flavor was good, but the consistency was closer to apple sauce than to jam. Needless to say, the peanut butter and jam sandwiches weren't very much appreciated. As a matter of fact, they weren't very much consumed. (Heh... remember the part where I hate packing lunch boxes?).


Well, the no-added-sugar jam went into these bars, and as long as you promise not to tell my kids, they shall never be any the wiser. Of course, you can make these bars with any jam or jelly that you like best.

Peanut Butter and Jelly Bars
(from Family Fun Magazine)

2 1/2 cups flour
1/2 cup rolled oats
1 teaspoon baking powder
1/2 teaspoon cinamon
1 teaspoon salt
3/4 cup softened butter
1 cup sugar
1/2 cup brown sugar
1 teaspoon vanilla
2 eggs
2 cups peanut butter
1 1/2 cups jam

Preheat the oven to 350. Grease a 9x13 pan and set aside.

In a medium bowl, combine the flour, oats, baking powder, cinnamon and salt. In your mixer, combine the butter, sugar, and brown sugar. Mix on medium until well blended. Reduce the speed to low, and add the vanilla, eggs, and peanut butter. Slowly add the flour mixture and mix until it is all incorporated.

Spread about 2/3 of the mixture in the prepared baking dish. Spread the jam evenly on top of the dough. With the remaining dough, form mounds and place them in three rows of 8. This will allow you to cut 24 squares with one mound on top of each. Sprinkle any remaining crumbs evenly over the entire pan.

Bake it until is is golden brown, about 45 minutes. Let it cool, and then cut into squares to serve.

Thursday, October 6, 2011

Chewy Granola Bars

This recipe, I must admit, has nothing to do with vegetables. I know I am supposed to be the box lady and write all about the fresh fruits and veggies I muddle through   deal with   enjoy from my big box of Abundant Harvest Organics each week. But it seems to me that the one recipe I end up giving to friends more often than any other is this recipe for chewy granola bars. 

I wish I could remember where I got it. I feel bad that I am not giving credit where credit is due. It was a long long time ago, and I can't seem to find it on the internet anymore. 

At one point I sent this recipe to a friend through her facebook inbox long long ago, and I have no idea where else I might have saved it. That means that every time I make them (although I pretty much have it memorized, I make them so often), or every time someone asks me to give the recipe to them, I go get it from facebook.  I then have to search through my inbox to find the message thread that I started over a year ago. It's one of those "first-world problems," no?


Well, lucky for me, I have a first world solution. I will put the recipe here. Instead of searching through my facebook archives every week or so, I will search through my blog archives! Aha! I got you, internet!

Why do I share this recipe so often? Because it is awesome!! These granola bars are easy to make, and last quite a while (shelf-life, that is. They don't last long with my kids around eating them). Plus, they travel well in lunch boxes and backpacks. And although they do contain quite a bit of sweetener and butter, I feel better that it is honey and brown sugar and butter instead of corn syrup and hydrogenated corn oil and preservatives. Or whatever that stuff is that we aren't supposed to be eating.

Plus... and this is no lie... my kids prefer these to every single kind of granola bar we have ever purchased. And believe me, we have purchased quite a plethora of granola bar varieties.


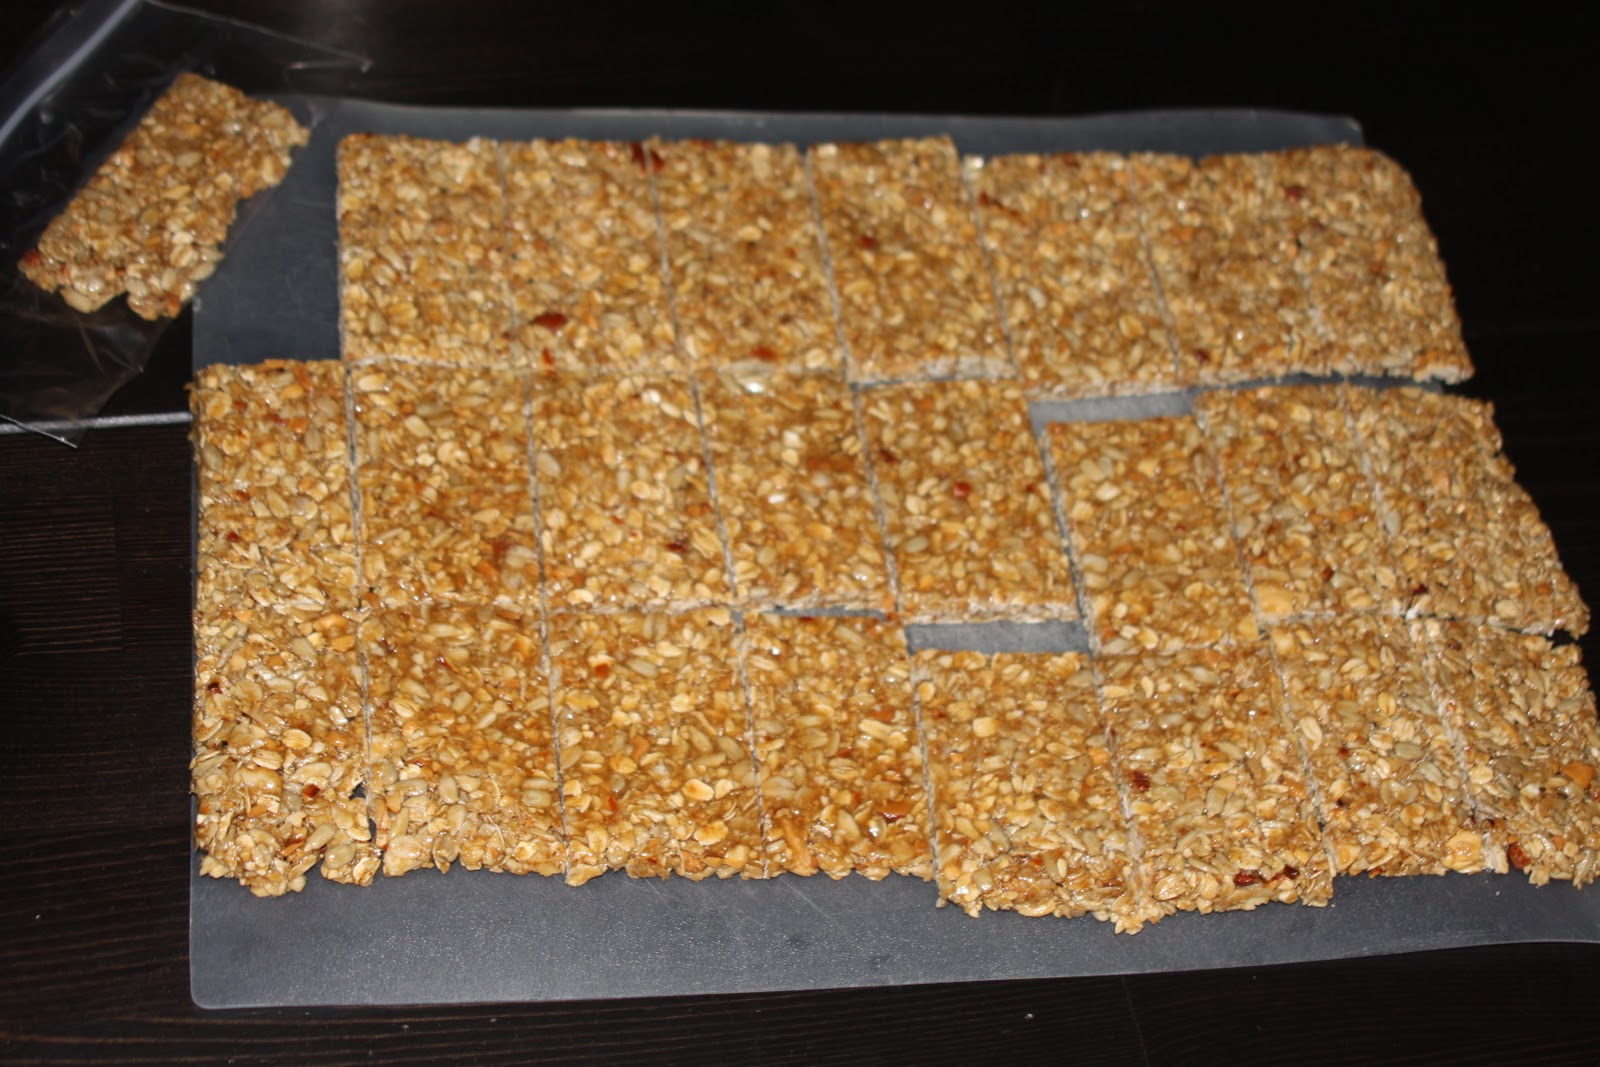
This recipe makes 24 medium-sized bars (although you can cut them larger and make fewer). I wrap them up in snack-sized bags, re-usable snack bags, or plastic wrap, depending on what I have clean and available. By individually wrapping them from the start, it makes it easy to pack a lunchbox or a picnic. They last a couple of weeks in the pantry, or you can freeze some.


Chewy Granola Bars

2 cups oats
3/4 cup wheat germ
3/4 cup sunflower seeds
1 cup cashews, crushed
2/3 cup brown sugar
1/2 cup honey
4 Tbsp butter
2 tsp vanilla extract
1/2 tsp Kosher salt

Stir together the oats, wheat germ, sunflower seeds, and cashews on a rimmed baking sheet. Toast them in a 400 degree oven for about 10 minutes, stirring twice or more.

Meanwhile, mix the remaining ingredients in a medium saucepan and bring to a simmer.

Stir it all together, making sure the wet ingredients are evenly distributed throughout the dry ingredients, so it all sticks.

Line the bottom of your pan (I used a jelly roll pan but you could use a cake pan. They would just be thicker.) with waxed paper, and spray with cooking spray. Press the granola mixture into the pan. Put another piece of waxed paper on top, and press it all well so it all sticks. I use a rolling pin to make it all even and well pressed, but you can just use your hands.  Peel off the top waxed paper as soon as you finish pressing the bars, so it doesn't get stuck.

Let it all cool, and then invert the bars onto a cutting mat. Peel off the remaining waxed paper and cut into bars.


You can wrap them individually, or you can keep them in an airtight container. If you plan to store them all together, layer parchment paper or waxed paper in between the bars.


Enjoy!

Friday, September 30, 2011

zucchini-chocolate chip muffins

When I was a kid, you brought your teacher two gifts a year -- one at Christmas time and one on the last day of school. I think it cost between $5 and $10, and it was probably usually a box of chocolate, a coffee mug, or some sort of tchotchke or desk item. And the parents were done, and the teachers were appreciated and it was good.

Then the manufacturers got wind of this trend, and they started to capitalize on this trend by making specific "teacher" mugs and pads of paper that say "2 teach + 2 touch lives = 4-ever." They made funny ones and sentimental ones and cute ones and cheesy ones. So the parents went to the stores and bought the teacher-themed gifts and wrapped them up and sent them in. And the parents were happy and the teachers were appreciated and it was good.

Then word got out... maybe teachers don't really need any more mugs. Maybe they want something a little more for themselves and less for the classroom than a cute notepad or a pencil caddy. So the parents went to the stores, and they bought the lotion and the candles and the picture frames. And the teachers were surprised and the parents felt thoughtful and it was good.

And then the parents started to think. Maybe 32 bottles of lotion a year is too many? And maybe she doesn't need every apple-and-cinnamon scented candle there ever was and what exactly does "spring breeze" smell like? Meanwhile, Starbucks had invented "global domination" and had opened a store on the corner next to your school and the corner next to your house and inside the grocery store in between, and three more on top of and underneath and alongside all those first Starbucks stores. And the parents bought gift cards and they stuck them in a card and sent them in. And the parents felt that is was convenient and thoughtful and appreciated, and the teachers thought it was useful and a treat, and it was good.

And that's where we are. Which is great, especially because now we don't send in a gift only for Christmas and the end of the school year. We do send in a gift for those days, yes. But we add the teacher's birthday to the mix. We also have "Teacher Appreciation Week." Which is five more days of sending in something or other.

However, five days of Starbucks cards is silly, and she has so many candles they can be seen from space and she really doesn't want your kid's handprint in a frame. She is still washing her own kids' handprints off of her doorways. So, the "teacher appreciation committee" (do you see how far this has gone???) decides on a theme for each day. One day you do indeed get to send in a gift card for Starbucks, and one day you do get to send in a teacher-desk type school supply item -- but make it more glittery or special than the standard crayons and construction paper the school supplies anyway. And for days three, four, and five, you will probably be asked for a flower from your garden, a hand-made card, and a treat for the brunch in the teachers' lounge. It's lovely and manageable and most parents are happy to do something and really this isn't too much and we really truly do appreciate the teachers and we want to show them that.

But.

Have you seen a teacher's lounge during Teacher Appreciation Week? There are so many variations on doughnuts, muffins, coffee cake and cinnamon rolls that there is no room for the teachers to sit and enjoy any of it. The tables are covered and the counters are covered and the stuff is piling up and falling over.

And what do you think happens next? Some gets eaten. The teachers eat and the aides eat and the office staff eats and the custodian eats and the man who stocks the staff room vending machine eats. Then the PTA (the parents who brought the stuff in, remember) are told "Of course come have some! There is so much here! Let's not let it go to waste!"

And after that? It goes stale and it gets tossed. Out. Into the trash.


So every year I say to myself: Self, don't do it. Don't take precious hours to bake something lovely this week. Don't make a beautiful layered coffee cake and send it into the teacher lounge. First of all, it will never be seen among all the rest. Secondly, it won't be eaten. It will take up precious space where a teacher might like to set down a cup of coffee instead. And then later someone will have to throw it away and clean up the crumbs. Just wait a few weeks and do it then. They will be happy to have something a month from now when the long dry days of being back to under-appreciated teachers return.


But then I say to myself: Self, that stinks. If you can't bake a pan of muffins for these people, what is wrong with you? You really want to be the only person in the whole school who does nothing? Maybe if you had done it a month ago, you could skip it now. But even if you send in a note that says you are waiting for a hungrier time, it will just look like an excuse because you forgot to do it. Next year do it ahead. Ahead of time is okay. Late is not.


Every year.

But not this year! For once! I thought. I planned. I did it! I baked muffins for my daughter's grade-level teachers (I can't do the whole school at once. One grade at a time, thank you very much). I baked the muffins, wrote a note letting them know it was a pre-Appreciation Week snack, and really we appreciate them every week, and I sent them in.

Of course, I will still end up baking something during the actual week. I don't want to be the only person in the whole school who does nothing.


Zucchini-Chocolate Chip Muffins
Adapted from the recipe here.

Makes 18 muffins or 36 mini-muffins

3 cups grated zucchini (or summer squash... I actually used a combination)
1 stick butter, softened to room temperature
2/3 cup sugar
2 eggs
2 teaspoons vanilla
2 teaspoons baking soda
3 cups flour
1 teaspoon cinnamon
1/4 teaspoon nutmeg
1 cup chocolate chips

Preheat oven to 350.

In a mixer, combine everything but the chocolate chips, using the paddle attachment. If you prefer, you can mix by hand. I like to let the mixer run on low as I measure and add everything. It feels like multi-tasking. Turn the mixer off once it is all well combined, and stir in the chocolate chips.

Spray non-stick spray into the muffin pans (or use paper liners). Fill the muffin cups almost all the way to the top.

Bake mini-muffins for about 20-25 minutes, regular muffins for 30-35 minutes, until the top is golden brown and a toothpick comes out clean.

Saturday, April 23, 2011

the beet. is neat. and sweet. such a treat.

I don't know if you remember, but last time I got beets in my box, I avoided them like the plague. They sat in my fridge and called out to me every time I opened the door, until I finally made a beet salad.

Having gotten over my fear of beets, I went ahead and confronted the beets yesterday... only two days after the four of them came home to roost. And boy am I happy I did! Not only did I cook them, I ate them all up... single-handedly.  Sorry to those other people who live with me. I didn't share.

The beet is really not such a beautiful vegetable on the outside.


It does have a beautiful ruby red inside, though, as my fingers can testify.


Last time I cooked beets, I felt bad about all the vitamins that got thrown out with the bathwater...


So this time I went for a recipe that didn't involve boiling these guys. As a matter of fact, I didn't even peel them, so they didn't lose any nutrients that way, either. And all you add to the beets is salt, so there isn't any added calories or fats, either. Win-win-win!

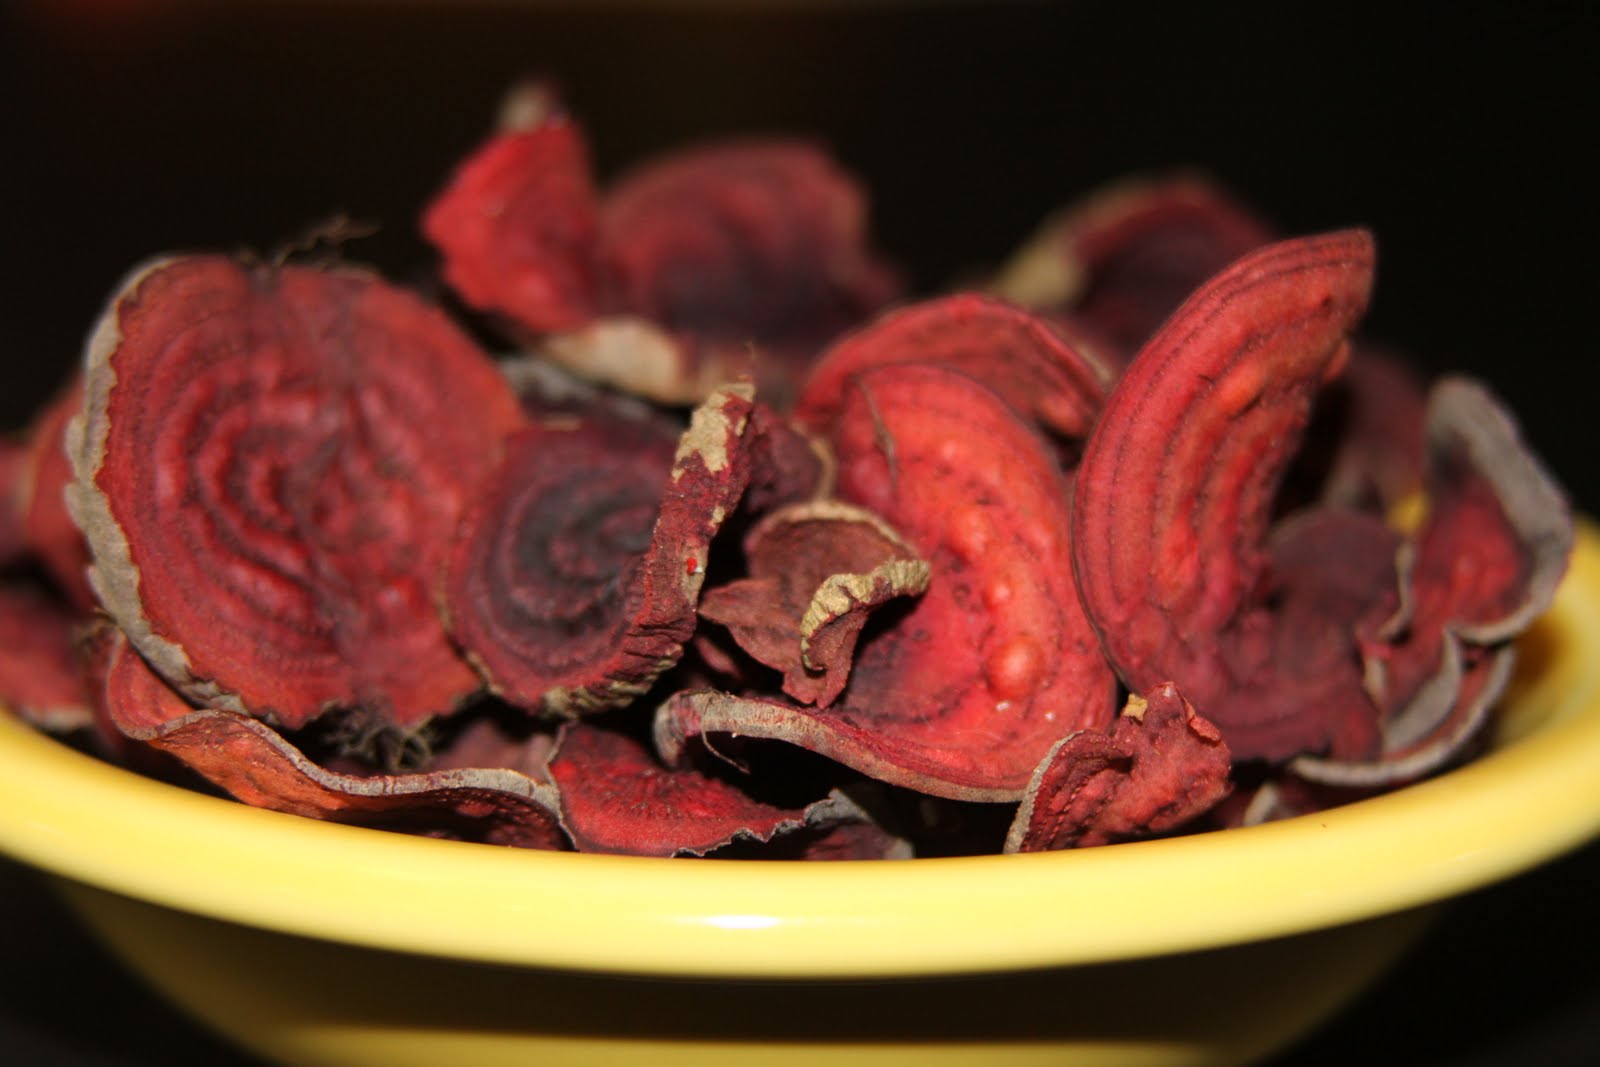
I present to you.... Beet chips!


First, slice the beets as thinly as you can. If you have a mandolin, use it. I don't, so I went ahead and did the best I could with a knife. Lay the slices out on a baking sheet, on top of a sheet of parchment paper. With parchment paper, you don't even need add oil. Shake a little salt onto each beet slice, and pop them in an oven that has been heated to 325 degrees.


These take a little longer to cook than other veggie chips. Start checking them after about half an hour.
You will know when they are done when they turn a lighter pink color.

Not done beet chip                            done beet chip 

Take out any chips that have turned pink, and let the rest keep cooking. Lay the done chips on a cutting board so they can cool and crisp up. As for the rest, check them every five minutes or so. After they turn pink, they can burn and turn back to a darker color, so you want to make sure you get them out while they are pink. Keep pulling out the done chips when you check, and let the rest cook. The thinner they are, the faster they will cook, of course, and the less likely they are going to turn tough and stale over time.

It was all I could do to wait long enough to take a picture of these before I ate them. I was eating them as they came out of the oven in little batches!  They are great by themselves, or dipped (I had some leftover yogurt-dill dip), and if I had any left, I would crumble them on top of a salad. I can always hope for more beets next week!


While I was at it, I used the green leaves to make some green chips. Here is how you do it, if you are interested. They are also a delicious and nutritious snack.


Thursday, April 7, 2011

Lemon cookies


My grandmother was the world's best baker. You may not have heard of her, because she didn't bake for anyone other than family. And the ladies who came over to play pinochle. If you aren't related to me, or named Pearl, Helen, or Hazel, you probably never  met her. So much is your loss.

Although my grandmother lived her entire life in Wisconsin, and I lived my entire life in California, we saw each other for two extended visits each year. Before my mom, three brothers and I arrived in Green Bay for a chunk of each summer, she would bake and bake and bake. The happy result was that there were plenty of different types of cookies and cakes waiting for us. And of course, more baking went on while we were there. Sometimes my mom was helping out in the kitchen. Sometimes I tried to help out. I think for the most part, though, we played and she baked. And at the end of the day, we all sat down and enjoyed a slice of cake or pie together.

When my grandmother died when I was 18, my mom and her two brothers were left with the task of cleaning out her home. She had all kinds of knickknacks accumulated over a lifetime, and some beautiful old pieces of furniture. Any time any family member had complimented any item in her home, including pieces of furniture, my grandmother turned it over, and wrote that person's name on the bottom. That made the task of dividing her things easy. Most things had been given away long ago.

The one thing that everyone wanted, and that grandmother never in a million years considered to be an heirloom, was her cookbook. This was the type of cookbook that I imagine every grandmother had. Or every woman born in her generation. It had been originally purchased as a cloth-covered, three-ring binder, filled with blank pages and dividers. By the time she died, the cover was coming apart, the blank pages had been filled with her typewriter and her pen. The dessert sections, especially, were stuffed with clippings from magazines and recipes given to her by friends.

There was no name written on the back of it, and yet everyone had complimented her cooking, her recipes. That left my mom and uncles to have to decide who got the coveted cookbook.

To make a long story short, the cookbook was stored for quite some time, since no one wanted to take it away from everyone else and no one could bear to give it up forever, either. Flash forward several years, and the cookbook resurfaces. This time, copies are made, everyone gets one.

The very first section is for cookies and cakes. The very first recipe typed into this section is from Good Housekeeping magazine, "Lemon Wafers."

I don't particularly remember my grandmother making them, and I don't think they were one of her most commonly baked cookies. But like everything she baked, they are delicious. They are light and crispy, with just a hint of lemon.


Lemon Wafers (Good Housekeeping)

1/2 cup butter
3/4 cup sugar
1 egg
2 tsp. grated lemon rind
1 1/2 cup all-purpose sifted flour
1/2 tsp. baking soda
1/2 tsp. salt
1 Tbsp. lemon juice

Cream together butter and sugar. Add egg and lemon rind, and beat well. Add flour, soda, salt and lemon juice, and mix. Chill the dough in the refrigerator for at least an hour. Roll into balls, coat each with sugar, and press down with a fork. Bake 10 minutes at 375 degrees.

Wednesday, March 30, 2011

So aPEELing (I couldn't help myself)


Last week, I mused, somewhat facetiously, about the fact that there is no part of the vegetable that can't be used... be that leaf, root, stem, etc.

It got me to thinking. (Some people think and then talk about their ideas. Some people talk and then think about what they've said. I'm not saying it's a good thing.)

Why throw away peels?

I searched (and I found that once again millions of internet users had beaten me to the punch), and I read several recipes for candied citrus peels.

Let me back up a little bit. There is a gal at my work who celebrates her birthday this week. I wish I could give her my $1,000 car repair bill, but I can't. I also can't give her anything very extravagant for her birthday, even though she deserves the world. I decided to make her something instead.

Okay, back to peels.

This recipe can be done with any type of citrus peel. I happened to have several citrus fruits that had retired, and were ready to try a second career. I used 5 lemons (that had previously been a pitcher of lemonade), one navel orange (from a banana-orange smoothie), and 2 grapefruits (my breakfast).

The first thing to do is to quarter the fruits, and cut out all of the flesh. Put all of the peels into a pot, and cover with cold water. Bring this to a boil, and boil for one minute. Drain the water, and fill it back up again with cold water, and bring it back to a boil for another minute.


You need to do this a total of four times. Not all recipes asked for this step to be repeated, but the ones that did, said it helped limit some of the bitterness. And since there were several reviews of several recipes that said it turned out too bitter, I felt it was well worth my time.

Let the peels cool enough that you can handle them. The next step is to scrape as much pith as you an out of each peel. This is also to help with bitterness.


But save all that pith... once it dries, you can sew it into sachets, which will keep your linens fresh.

I'm just kidding. I have to draw the line somewhere at what parts of the dang plant we can use. Throw the scraped pith out. It's had a good life, and it is time to let it go.

After scraping out the pith, slice the peels into thin strips.


In a saucepan, bring to a boil two cups of water and two cups of sugar. Once it is boiling and all the sugar has dissolved, you can add the peels back in.


Stir and boil, boil and stir. The recipes said that after 10 minutes, the peels would be almost translucent, and the water almost gone. It took me 25 minutes, but it worked.


Again, wait a bit for this to cool. Spread the peels out on a cooling rack, separated from each other, so the syrup can drain.


Once they have cooled quite a bit, but haven't gotten dry, shake them, a few at a time, in sugar. And enjoy!


Or give them to someone else to enjoy!

Monday, March 28, 2011

And they're kosher, to boot.

Why is it, that when I hear of something new, I google it, only to find out that 1,120,000 people have already done it? I am SO not a trendsetter. We could argue that I come rather late to all things trendy, actually.

I guess today I am hoping that you are one of the 6,908,880,000 people on earth who haven't already put something on the internet about how to make green chips.

At any rate.

Green chips.

Take a leafy green vegetable. (I have done this with kale, beet greens, and collard greens, but I hear rumors of it being done with chard and even spinach. For me, I'll stick with the heartier veggies.)


This time, it was collard greens who needed to make their exit from my refrigerator. I discovered that just about every recipe for sautéing collard greens starts with bacon or ham. Like I have said before, if you have to disguise the taste by hiding it in some bacon, it isn't that good to begin with.  So, I chose to skip the stove, and throw them in the oven instead.

Actually, though, cooked into chips, these leaves are very very good! I would eat these every day.

Take your greens, whatever they are, and tear them up into chip-sized pieces. The shape and exact size doesn't matter at all.

Throw them all on a baking sheet, drizzle a little olive oil over it all, and then toss them with your hands, to get them nice and evenly coated.


Amazingly, they will go from the dull green above to a vibrant, bright green.


Shake on some salt and pepper, or even red pepper if you like spice, and spread them out on a baking sheet or two. They need to be in a single layer.

Now stick them in the oven, heated to 300 degrees, for about 5-10 minutes. As soon as they start to brown you need to pull them out, so watch carefully.


Now, you get to enjoy a crispy, salty, tasty snack -- with no guilt!