New Here? Read The Story behind the Box

Thursday, March 29, 2012

Larb (Thai Salad)

Oh happy day! I love when I discover that one of my favorite, special occasion, once-in-a-while treats can be made easily and with great results at home!


Larb has always been one of my favorite things to order at a Thai restaurant, when I am being schmancy and ordering appetizers. It seems like an appetizer to me, that is, but it is usually found under the salad portion of the menu. (maybe because the veggies in it are added at the end and not cooked?) If you have never had it, either make this version or go to a Thai restaurant (tonight!) and order it. You won't regret it. Despite the unfortunate-sounding name (to our western ears) the dish is to. die. for.


Before I move on, I feel I need to give props to Laos. I discovered, in looking up some different versions of Larb recipes, that it is actually the national dish of Laos. Who knew? I haven't been to a Laotian restaurant (or Laos for that matter), but I know what I will be ordering if I ever do go! (To either a restaurant or the country, that is). I also learned that a portion of Thailand used to be Laos (Again, who knew? I am clearly not up to snuff on my Asian history), and that this dish is common mostly in that part of Thailand. Well. I am glad for that, because that means it made it into some of my favorite restaurants. And if you live in town, go to Thai Pepper on Main Street and order the Larb. It's number 19 under the ... you guessed it... salad portion of the menu. Not only is the food fabulous, but so is the adorable older couple who own the place.

Ahem. Back to the appetizer salad recipe at hand. Larb is a mixture of meat (I have seen it made with chicken, beef, turkey, and pork), lime juice, fish sauce, and cilantro and onions. All flavored with garlic and ginger.


I found this recipe thanks to Rachel at De Ma Cuisine, who does the weekly cooking show and meal planner for Abundant Harvest. If you are an AHO subscriber (or just a lover of fresh delicious veggie-loaded food), check her out! She is adorable, her show is fun, and her recipes are yummy. Anyway, Rachel had included this on her weekly plan when we got cabbages in her box. The recipe was listed as Thai Beef Cabbage Cups, which intrigued me. When I saw the subtitle (Larb), I was hooked.

I followed the recipe more or less, but I added a little fresh basil, and forgot the peanuts (accidentally). It's perfect! I think I will try making it with turkey next time, since the beef tastes still rather beefy, and I think the turkey might take on more of the flavors of the garlic and ginger, but I am not complaining. I am in love!


Larb

2 1/2 teaspoons dark sesame oil, divided
3 teaspoons minced fresh ginger
3 garlic cloves, minced
1 pound ground sirloin (or turkey, or chicken, or....)
1 tablespoon sugar
2 tablespoons fresh lime juice
1 1/2 tablespoons fish sauce
1/4 teaspoon crushed red pepper
1/2 cup vertically sliced onion
1/2 cup chopped fresh cilantro
1/2 cup chopped fresh basil
8 large cabbage leaves
2 teaspoons finely chopped peanuts

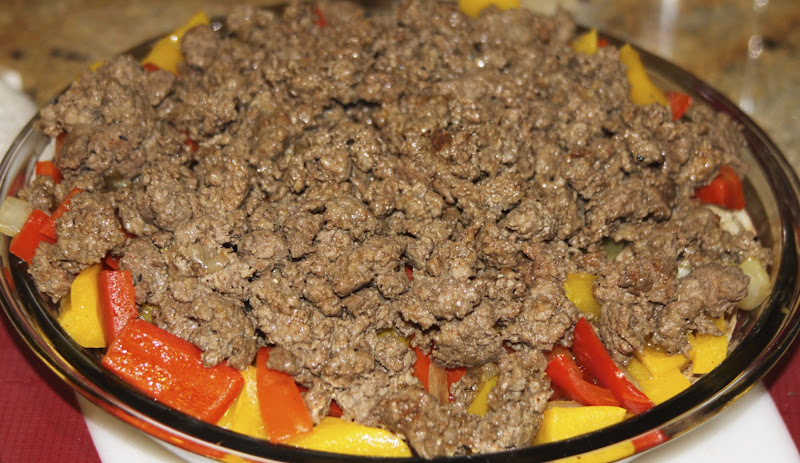
Heat a skillet over medium-high heat. Add 2 teaspoons of the sesame oil to the pan. Add the ginger and garlic and cook for one minute stirring constantly. Add the meat and cook, stirring to break it up, until it is done all the way through.

Combine the rest of the sesame oil, sugar, lime juice, fish sauce, and crushed pepper in a large bowl When the meat is cooked, add it to the bowl along with the cilantro, basil, and onion, and toss well.

Divide the meat mixture into the cabbage leaves, and serve. (At this point, you may want to go ahead and add the peanuts. I wish I had!)


Wednesday, March 28, 2012

Asparagus Pesto

I have to admit, I am a fool for anything with the name pesto in it. I adore basil (as much as any person can adore an herb), and by the time you add some garlic to it, I am in flavor heaven.

I also happen to be a fool for asparagus. I was thrilled to see it it my Abundant Harvest Box this week. I have read that there are many cultures who see the first asparagus as the official start to spring, and hold festivals to celebrate its arrival. I totally get it.

When two worlds collide, and I see a veggie I love and a recipe that intrigues me on the same day, I know the vegetable gods are asking that I make it. Who am I to defy the gods?


This pesto is everything I hoped for. The salty, garlic-y, basil-y nutty flavors were perfect. It's not a sauce so much as a paste, and it seems perfect for spreading on crackers or crostini for an appetizer, or with chicken, pork, or fish for a delicious main dish. If you wanted to toss it with pasta I would recommend adding a bit more oil, and letting it puree finer. I served it with chicken breasts that I grilled. A big salad and some fresh strawberries and orange slices, and it was a perfect spring dinner.


Asparagus Pesto
(Adapted from here)

one pound asparagus, tough ends trimmed
3 cloves garlic
1/4 cup cashews
3/4 cup fresh basil leaves, packed
1 teaspoon salt
1 tablespoon olive oil
1/2 teaspoon fresh ground pepper

First, steam the asparagus until tender. I used a microwave steamer that I love for its handiness, but you can do it on the stovetop as well. Set aside to cool.

In a food processor, whir the garlic cloves until they are chopped pretty finely. (This way no big chunks will be left to overpower any one mouthful). Add the remaining ingredients, and pulse until they are all chopped finely and mixed well, but not pureed into a sauce. You want some bite to it.

That's it! Serve it with your favorite accompaniment!


Tuesday, March 27, 2012

loaded baked potato soup (loaded with sshh! Cauliflower!)

Well, here in southern California we finally got winter. It happened last Sunday. After weeks months of sunshine and tank tops, Sunday was winter. It rained and poured for about half of the day. And now we're back to spring.

For that one day, though, it seemed like I ought take advantage of the cold and dreary skies outside and make the house seem warm and cozy by heating up the kitchen. I made two batches of strawberry jam (see what I mean about the warm winter lately? Strawberries already at the farm stands!!).  And then I made a big pot of hearty potato soup.


But, since around here the name of the game is to load everything I can with more vegetables (and to make things healthier while I'm at it), I found a recipe that replaces half of the potatoes with cauliflower.

It turns out nice and creamy and rich, and by the time you top it with bacon and cheese and chives, you are in heaven. Rainy days don't get much better than this!


Baked Potato Soup
(I got this recipe from Skinnytaste.com)

2 potatoes
1 medium head of cauliflower, cut into florets
1 1/2 cups chicken or vegetable stock
1 1/2 cups milk
salt and pepper
1/2 cup sour cream
shredded sharp cheddar cheese
bacon, cooked and crumbled
6 tablespoons chives, diced

First, scrub and dry, poke the potatoes all over with a fork, then bake them. You can do it in the microwave or the oven. In the microwave, put them on high for 5 minutes, flip them, and cook them another 5 minutes. In the oven, place them on a rack for about an hour at 400. When they are done, take them out and let them cool.

While the potatoes are baking, cook the bacon. Yum! Try hard not to eat it all before the soup is finished.

Cut up the cauliflower and steam it. Again, this can be done in the microwave (about 8 minutes on high), or you can do it on the stove.

When the cauliflower and the potatoes are done, its time to puree them! Peel the potatoes and put them in  a blender with about half of the milk. Puree until smooth and pour into a stockpot. Next, put the cauliflower and the remaining milk in tot he blender and puree until smooth again (you may need to do this in batches). Add the pureed cauliflower to the pureed potatoes in the stockpot. Stir in the chicken or vegetable stock and season it all with a little bit of salt and lots of freshly cracked black pepper. Bring it to a boil then reduce to a simmer.

Add the sour cream and about half of the chives. Let it all cook for another 20 minutes on low.

Ladle into bowls and top each with some more chives, some shredded cheese, and some bacon.


Monday, March 19, 2012

cauliflower pizza crust

Last week, I had a big, beautiful cauliflower sitting in my fridge, who just know she was destined for greatness. And as it turns out, she wasn't just an empty dreamer. Greatness, indeed.

The concept of the cauliflower pizza crust was spreading like wildfire throughout Pinterest a couple of weeks ago, which proved to be excellent timing for the beauty in the crisper drawer.

Pinterest is now home to several links to different versions of this veggie pizza crust, and with good reason. It happens to be an amazingly good-tasting, solid solution for people who are vegetarian, gluten-free, low-carb, or just trying to eat more veggies.


All of the reviews I read for all of the different versions of the recipe said more or less the same thing: It's delicious! It doesn't taste exactly like a pizza crust, but it doesn't taste like cauliflower, either. And it needs to be eaten with a fork.

Although I agree with all of these opinions, my kids took umbrage with the last one. It can't be pizza if you need a fork. And so, they went ahead and picked it up and ate from the tip to the crust. Then, they licked their fingers and asked for more. (I'm with my kids on this one... it isn't a dry crust, but it is perfectly lift-able, and I see no reason why those inclined to lift shouldn't).

success!

It's really quite easy to make. Some of the recipes I saw said to steam the cauliflower first, then rice it. I found it easier to run it through my food processor first, and then cook it. The cauliflower doesn't need any additional water to cook, so just put it all in a glass bowl and microwave it. After that, stir it with some "glue" ingredients, bake it, top it, and melt the cheese.  Then sit back and enjoy perfectly guilt-free pizza. (Well, guilt-free until you add pepperoni. I would have preferred some veggies, but I was determined to get the kids to eat it this first time. We can always go up from here).

Most recipes I saw, on various blogs, traced back to Your Lighter Side as the originator of the concept.

cauliflower pizza crust
(makes enough for two 14-inch pizzas)

one medium-large cauliflower
1 egg, lightly beaten
1 cup shredded mozzarella cheese
1 tablespoon dried oregano
1 teaspoon garlic powder
1/2 teaspoon salt

Preheat the oven to 450.

In a food processor, finely chop the cauliflower. (Use the shredding blade). You can also hand-shred this, if you want to be industrious and work out your forearms.

In a large bowl, cook in the microwave on high for 8-9 minutes. It should be soft, not mushy. Stir together the cooked cauliflower, cheese, egg, and seasonings. Shape it into a disk on an oiled (or non-stick) pizza pan.


Bake it for about 15 minutes, until golden brown.


After the crust is done, go ahead and top it any way you like. I did traditional sauce, mozzarella, and pepperoni.

Pop it back in the oven for another few minutes, to melt the cheese.


Enjoy!


Friday, March 16, 2012

Spinach Cupcakes for St. Patrick's Day

Once again, I have resorted to hiding vegetables in my kids' food. I'm not proud of it.


But the cool thing is that on St. Patrick's Day, my children would never think that there is anything amiss with green food. They are all about leprechauns and rainbows and not at all about what veggies I am cajoling them into eating.


Actually, I saw these cupcakes and thought that they were super cute and a fabulous shade of green... prefect for St. Paddy's Day... before I read the part about the green coming from spinach.


It just seemed like a fun snack to make the kids, and has the bonus of a wee little bit more nutrition from the applesauce and spinach than they would get from oil and food coloring.


This recipe comes from Amy at A Little Nosh. They were super easy to make... just puree raw spinach into the applesauce, mix it with some basic dry ingredients, and bake.


The kids were completely fooled. The cupcakes are a little dense, as I have found cakes are when applesauce is substituted for oil. Other than that, though, you would have no idea there was anything different about them. As long as you're color-blind.


And one more thing before I go... a friend from Ireland asks that you not write St. Patty's Day. Patty would be a lass. Paddy is the proper abbreviation for Patrick. (And we don't want to offend the auld bloke). There is a very funny explanation of the dear StPádraig's name here, if you're interested. 


Enjoy St. Paddy's Day, folks! I'll be looking for people I can pinch.


Green Spinach Cupcakes
2 1/2 cups all purpose flour
1 1/2 cups sugar
1/2 cup nonfat dried milk
1 tsp baking powder
1/2 tsp baking soda
1 tsp vanilla
1 cup unsweetened applesauce
4 cups baby spinach


Preheat oven to 350 degrees and line a muffin pan with 18 cupcake liners.
Combine all the dry ingredients in a large bowl.
Puree the applesauce and spinach in a blender.  You may need to add the spinach in batches. Add the spinach mixture and the vanilla to the flour mixture and mix thoroughly.  Divide evenly into the muffin pan.


Bake for 18-20 minutes, or until a toothpick inserted in the center comes out clean.


Cool completely before frosting.


(I make my buttercream frosting by softening a stick of butter, and then adding powdered sugar and tiny amounts of milk until I have a consistency and an amount that I like. Just keep stirring in more milk and more sugar until you have enough. One of life's great miracles is how one stick of butter can become enough loaves and fish for the masses frost anywhere from 12 to 50 cupcakes.)


Thursday, March 15, 2012

Irish Nachos

What with St. Paddy's Day right around the corner, I decided to combine two of my favorite things: My wee bit of Irish heritage and guacamole.


I have had Irish nachos in pubs and restaurants, and I've made them at home many times. The concept (if you've never been so lucky as to enjoy the experience) is simple... Take all that is amazing about a plate of fully loaded nachos (sour cream, guacamole, cheese, onions, meat) and put it on potatoes instead of tortilla chips. The potatoes aren't as conveniently scoop able and finger-food-ish as the chips are, but on the other hand they are quite a bit more filling and help to justify using this appetizer-y, snack-y food as a meal.


Ha! As if I felt a need to justify eating this for dinner! It's damn delicious and much preferable to may other things I've eaten for dinner. That's good enough for me.

I have seen many recipes and suggestions for how to build your Irish Nachos. I think the best I have seen is Gaby's at What's Gaby Cooking. I used her recipe, with a few additions (sour cream!), and a couple substitutions (beef instead of turkey... I mean, Irish is Irish!). Really, Gaby is adorable and her recipes are delicious, and her photography is amazing. You should check out her original post and everything else she is cooking. But be prepared to find yourself suddenly starving.

Here is my version of Gaby's Irish Nachos:

2 russet potatoes, skin on
1 red bell pepper, cut into bite-sized pieces
1 yellow bell pepper, cut into bite-sized pieces
1 smallish onion, cut into bite-sized pieces
1 pound ground beef
salt and pepper
2 teaspoons paprika
2 teaspoons olive oil
1 cup cheddar cheese
1/2 cup salsa (I used the salsa I canned last summer, you can use the kind you love best)
1/2 cup sour cream
guacamole (the more, the better, in my book)

Preheat the oven to 350. Slice the potatoes and layer them in a pie plate or similar-sized baking dish. Sprinkle them with one teaspoon of the paprika, salt and pepper. Then drizzle it all with olive oil and bake it for 35 minutes.


While the potatoes are in the oven, slice the bell peppers and onion. Sauté them in a pan over medium heat for about 10 minutes. You want them to be softened a bit, but still something to bite into. Turn them out onto a plate and then brown the beef in the same pan, with the remaining teaspoon of paprika and some more salt and pepper.

When the potatoes are done, layer them with the vegetables.


And then the beef.


Spread the cheese over all of this, and pop it back in the oven for a few minutes, until the cheese melts.

Top it with salsa, sour cream, and guacamole.


And enjoy the best thing that ever came out of the old world's invasion discovery of the new world. So good, in fact, my husband said "Would you stop taking pictures of that and please let me eat it? I can't wait any longer!" So, I never got the shot I was looking for, but my belly never complained.


This post is linked to the Improv Challenge hosted by Kristen at Frugal Antics of  Harried Homemaker. Check out what everyone else did with potatoes and cheese!


Improv Challenge


Tuesday, March 13, 2012

apple butter in a slow cooker

My kindergartner's class has a class "pet" in the form of a teddy bear known as Super Bear. Each kid in the class gets to take Super Bear home for the weekend a couple of times during the year. Super Bear comes with his very own journal, where his host's parents have to get to write about what adventures Super Bear had with the family. Lucky parents! They even are encouraged to include photos, drawings, ticket stubs or other crap very exciting memorabilia.

Don't get me wrong. I actually like it. My son loves having the bear here, and I am happy to photograph and record the things we do over the weekend. I am happy to write about it and glue in the pictures and send it all back to entertain the kiddos.

It just feels like so much pressure. What if our weekends are more boring than everyone else's? What if I forget to take pictures? What if we forget to bring the bear and the journal back on Monday morning? What if Super Bear gets dirty or torn? What if Super Bear gets lost?


Anyway, my particular little charming kindergartner managed to convince his mom and dad that having Super Bear as a guest at the house was a very. special. occasion. And that the very boring weekend we had on the books would never do. And that the bear... the stuffed bear... really wanted to go to the zoo.

As it turns out, we really didn't have much planned, and it was a beautiful weekend. A go swimming-go hiking-play baseball-be warm-soak up the sun kind of weekend. And yes, it ended up being a go-to-the-zoo kind of weekend as well.

I also picked up my Abundant Harvest box of produce this weekend. One of the optional add-on items was a 10-pound bag of really ugly apples for only $3. I'm not just being mean when I call them really ugly. The farmer himself told me so.


Although truthfully, I didn't think they were all that bad. They weren't ugly as much as lopsided. And some had warts.


But all told, there was only one bruise on one apple out of the two 10-pound bags I bought. I had gotten them with the idea of making apple butter out of the ugly little guys, but to my pleasant surprise I found that they were perfectly fine to just bite into and enjoy a delicious snack.

As I was retrieving the photos of the apple butter process, you would think that I had uploaded different cameras from different people all weekend:

A couple of pool pictures, a crockpot full of raw apples, a picture of the teddy bear at the zoo, a crockpot full of cooked apples, a picture from Bob's Big Boy restaurant, a picture of jars of apple butter sealed, labeled and ready to store.

Truthfully, although the apple butter requires a decent session of apple peeling and chopping, and a very long cooking process (13 hours in the crockpot, all told), it is very hands-off cooking. Let it slowly turn from apples and sugar and spices into delicious, smooth, silky, sweet apple butter while you go out and have fun!

First, peel and dice a crockpot full of apples. Mix together some sugar and spice and stir that into the apples.


Then, go out and enjoy a swim and some relaxation in the sun.


After an hour, turn the crockpot to low and leave it for 11 more hours. By the time that is done, you will have very soft apple pieces floating in brown, sugary, sweet juice.


While that is all happening, take a trip to the zoo.


After the 11 hours are done, take the lid off of the crockpot. Give the apples a big stir and let them cook for another hour with the lid off. Give it a good stir every so often. Or... go out for a hamburger.


After an hour, the apples should have turned into a lovely brown sauce. If you give it a real good whisking, you will end up with very small lumps. This is fine as it is, but I chose to give mine a whirl in the blender to get it all to a smooth consistency. (I have those dang picky kids who don't like lumpy food.)


Finally, pour it into jars and process them in boiling water. You now have about 6 or 7 pint-sized, beautifully sealed jars of apple butter than taste like a little bit of heaven and will keep for a year or more! (If you can stand to wait that long).


Here is the recipe:

5-9 pounds of apples
4 cups sugar
2 teaspoons cinnamon
1/4 teaspoon cloves
1/4 teaspoon salt

Peel and chop enough apples to fill your crockpot. You will use anywhere from 5-9 pounds, depending on how small you chop. The larger you chop them (and therefore the fewer apples you use) will mean that you might want to use a little less sugar.

Stir together the sugar, cinnamon, cloves, and salt, and then stir it into the apples.

Turn the crockpot on high for an hour. Then, turn it to low and let it cook 11 more hours.

After 11 hours, take the lid off and give the apples a good stirring. Let it cook one more hour with the lid off, stirring occasionally. After an hour, whisk it thoroughly. It should have some very small lumps. If you want, puree it in a blender or food processor to make it smooth.

Ladle into clean mason jars, and process in boiling water.

Here is a chart for processing times from The National Center for Home Food Preservation:


Table 1. Recommended process time for Apple Butter in a boiling-water canner.
Process Time at Altitudes of
Style of PackJar Size0 - 1,000 ft1,001 - 6,000 ftAbove 6,000 ft
HotHalf-pints or Pints5 min1015
Quarts101520

If you don't know much about canning, here is a great set of instructions and information.

Monday, March 12, 2012

Bok Choy Peanut Slaw

I had never eaten bok choy before I started subscribing to Abundant Harvest, but now I count it as one of my favorite vegetables! Thank you AHO!

It is equally delicious cooked or raw, and it is a mild enough taste that it goes well with a variety of different flavors. I like to simply wilt it a little with garlic and ginger, or stir-fry it with soy sauce, or put it in mooshu (Spelling!? Help!) with hoisin sauce or plum sauce. This weekend was far too warm and beautiful to spend any time inside cooking, though. It called for easy, cold, ready-to-go meals on the back patio.


So, I made my bok choy into a slaw. I did one before  that had soy sauce, ginger, and almonds in it. This one is similar, but I added some peanut butter and peanuts to it to make it a little more Thai-ish. I liked them both!


Bok Choy Peanut Slaw

Dressing:
1/4 cup rice vinegar
1 tablespoon sesame oil
2 teaspoons sugar
2 teaspoons prepared mustard
1/4 teaspoon salt
1/3 cup natural peanut butter

salad:

l large head bok choy, very thinly sliced
3 carrots, shredded
3 green onions, sliced
1/2 cup peanuts


In a large bowl, whisk together all the dressing ingredients, until the peanut butter is well incorporated.

Chop all the vegetables, and toss them, and the peanuts, into the dressing.


Friday, March 9, 2012

chicken, spinach and noodle casserole

One of my readers told me that she was getting a little tired of looking at my recipe for vegetable scraps pasta sauce for 8 days straight.

Since I didn't feel it was polite to say "What, are you new? Read my blog in a reader, and you won't have to check the website 8 times to find out if there is anything new," instead I said, "Sorry Mom. I just haven't made anything interesting lately."

And that is how I am justifying giving you this recipe, straight out of Real Simple magazine, for a very plain, very ordinary chicken and spinach casserole.


Don't get me wrong. It's good. It's hearty and filling and easy and can be made ahead, and it is a lovely, comforting, crowd-pleasing, kid-friendly, casserole. I plan to make it again, and I know the family will appreciate it.

I had chicken an spinach salad for dinner on Tuesday evening, so I went ahead and cooked extra chicken and washed extra spinach while I was at it. That made everything very easy Wednesday evening, when I made this casserole.

The coarse bred crumbs are made by pulsing a few slices of bread in a food processor a few times I used a combination... the heels of one loaf of white bread, one heel of a loaf of wheat bread, and one whole-wheat pita that was on the verge of heading south.

The rest of it is very simple... make a white sauce, add sour cream, and stir that with the cooked chicken and chopped spinach. Add some cooked noodles, put it in a casserole pan and top with the bread crumbs and melted butter, and bake.


Voila! Meat and grains and dairy and veggies, all in one dish. I served it with (another) spinach salad, and called it a weeknight.

Here is the recipe, straight out of Real Simple Magazine:


  • 6 tablespoons unsalted butter
  • 1/4 cup all-purpose flour
  • 4 cups whole milk
  • 1 cup sour cream
  • kosher salt and black pepper
  • 12 ounces egg noodles
  • slices sandwich bread
  • 2 cups shredded cooked chicken or rotisserie chicken
  • 5 ounces baby spinach, chopped
  • 2 teaspoons dried thyme

Directions

  1. Heat oven to 400° F. Melt 4 tablespoons of the butter in a large saucepan over medium heat. Add the flour and cook, stirring, until foamy, 1 to 2 minutes (do not let the mixture darken). Slowly whisk in the milk. Bring to a simmer and cook, whisking often, until thickened, 3 to 5 minutes. Remove from heat and whisk in the sour cream, 1 teaspoon salt, and ¼ teaspoon pepper.
  2. Meanwhile, cook the noodles according to the package directions; drain and return them to the pot. Pulse the bread in a food processor until coarse crumbs form. Melt the remaining 2 tablespoons of butter in a microwave-safe bowl.
  3. Add the milk mixture, chicken, spinach, and thyme to the noodles and toss to combine. Transfer to a 9-by-13-inch or some other 3-quart baking dish, sprinkle with the bread crumbs, and drizzle with the melted butter.
  4. Bake until the bread crumbs are golden and the filling is bubbling, 8 to 10 minutes. Let cool for 5 minutes before serving.

Wednesday, March 7, 2012

rutabaga fries

Did I ever tell you about rutabaga hell week?

For a couple weeks in a row, I got a total of about 10 large rutabagas in my Abundant Harvest box. I wasn't sure that I was going to get along very well with rutabagas. I am not much of a turnip gal, and the rutabagas have the coloring of over-grown turnips, which made me pretty sure that they were going to tasted similar.

The first week I had rutabagas, I very carefully put them at the bottom of the crisper drawer and let them serve a prison sentence. The second week when I got more rutabagas, I realized that they weren't going anywhere unless I was willing to set them free. Mind you, the previous stash were happy and edible as you please, still living out their term in the refrigerator penitentiary. So now my inmate population had doubled, but my desire to reform them had not.

So, I decided to shred, dice, shop, and puree them into just about anything I could. They made a guest appearance diced into a broccoli and cauliflower salad, and they were shredded into cole slaw. They got mashed with some potatoes (and those potatoes themselves made two appearances on our table, once alone and once topping a Shepherd's Pie). They were added to a pot of stew. I was trying anything I could do to get myself and my family to eat the rutabagas without having to actually taste the rutabagas. One day, as we sat down to dinner, I was giggling silently to myself, as I noticed that there were three dishes on the table... and every single one of them had some rutabaga hidden in it!

Finally, I relented, stopped trying to hide the blessed things, and took the last two rutabagas and peeled and cut them and roasted them with a chicken. Rutabaga as rutabaga? It was a novel idea.

And it turns out, I like them! They're yummy!

Rutabagas are sweet and mild flavored. They take on their seasoning well... I have now roasted them with rosemary, thyme, and plain old salt and pepper, and I like them all.


I decided to go ahead and make some rutabaga "fries." I figured that my kids would be mush more likely to willingly try "fries" than they would be to try "roast rutabaga." Whether my logic was true or not, I am glad to report that all three kids cleaned their plates, and one even asked for seconds... and I did admit to them that they were eating rutabaga. Score one for the veggies!


The idea is the same as roasting any root vegetable... get the oven nice and hot, cut the rutabaga up (in this case, into sticks), and coat it with oil. I then sprinkled them with salt and pepper and laid them out on a baking sheet in a single layer.

I let the rutabaga roast for about 20 minutes, turned it all over, and then roasted it for another 20 minutes or so. Let it get nicely browned, then let it drain any excess oil onto a paper towel, and enjoy!